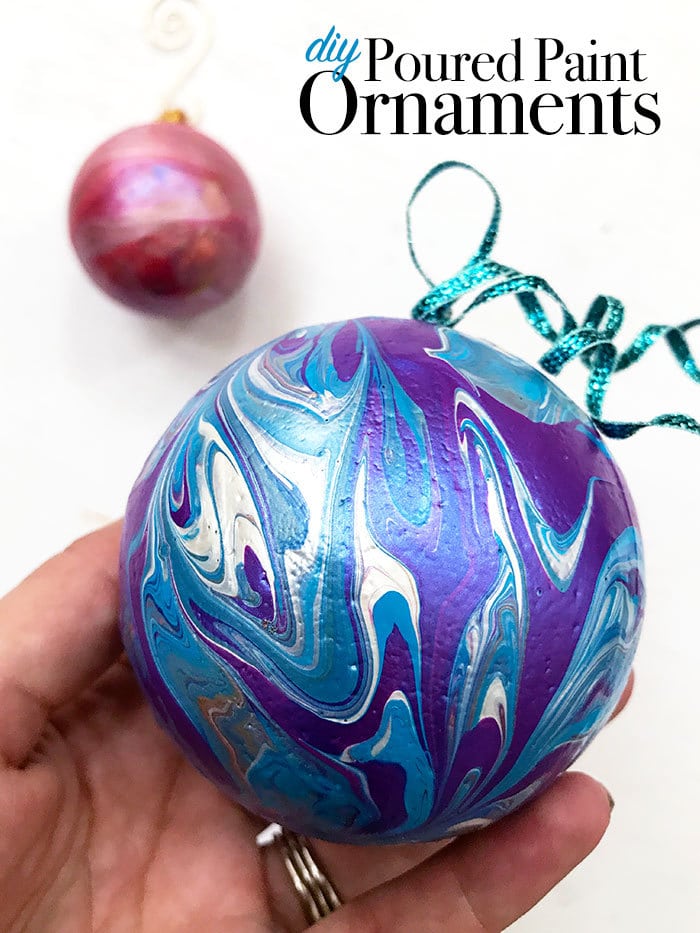
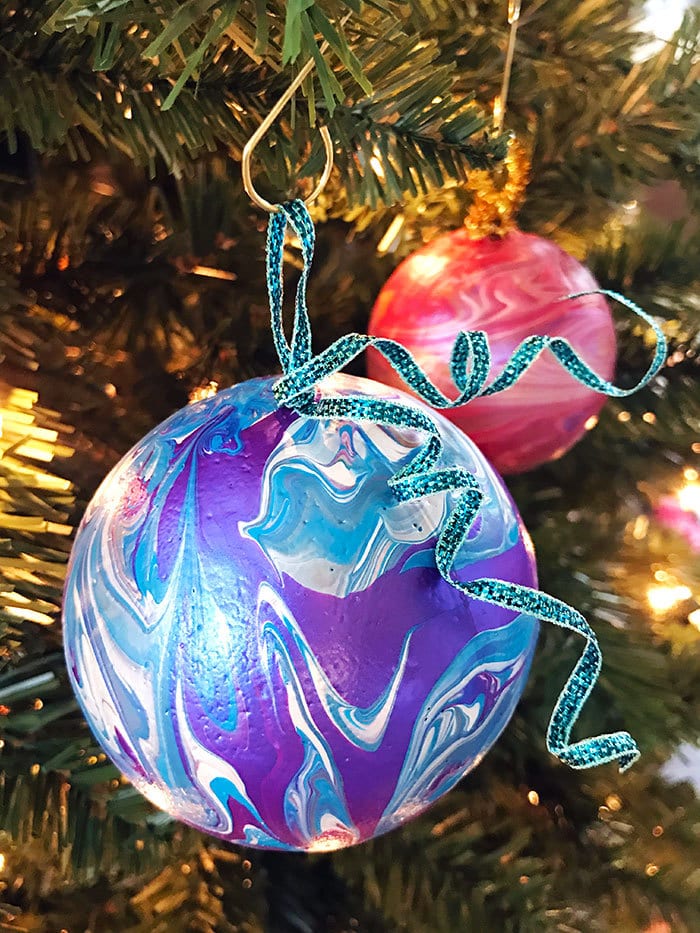
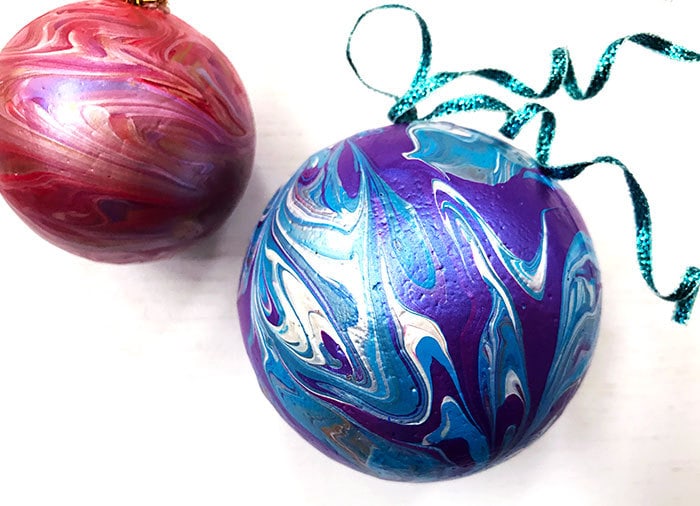
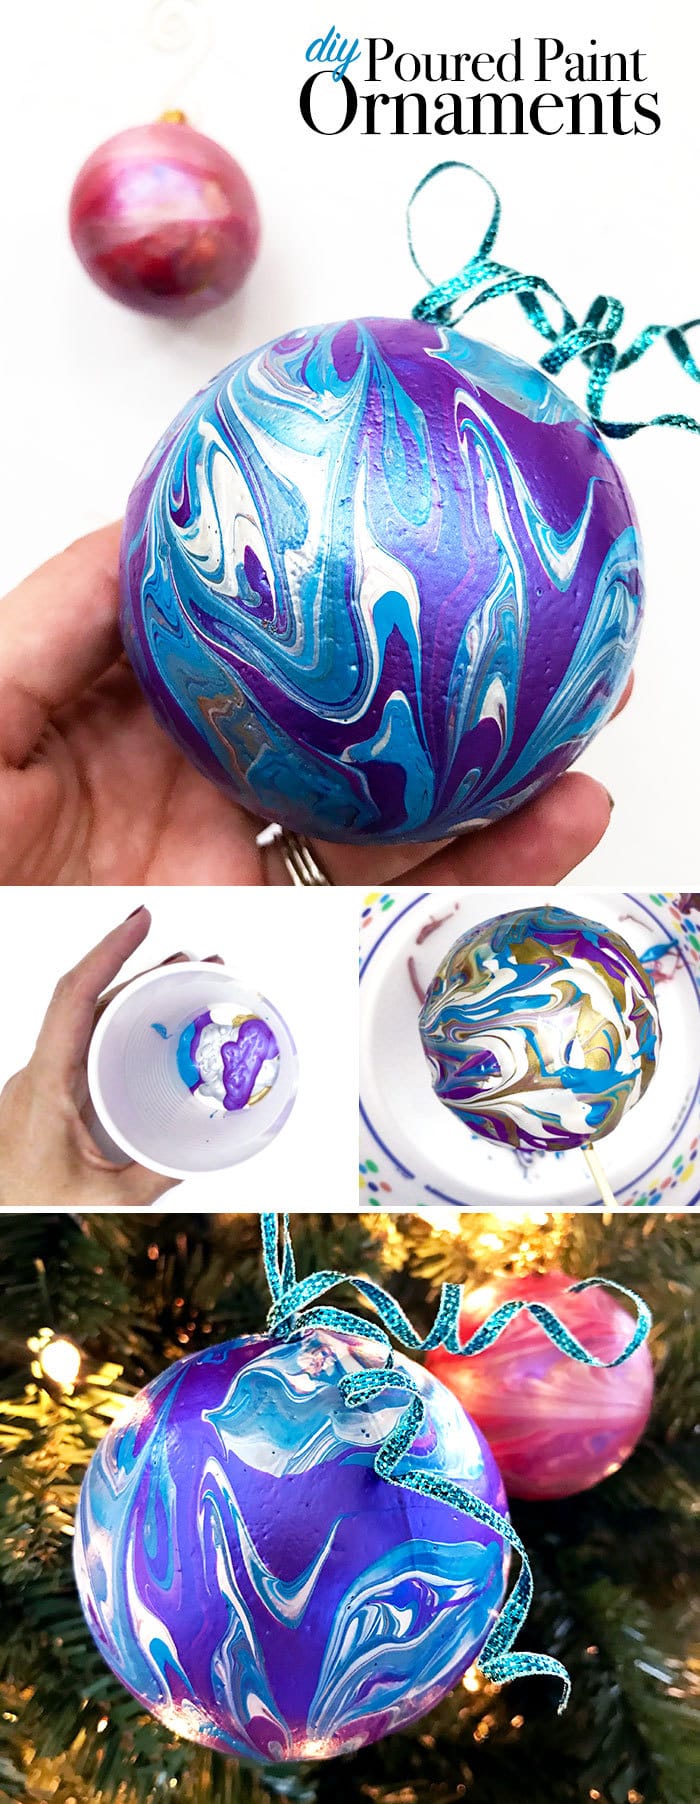
Have you tried dirty paint pouring? These poured paint ornaments use the dirty pour method to create a pretty marbled look with whatever paint colors you choose. Mix paint brands, colors and types to create a variety of painted ornament looks. This is a fun handmade holiday decor project idea and no two ornaments will be the same… even if you use the same colors! These Christmas ornaments will look fabulous on your tree and make great gifts. PLUS they take less than 15 minutes to create.
DIY Poured Paint Ornaments
Making ornaments with poured paint is super quick and easy. You can make these as gifts, make your own ornaments as a class or group activity or make poured paint ornaments to decorate your own tree. The color combinations are endless and you don't need expensive supplies to create these pretty ornaments. Make sure to set aside a place that your ornaments can dry overnight – or use dryer or heat gun to speed up the drying process. Be careful not to burn the paint!
Materials
- Acrylic Craft paint in a variety of colors and finishes
- Styrofoam Balls
- Wood skewers
- Disposable cups
- Some kind of disposable bowl or plate to pour over. We'll call this the “pour bucket”. I used an empty ice cream tub.
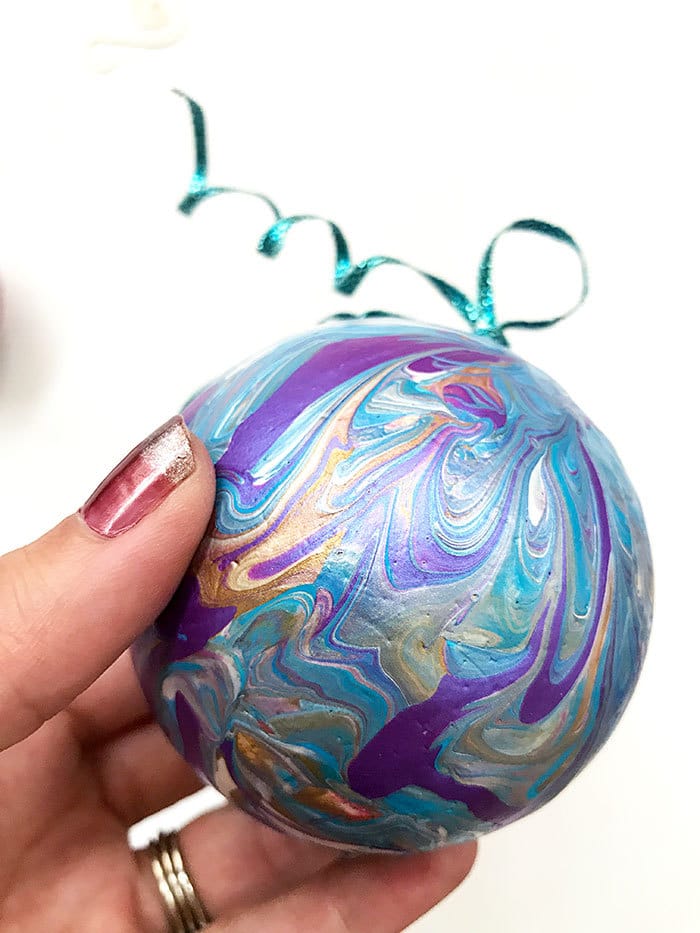
A note about the paint I used. I used a variety of paints to create my “dirty pour” including metallics, pearls, standard paints and even a pretty blended color called Color Shift from Plaid. Because they are ornaments, I thought using the fancier finished would create a great look. Play with your colors and see which you like best.
Instructions
- Cover your work surface to protect from any accidental paint spills.
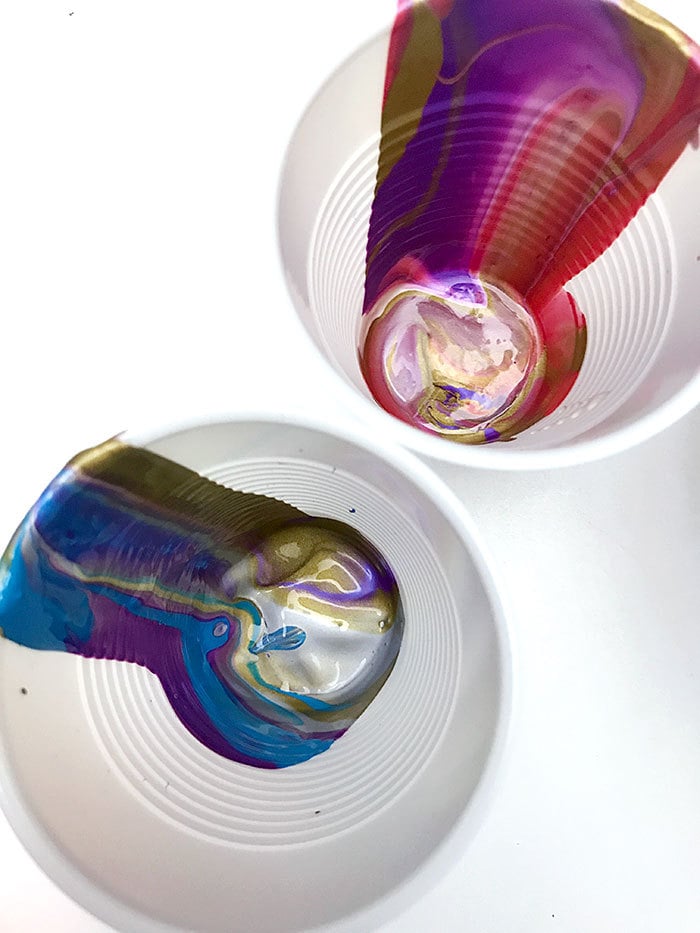
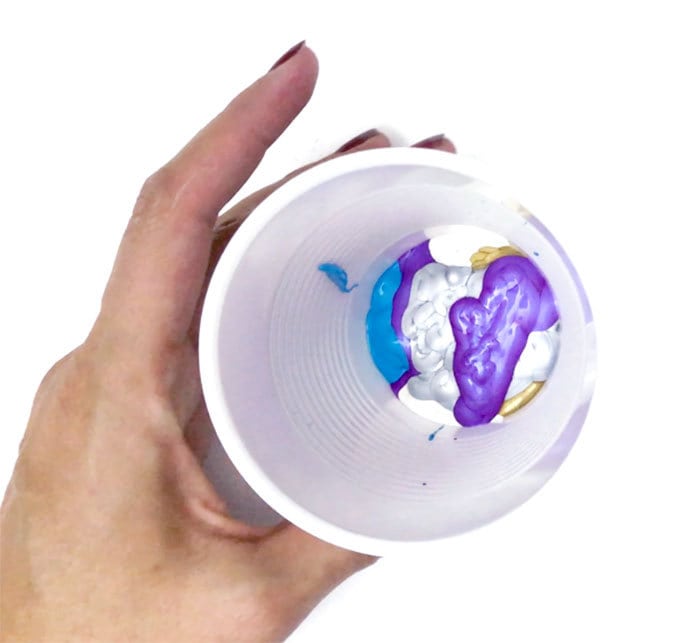
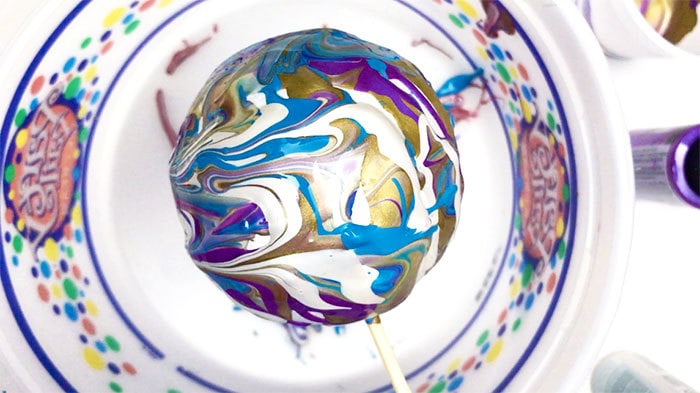
- Pour layers of paint into a plastic cup. Be careful not to mix the paint colors. When you pour the paint, the layers will not blend, they'll create a marbled look.
- Insert a wooden skewer into the styrofoam ball.
- Hold the skewered ball over the pour bucket and very slowly pour the paint over the ball. Turn the skewer to rotate the ball as you pour. I found that if I pour the paint in a back and forth motion over the ball, as I turn the skewer, I covered more space on the ball with paint.
- Continue to pour paint until you run out of paint or the ball is entirely covered.
- Rotate the ball with the skewer to move the paint around, making sure all the areas of the styrofoam have been covered in paint.
- If you end up with bare spots without paint, use another skewer to move some of the paint around in kind of a swirl motion to mimic the marble look.
- Optional, gently tap the ball to remote excess paint.
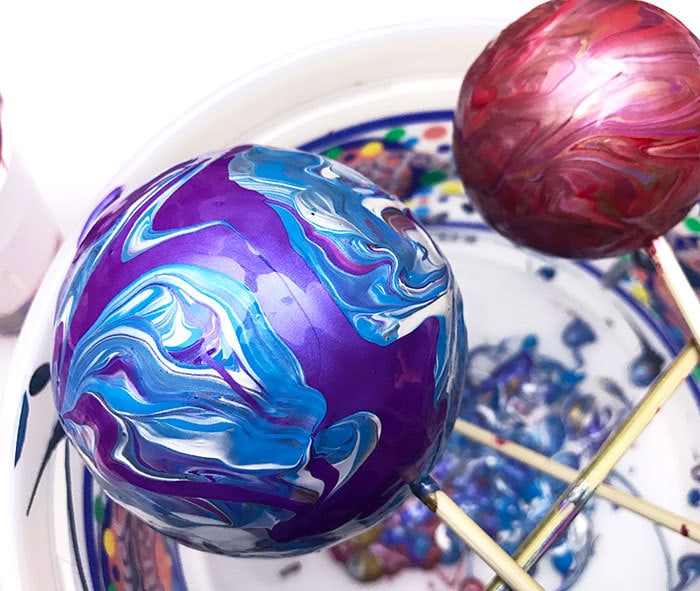
- Keep the ball on the stick and set aside and allow to dry.
- Add a wire or jewelry hoop to the top of the ball to create a hanging loop.
- Display however you'd like.
Recommended: Wood Slice Ornament DIY
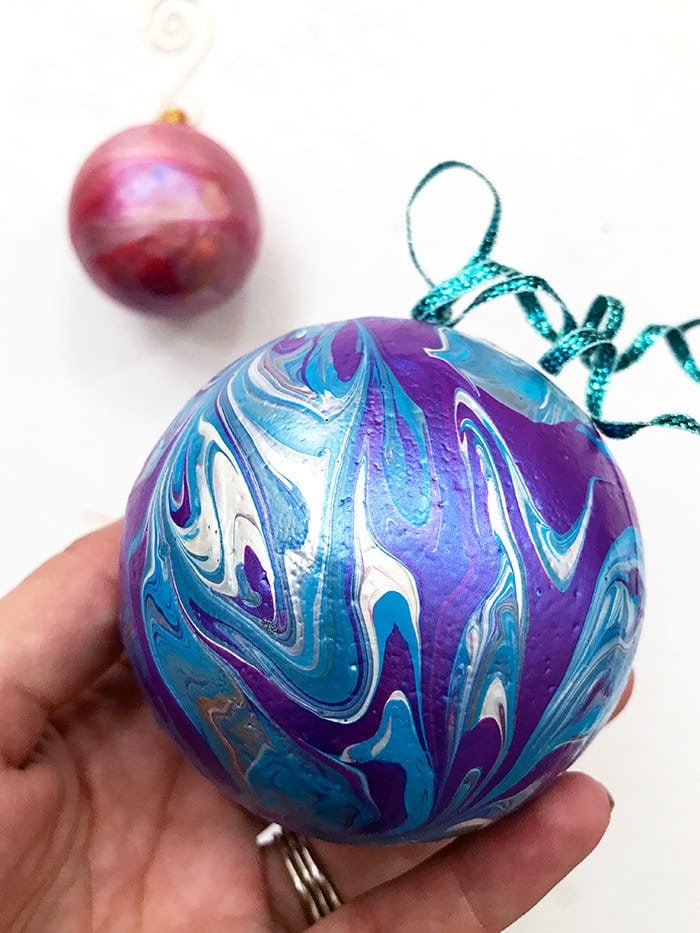
Note about the ornament hook: The ornaments I made have two different kind of hanging loops. One (the blue ornament) is a wired ribbon that I tied and pinned to the top of the ornament. You can glue the pin in place if you'd like. The other ornament (red) has a hanging loop made with a chenille stem (pipe cleaner) that I twisted into shape and then glued to the ornament using hot glue.
Make your own poured paint ornament
Here's a quick video to check out how I made the red ornament. It's really a quick process. Pour paint in a cup, pour cup of paint on an ornament, let dry. Drying definitely takes the longest. I let my ornament dry overnight. You can add extra embellishments such as glitter or gems if you'd like, just apply with glue.
Recommended: Handmade Ornaments to Make with your Cricut
Design notes:
The styrofoam ball I used had dents in it which the paint then takes on as it dries. I don't mind the dents, however if you prefer a smooth surface, there are a few ways you can work with this. Prep the surface of the styrofoam with a sealant and smooth out the ball. Or add a top coat to the ornament after the paint dries that will fill in some of the dents. You can also just add more paint if you'd like. Finally, you could pour paint on a traditional ornament. I haven't tried the plastic ornaments yet, but i think they will work great, just make sure to use a multi-surface paint that sticks nicely to plastic or glass.
Make your own 15 minute poured paint ornament and come back by and tell me about it!
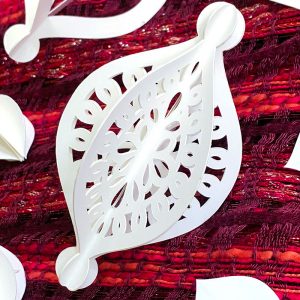
If you like making your own ornaments, you might also like this fancy cut paper ornament. Customize the color and size to create the look you want.
Here are even more ornament project ideas you can make:


What a neat take on pour painted ornaments!
Thank you so much! I wasn’t sure it would work when I first started… glad the experiment turned out! Have you tried paint pouring?
These are amazing!! Thanks for joining in!
Thank you! These ornaments were so fun to make!
The colors on these ornaments are stunning!
Thank YOU! It was a lot of fun to play with the different colors.