Let's talk about drawing and writing with Cricut. If you know me, you know I love to create drawing designs with my Cricut. You can create hand drawn accents on all of your Cricut projects including pen and ink illustrations and coloring page designs. If you love the look of hand drawn art, but don't want to draw it yourself, let your Cricut machine do the work for you!
Are you new to Cricut? Start here: Create with Cricut – an overview of all things Cricut and Cricut machines.
Drawing and Writing with Cricut
Today we're talking about Drawing with your Cricut machine – the basics to get started. I talked about this a bit when the Cricut Explore first came out. Now we're looking at Explore Air 2 machines and the newest version of Design Space… a few things have changed. There are easier options and more Make-it-Now project ideas to choose from that include drawing and writing. Cricut is always updating Design Space with new designs and fonts available specifically for drawing and writing with your Cricut.
If you're interested at where we started, Take a look at the first article I wrote on how to draw and write with Cricut Explore
Please share your questions!
I will be sharing a number of articles about Drawing and Writing with your Cricut, this is just the beginning. So if you have a question and don't see an answer here, please feel free to leave me a comment so I can help find you an answer!
Materials you need for this tutorial series
- Cricut machine – any of the Cricut Air, Maker or Joy machines, will work great.
- Cricut Design Space – You will need a Cricut Access account to use the fonts and features I am using. I will be sharing a variety of canvas layouts, some include free images, and some do not. You can always replace paid images and fonts with those you already own from your library.
- Cricut Pens – You can use the pen that comes with the machine. I use the basic black in most of my projects (.3, .4 or midnight are great). If you want to use the different writing styles, you must buy additional Cricut pens and pen sets.
Using Cricut Pens
Let me start off by clarifying I usually draw with my Cricut. I draw far more than I write. So, I tend to talk about “drawing” far more than I talk about “writing”.
However, when I share these tips and information, the ideas generally apply to both drawing and writing. So please keep in mind that if I say drawing, the tip will probably work for your writing as well.
Learn how to use the Cricut Pens to draw and write
This article is the first in a full series of drawing and writing articles using a Cricut machine. Here are all of the articles in the series. Start at the beginning, or jump around to the topics that interest you.
- Using Cricut Pens – Get Started Guide
- How to use the Cricut Pens to Write Fonts
- Drawing Designs with Cricut Basic Shapes
- Making Advanced Font Designs in Cricut Design Space
- Converting a Cut Design to Draw with Your Cricut Machine
- Using the Weld Tool to Edit Designs to Draw in Cricut Design Space
- How to Draw Multiple line Art with Your Cricut
- How to Draw Layered Designs with Your Cricut
- How to Print, Cut and Draw with Your Cricut
- Drawing Coloring Pages and Cards with Your Cricut
- Choosing the Right Cricut Pen for Your Cricut Project
- Using Cricut Pens to Add Art Accents
Start at the beginning:
- Types of pens you can use and how they draw/write
- Tools available in Cricut Design Space – The Writing Palette
- Finding designs to draw
- Additional Tips
Let's get started drawing and writing with the Cricut
You can convert almost any cut design to a drawing design or add drawing elements to any project. I like to play with the designs and see what looks good as a drawing. Feel free to test different looks with your cut files and see what happens if you convert them into drawing designs.
Just remember, what you see on screen is generally what you're going to get on paper.
Types of Cricut Pens
Each Cricut machine comes packaged with the standard fine-point black ink Cricut pen. You can create a ton of great designs with just this one pen.
I use this same pen for 90% of my projects… mostly because I love black-line art. So don't worry if you don't have all the pen sets. Play with the art ideas using the pen you have, when you fall in love with the drawing capabilities of your Cricut, you can always buy more pens!
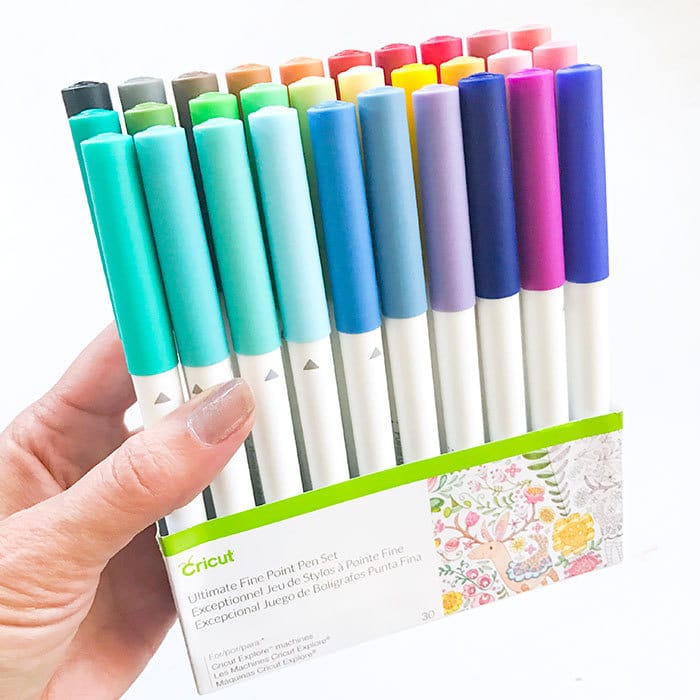
You can also buy a variety of other pens for your Cricut machine.
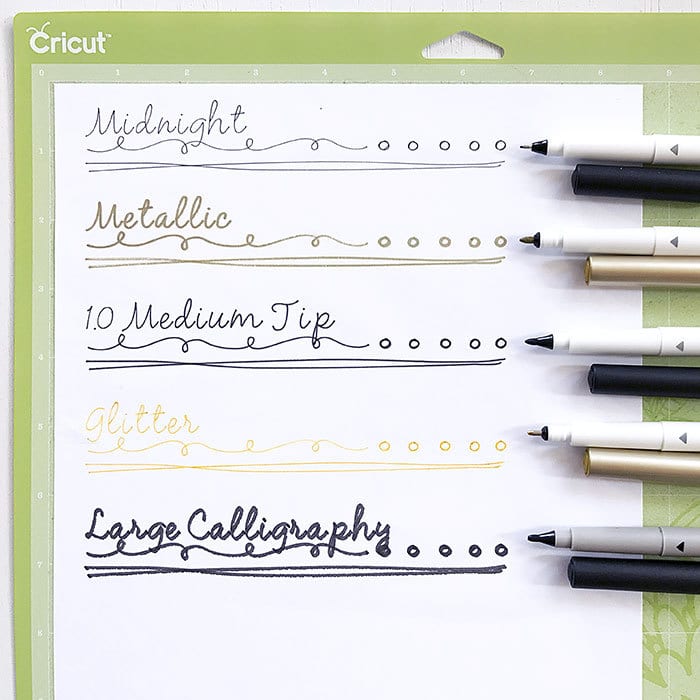
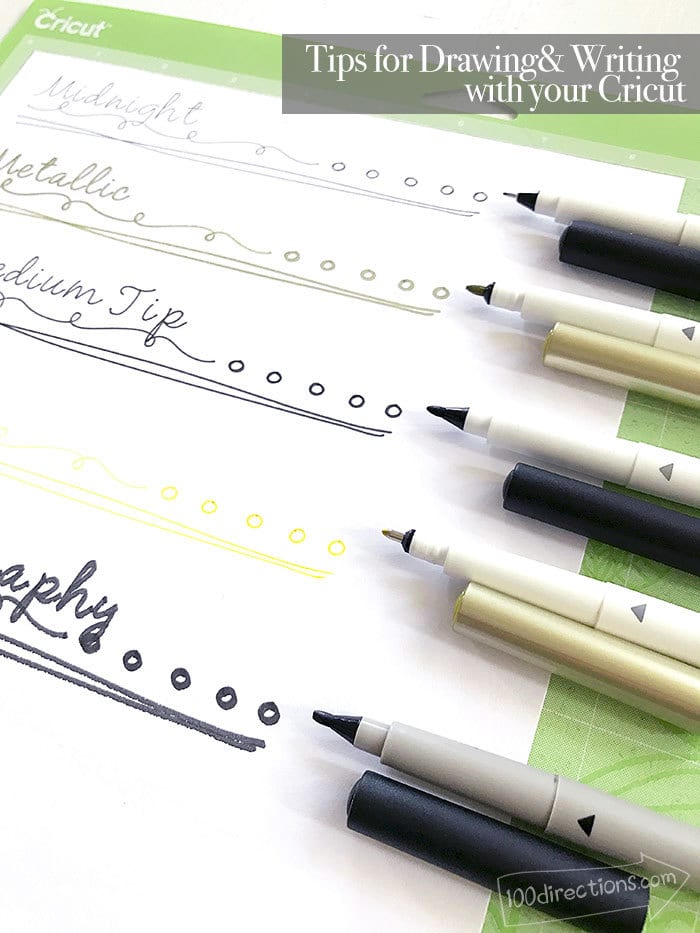
- Standard fine tip pens come in a wide range of colors. The fine point tips are perfect for adding accents to your work or creating drawing-only designs. The tips are small enough to draw fairly small detail while creating a nice crisp line. I use the .3 and .4 black tip pens for just about everything, including my had drawn art… it's a fantastic fine point black pen. The “Midnight” pen is a fine point.
- Glitter pens are more like a ball point pen with a nice glide to the ink so you get a fun glitter accent with a consistent line.
- Calligraphy pens come in a variety pack with a few different sizes including up to 2 calligraphy pen nib sizes. This will allow you to create a fancy calligraphy look in your Cricut pen art.
- Metallic pens have a bit bigger nib and draw more like a small marker. These nibs are the “medium” labeled pens.
- Infusible Ink Pens and Markers offer a whole new reason to use pens with your Cricut machine. Infusible Ink is a heat set ink that allows you to create all kinds of custom designs for your projects. Read more about Infusible Ink and Infusible Ink pens here.
A note about off-brand pens
Yes, you can use off-brand pens with your Cricut. I've tried a number of different brands of pens. I've spent countless hours roaming the craft store aisles looking for other pens that might fit into my Cricut machine. There are adapters and I know people love their other pens. I'm a big Cricut fan, so I do try to stay on brand.
I'm here to tell you friends, the ink in the Cricut specific pens is fantastic and they fit the machine perfectly. Off-brands either don't fit or the ink doesn't always flow as nicely OR the ink bleeds. I recommend sticking with the Cricut brand in this case. With all the color choices, you don't need to hunt for other pens. Please let me know if you've found some writing tricks and pens you love. I'm always excited to learn more new ideas!
Let's practice and test our Cricut pens!
Here's a canvas I set up for you to test your pens work. If you have Cricut Design Space, the font is included. I also designed an image set of doodle borders you can use while in CDS. Go to the Pen Example Canvas in Cricut Design Space.
Tip: sometimes Design Space hits a snag and says the project isn't available. Just close your Design Space window and try again. If all else fails, message me and let me know so I can try to help.
The Cricut Writing Tool Palette
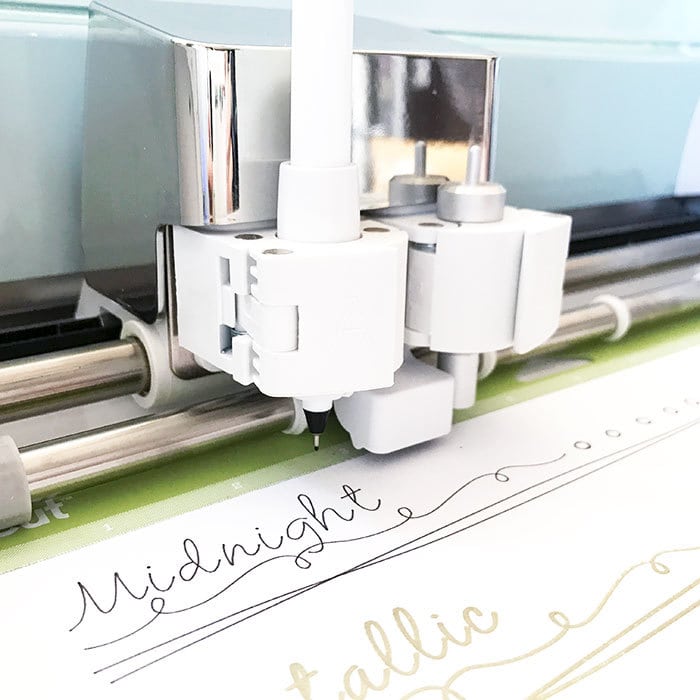
To create a drawing or writing line in Cricut Design space, you only need to designate the line as “draw”. To do this:
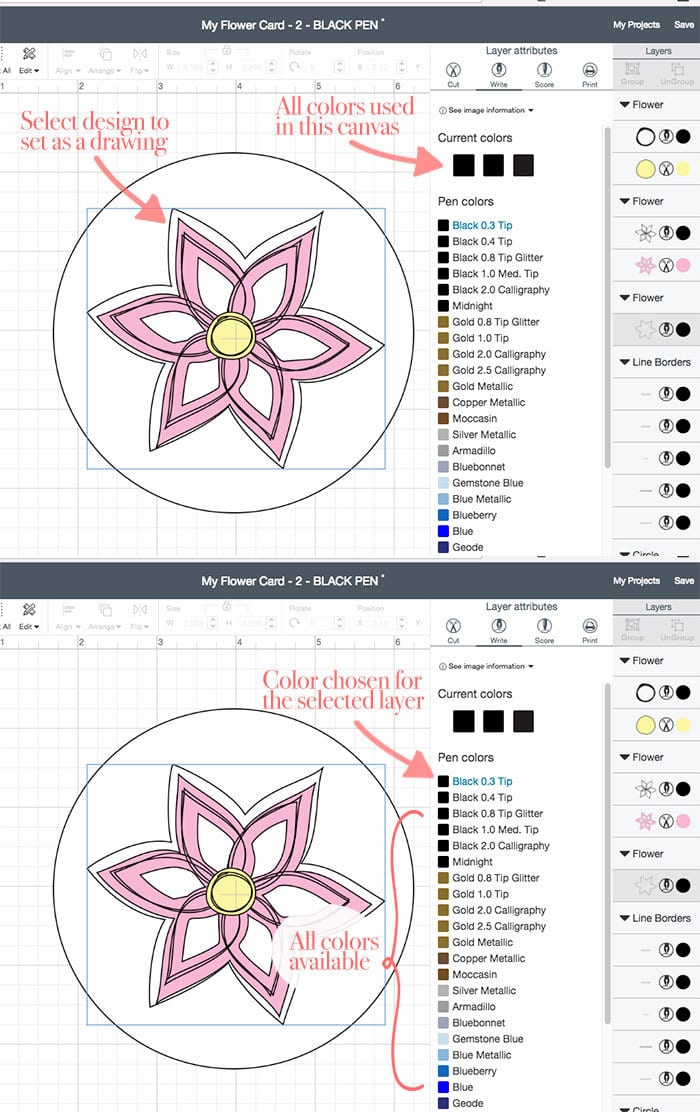
- Select the image layer you want to draw. Click the layer icon, whether it's a pen or scissors or printer. The palette will pop open, allowing you to select “draw” for this layer. You can then choose a pen color for that specific design layer.
- You can choose the color you want the design to appear on screen. If you want all images, for example, to be drawn with the same black pen, make sure you select the same pen and color choice for every design in your finished piece.
The current version of Design Space includes a color selection display that allows you to easily select a color you've already used. You can still select a color from the larger color palette.
- When you set your Cricut to create your project in Design Space, you will be prompted to change your pen colors as needed. Every color you select for each design layer, will result in an on-screen message letting you know when to switch your pen color while the Cricut is drawing (or writing) your design.
Finding designs to draw
You can turn just about any line into a drawing design. Many of my own designs I've created for the Cricut library include for a cut design and a draw line. The draw line in many cases can not be used as a cut shape. See the image above of the flower? You can convert the cut line to draw, but if you set the draw line to cut, you'll end up with a bunch of scraps of paper and not a pretty flower.
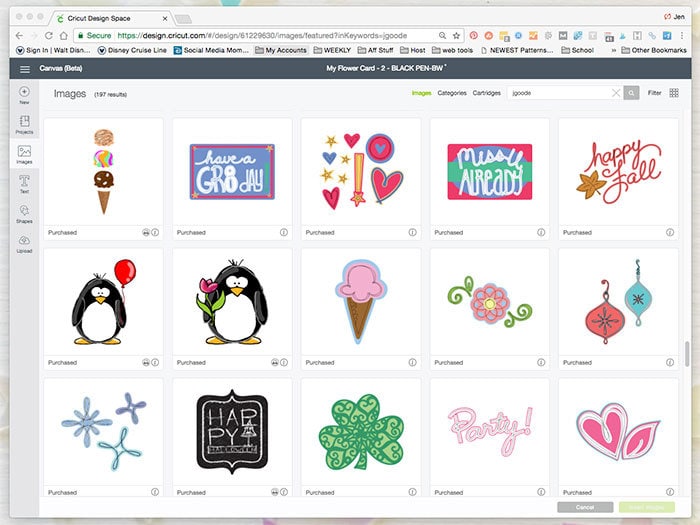
There are two ways to find my designs (JGoode Designs branded art) in Design Space. Many of these designs also include options for using the pen to draw accents, images and word art with the Cricut pen.
- Goto Cricut Design Space and click on “images” on the left side of the screen when you are working on your canvas. In the upper right, enter “jgoode” in the search bar. You should be able to browse image sets that I have created for the Cricut library.
- To see my newly uploaded images, you can now browse my Cricut profile to view projects and images available in Cricut Design Space.
Tips: Drawing and Writing with Cricut Machines
- Attach the drawing lines. To keep a layout together, attach the drawing lines together. Grouping lines will not result in a specific layout; grouping lets you move the pieces around your work canvas together.
- Designate drawing line placement. To dictate where drawings are placed on your layout, there are two choices:
- Attach the drawing to the layout on your canvas layout. I like to create a background paper on my canvas and attach the drawings there. Also, if you are working on a specific shape cut design with drawing, make sure you attach the drawing to the cut design.
- Move on the Canvas before cutting. If you don't have a specific cut design to attach the drawing, you can move the drawing around on the final mat view. Just make sure to place your paper on the mat in coordination with where you envision the drawing to appear.
- Pay attention to how lines look on screen. How lines appear on screen is how they will appear on your paper. If designs are overlapping… the pen will draw overlapping lines. Currently, there is no direct way to cut out portions of lines, so make sure to pay attention to how the lines appear on screen.
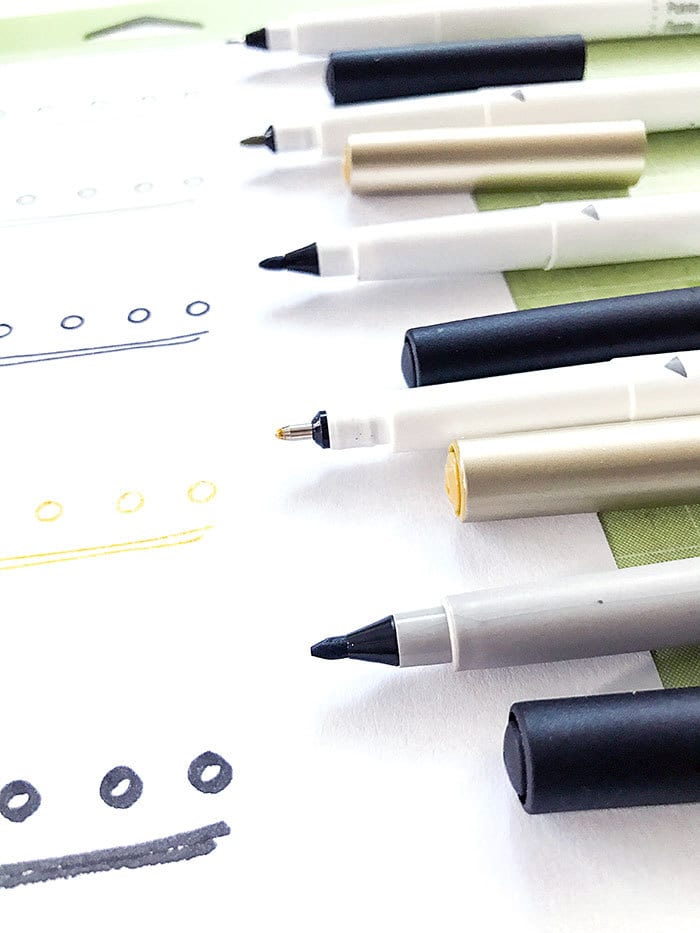
- Test the different pen types before using on your project. Testing out pens beforehand allows you to get an idea of how dark the colors are and how they appear on different papers. For example, gold glitter isn't nearly as bold nor obvious as gold metallic… so play with the pens on paper to see which you like for which use.
Help for you
I've created this project Canvas in Cricut Design Space: writing with your Cricut machine practice design canvas – use this information to learn and practice drawing and writing with your Cricut Machine. You can play with the different shapes, practice switching from writing to cutting and printing (print-then-cut) to see the various results.
More Help and Ideas for Drawing and Writing with your Cricut Machine
Check out the Cricut Drawing and Writing Series! I've written a 12-part series to help teach you how to use your Criut pens for all the features available. Below you will find a list of the topics to choose from.
Each lesson includes a project canvas you can use through Cricut Design Space to help you practice the techniques AND make a fun project. I'd love to hear what you think. Please let me know if you have any questions or you get stuck along the way. You can also stop by the 100 Directions facebook page and say hello!
The first in this series is this get-started guide with all the tips and tricks you need to get started using your Cricut machine and the Cricut pens. I also have a basic Drawing with your Cricut tutorial as an overview to help you learn how to add drawing and writing to your Cricut projects. The series includes 11 additional lessons touching on different uses and techniques.
You do not necessarily have to learn these techniques in order. However, I have organized the methods in a simple to advanced order.
- Using Cricut Pens – Get Started Guide
- How to use the Cricut Pens to Write Fonts
- Drawing Designs with Cricut Basic Shapes
- Making Advanced Font Designs in Cricut Design Space
- Converting a Cut Design to Draw with Your Cricut Machine
- Using the Weld Tool to Edit Designs to Draw in Cricut Design Space
- How to Draw Multiple line Art with Your Cricut
- How to Draw Layered Designs with Your Cricut
- How to Print, Cut and Draw with Your Cricut
- Drawing Coloring Pages and Cards with Your Cricut
- Choosing the Right Cricut Pen for Your Cricut Project
- Using Cricut Pens to Add Art Accents
Using Your Cricut Pens – Tutorials and Example Projects

Take a look at the full list of Cricut Pen projects. You'll find various projects you can make with your Cricut and Cricut pens.
More Cricut Tutorials, Ideas and SVG Cut Files
- Creating with Cricut – an overview of everything Cricut
- Cricut Projects You Can Make
- More Cricut Tips, Tricks and Help
- SVG Cut Files to Create with Your Cricut


I recently made Halloween cards for my family. I have the large box of circuit pens as well as a pack of 4 pens that include 2 calligraphy and a glitter. I truly need to find pens that show up well on black or dark brown paper. I wonder do you have any suggestions?
Hi! I agree, we need more pen choices for dark papers. The Cricut metallic pens work well. Sometimes the glitter gel pens work too. Michael’s also carries pens that are the same body as the Cricut pens, so sometimes you can find more metallics or even a white chalk that I’ve found to work. Thank you for stopping by!
How can you fill in lettering and drawings? It seems they always get outlined instead of filled.
Unless a font is set up to draw a single line, it will always draw the double line. So it’s best to either select a “writing font” in Cricut Design Space… or, you can color in the letters by hand. Both methods should work. Thank you so much for the note.
Hi Jen,
I am trying to make coasters using pens on my cricut. I have the design set and everything formatted properly. I am finding that the grooves of the roller on the cricut itself are creating an indent on the cardboard we are using for the coasters.
Any suggestions?
Thanks!
You can slide the rollers off to the sides of the metal bar. They are a little tight, but they will move. Let me know how that works out.
Hi!! Im from Mexico! Thank you so much for this blog you help me a lot… i have a
Cuestion, i tried to Make a invitation for mi kids Party, but when i write the letters has double line…. I read in your post that to has a line must have the style of writing … my question, I have uploaded many types of letters from the dafont.com page and I love them is there any way to convert them into a single line or writing style?
Hi! Unfortunately, there is no simple way to convert a font to a writing style for the Cricut machine. The writing fonts are specifically designed as single line fonts. Cricut does offer a variety of writing fonts, however. I hope this helps!
Can I stamp on cardstock then cut it with my cricut?
Hi Edna, The Cricut will not know where to cut around a stamp, but there is a work around… on a separate piece of paper, apply your stamp image with black ink. Scan or take a photo of your stamped image and save as a jpeg. Upload the jpeg to Design Space and create a cut design with it. Set the size to fit the size of your stamp and then cut the image. THEN apply the stamp to your cut image. Does that make sense? I’ll write up a tutorial. You’ll have to make a judgement call as to which details to cut and which to remove.
Hello Jen
I have been trying to use sketches to “write/draw” on the cricut. I have uploaded them different ways and don’t seem to be able to get a way from the double line/cut line. I have saved as simple, print and cut and just cut. There doesn’t seem to be an option (that I see) for just “draw/write” images. Help please.
Thank you
Shelly
Hi Shelly, unfortunately there is no way to turn a hand drawn design into a drawing for the Cricut. The only way to create the drawing lines is with a vector based design program like Adobe Illustrator or Inkspace and then save the image as an SVG. The Cricut wants to draw “outlines” of shapes… which most line art is. An actual digital line has to be manually created in a drawing program. I hope this helps.
Do you have trouble with the cricut markers not performing? The marker that came with my Explore would only write half of a word before it seemed like it was running out. I chalked it up to being in the box for who knows how long.
I ordered new markers from Cricut and they perform the same way. I tried to make the Merry and Bright reindeer tag and it doesn’t even complete one reindeer outline. This is one of the primary reasons I purchased a Cricut and I am getting frustrated. Any thoughts?
Hi Kendra,
I’m so sorry the Cricut is giving you a hard time. One thing to double check is that the pen is pressed all the way in the pen holder. Sometimes it doesn’t click in and as the machine draws, the pen slips upward… causing it to stop drawing. if that’s the case, check that the pen can click into place and if not, call customer service – you might have a problem with the pen holder. Please let me know how it goes!
How do I draw a photograph with the Cricut?
Hi Christie, thanks for the note! I’m note quite sure about drawing a photograph, that sounds a little trick for the Cricut machine. Do you have an example of something you’ve seen that i can look at and maybe be able to help solve this with you?
I just bought and received a cricut explore 2 and love the writing feature, however I don’t know how to get it to write a single line, it only writes double lines. Can you help me with this? thank you
Hooray for new Cricut machines! Drawing lines are tricky when it comes to single or double. Double lines are a result of a cut shape. So any time you convert a cutting shape into a drawing design, you can end up with a “double line” depending on the design. If you are trying to write/draw words, make sure to choose a “writing style” font from the Cricut Design Space font menu. I have more detailed information about writing with your Cricut here. Let me know how that works for you and thank YOU for stopping by!
This is great to know – Thank you Jen!
As the proud new owner of a Cricut Maker machine, I was also troubled by why this was happening, but now I know how to solve it, thanks to you 🙂
Great website by the way, I’m real glad I subscribed.
Thank you Caz, I’m so glad this was helpful. I appreciate the note!
Great instructions, thanks so much.
Wow, this is a great tutorial! Thanks for the tips.
Thank YOU, give me a shout if you have questions!