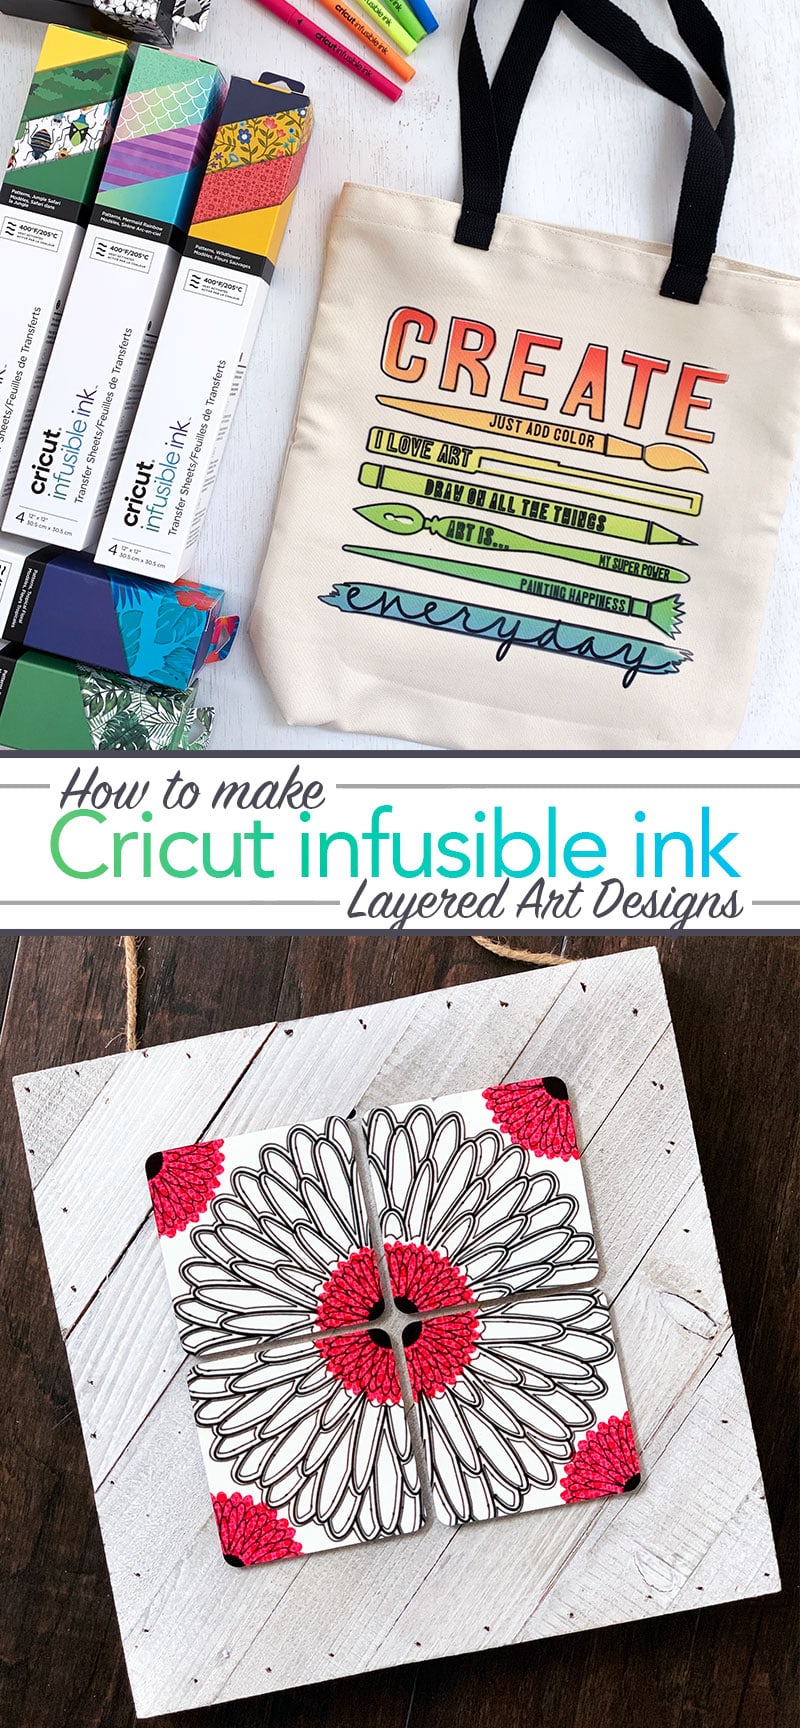
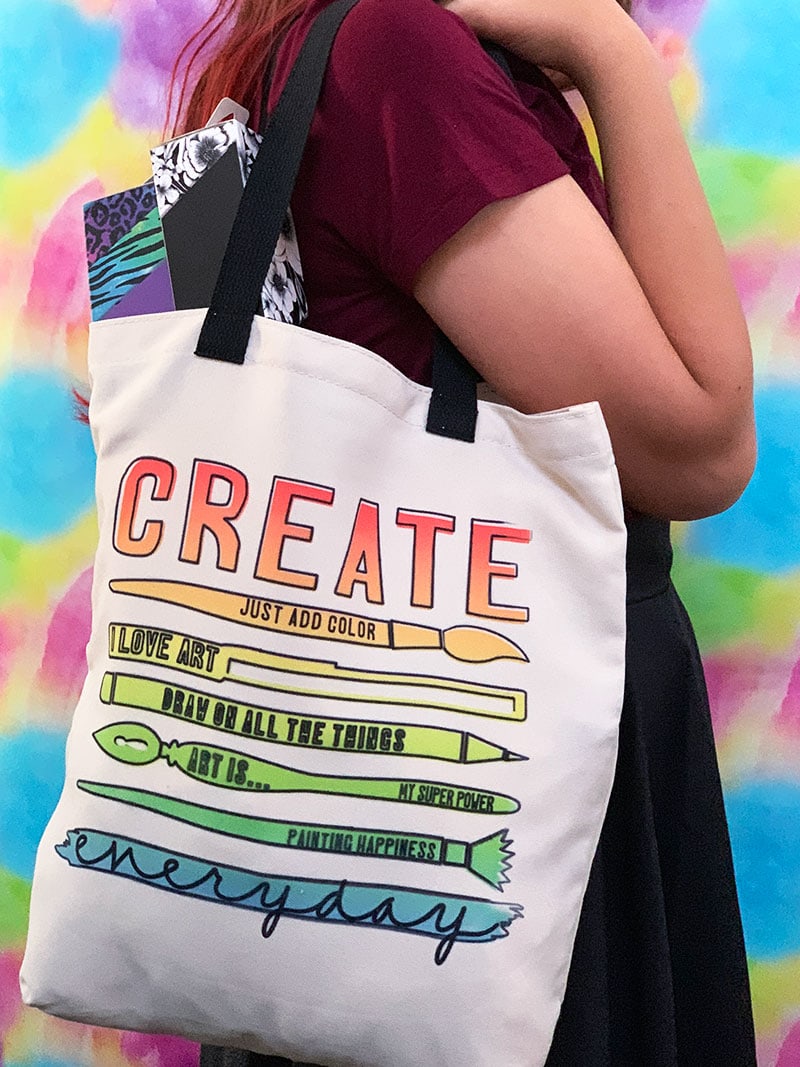
If you are a Cricut user, you've probably heard about Cricut Infusible Ink. Have you tried it yet? Today I'm going to show you how to use Infusible Ink with layered design projects.There's so many possibilities of projects you can create! The colors are amazingly vibrant and the patterned art transfer sheets are beautiful. This is going to make all your Cricut Projects next level! Did you know you can layer the Infusible Ink transfer sheets with the Infusible Ink pens and markers? Yes you can! You can layer cut out designs with drawn designs to create really cool accents and detailed art. I'll show you how.
How to Use Cricut Infusible Ink and Layered Design Projects
Before you get started, if you aren't familiar, read my Infusible Ink Get Started Guide. Then come on back to check out these two great tutorials. Also, take a look at the Infusible Ink product details in and information at Cricut.com.
Can you layer Cricut Infusible Ink?
Yes! You can layer Cricut Infusible Ink. One of the benefits of this product is the ability to seamlessly combine multiple design layers. A few things to note about layering Infusible Ink:
- Each layer needs to be applied separately.
- Always use a new piece of butcher paper for each layer to prevent re-transferring ink.
- Each layer needs to cool before heat-setting another layer.
- You can combine transfer sheets and pen/marker drawn designs.
- You can layer different patterns and colors of transfer sheets too.
- Dark colors will always show through. You can not layer a light color on top of a dark color and expect the light color to show.
How to layer Cricut Infusible Ink
You can easily layer multiple designs, patterns and colors of Infusible Ink, here's how:
- Prepare the surface you are heat-setting.*
- Follow Cricut's recommended guidelines to heat-set the first design layer.
- Allow surface to cool and carefully remove design transfer.
- Place next design layer, cover with butcher paper and heat-set. Again allow to cool and then remove design.
- Repeat steps 2-3 for as many layers of Infusible Ink as you'd like to transfer.
*Always reference the Cricut EasyPress heat-transfer guide for the materials you are using.
Make Layered Design Projects with Cricut Infusible Ink
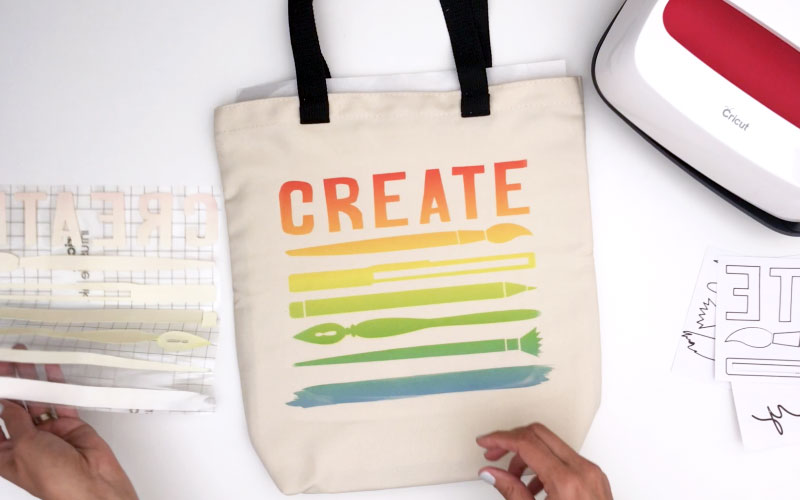
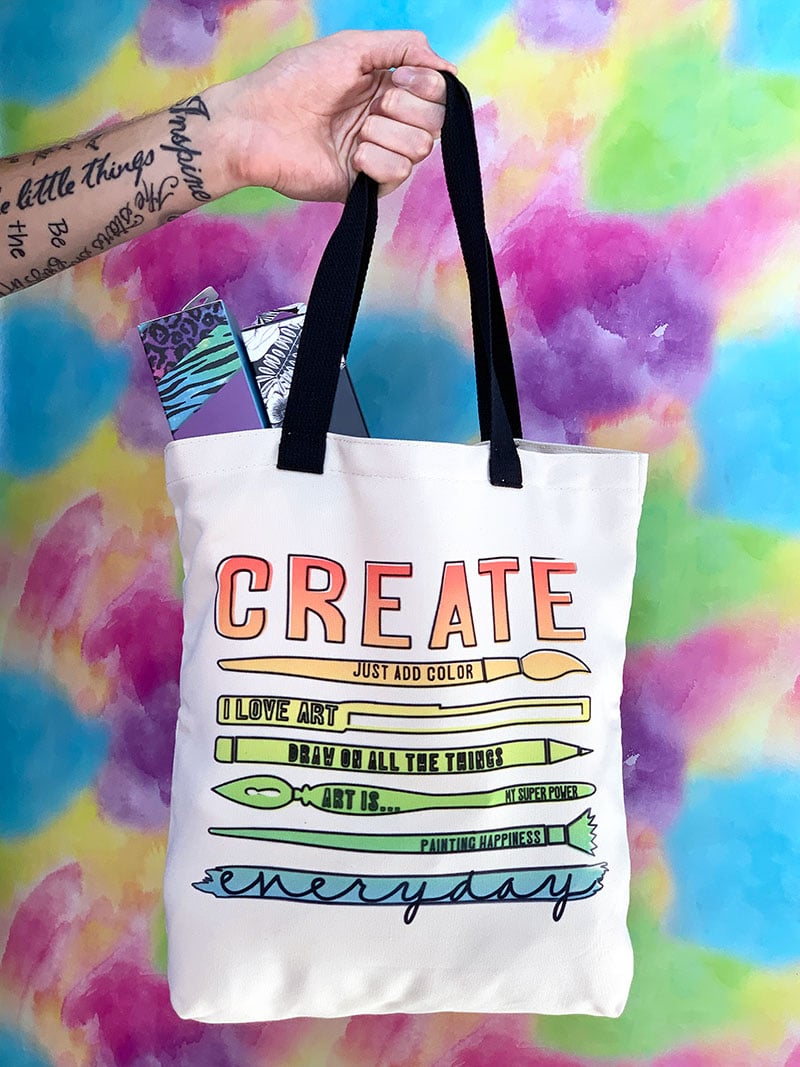
Today we're going to make a custom tote bag and tile coaster art. Let's start off with the tote bag. For any project you'd like to make, always double check the Cricut EasyPress Heat Transfer Guide. It's got all the information you need for successful heat transfers with each material type.
To Make an Art Tote Bag with Infusible Ink
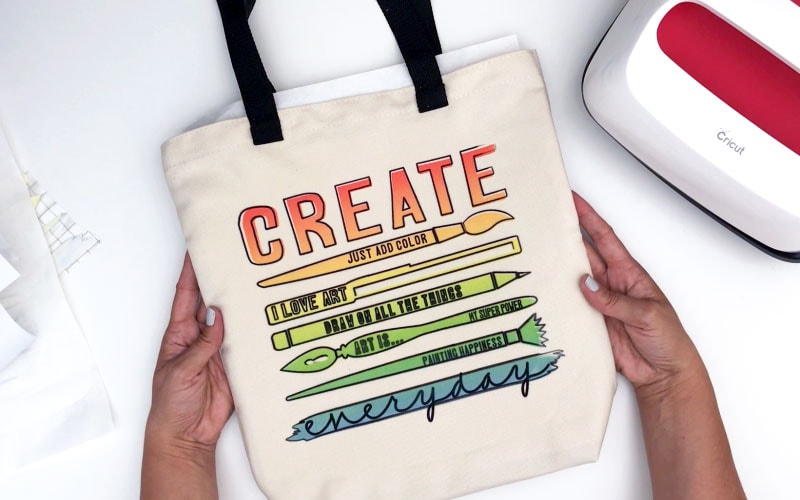
Add layers of color and pen/marker drawn details to create a unique look and a tote bag you can be proud to say you made yourself. This layered design technique is simple to create and fun to customize.
Materials
- Cricut Machine and Cricut Design Space
- Create Everyday Tote Bag Design Canvas by Jen Goode
- Cricut EasyPress 2
- Cricut EasyPress Mat*
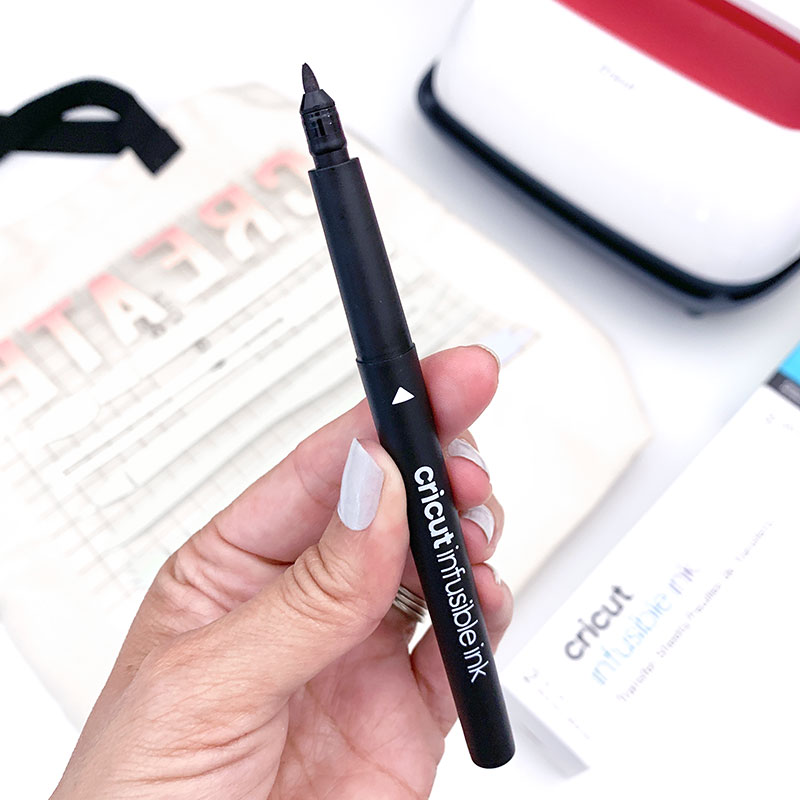
- Infusible Ink Pen / Marker design
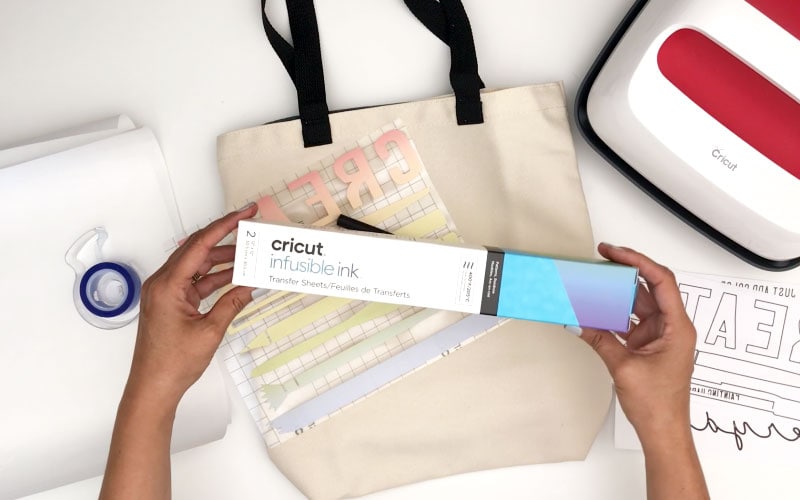
- Infusible Ink Paterns, Rainbow transfer sheet – rainbow colors
- Cricut Tote Bag Blank
- Heat Resistant Tape
- Butcher paper (included in packaging with transfer sheets)
- Cardstock (80 lb), White (or 4 layers butcher paper)
- Lint roller
*Not recommended without Cricut EasyPress Mat
Instructions
- Go to the art canvas for the tote bag art and follow on screen instructions to draw and cut each design.
- Make sure to mirror all the design layers before cutting or drawing this design.
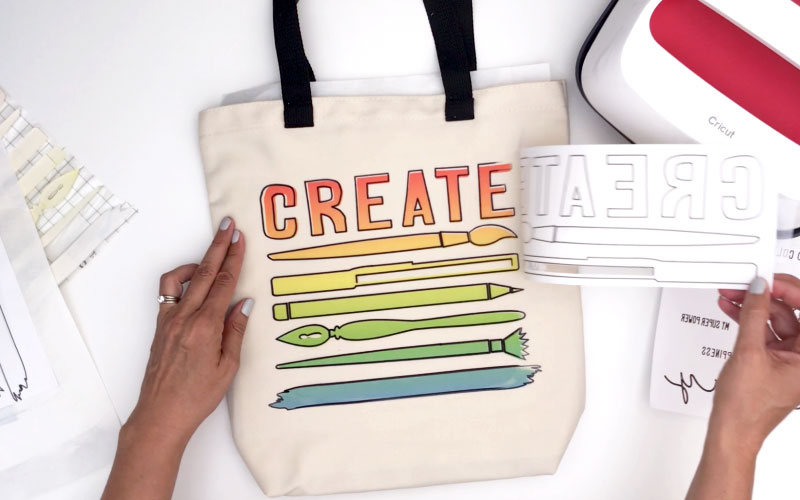
- Weed excess pattern from the transfer sheet cut out, leaving the design you've cut on the backing.
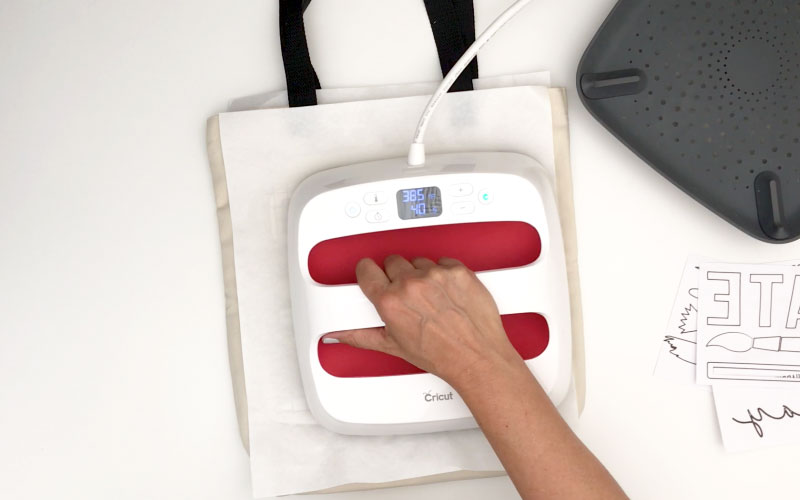
- Preheat Cricut EasyPress 2 to 385°F
- Place mat inside tote bag
- Insert cardstock on top of mat inside tote bag to prevent bleed through. I used butcher paper for this step, but I recommend cardstock to really ensure none of the ink bleeds through on to your mat.
- Lint roll tote bag.
- Cover tote bag with butcher paper larger than heat plate.
- Preheat tote bag for 15 seconds.
- Remove butcher paper from top of tote bag.
- Place colored transfer sheet design face down onto the tote bag.
- Cover with clean butcher paper larger then the heat plate.
- Press with light pressure at 385°F for 40 s
- Slowly lift press off tote bag and slowly remove butcher paper
- Cool Completely. Slowly remove transfer design.
- Repeat steps 7-14 for each additional design layer. For pen/marker drawn art, you can tape image in place using heat resistant tape, making sure not to tape on the image area. Allow each art layer to cool before removing.
Tip: I've created this design set with coordinating cut outs for each layer piece so you can line up the design with each new layer. Make sure, when you create your own layered designs, that you add in some way to easily layer each new piece of art.
For more ideas and help with these pens and markers, check out my how to use Cricut Pens guide. Many of the tips and ideas used with standard Cricut pens can be used with the Cricut Infusible pens and markers.

When you think of Infusible Ink… think more than t-shirt art
Infusible Ink is a fantastic product to create custom t-shirts. The heat set patterns and pens are perfect for all kinds of designs for the entire family. But you can also use Infusible Ink to customize gifts and home decor. Create tote bags for yourself or give them as gifts. Apply your art designs to coasters and see what lovely home decor and pretty accents you can create.
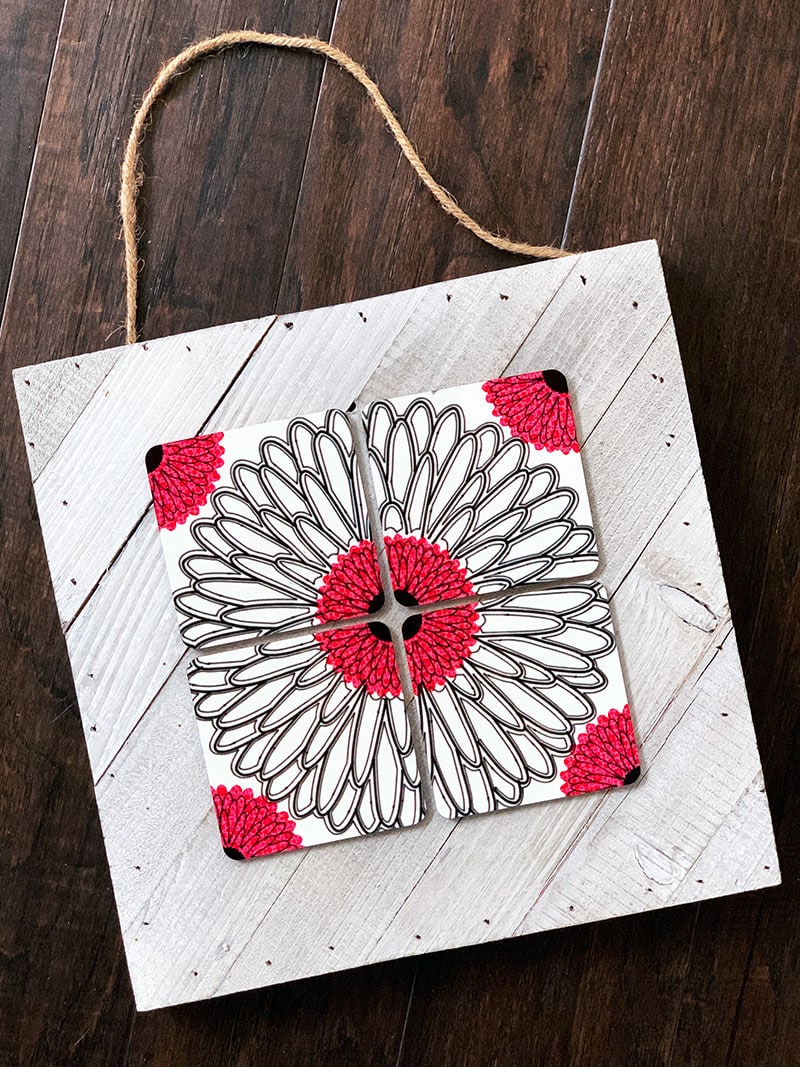
To Make Tile Art Coasters with Cricut Infusible Ink
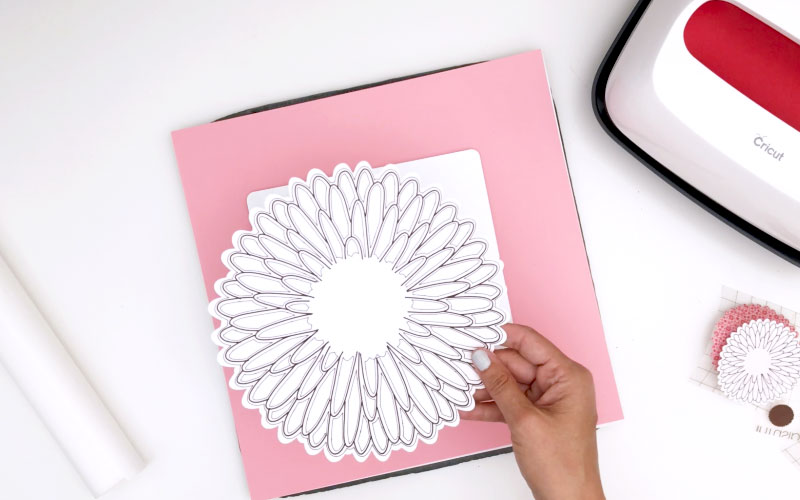
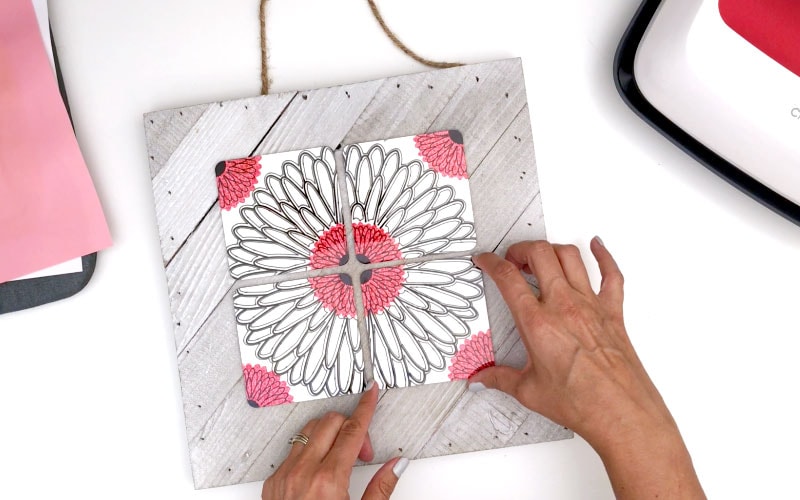
This project is a little tricky. It requires you heat transfer multiple layers of art to create a finished look. You'll start with the main flower design on all 4 coasters and then continue to apply center accents.
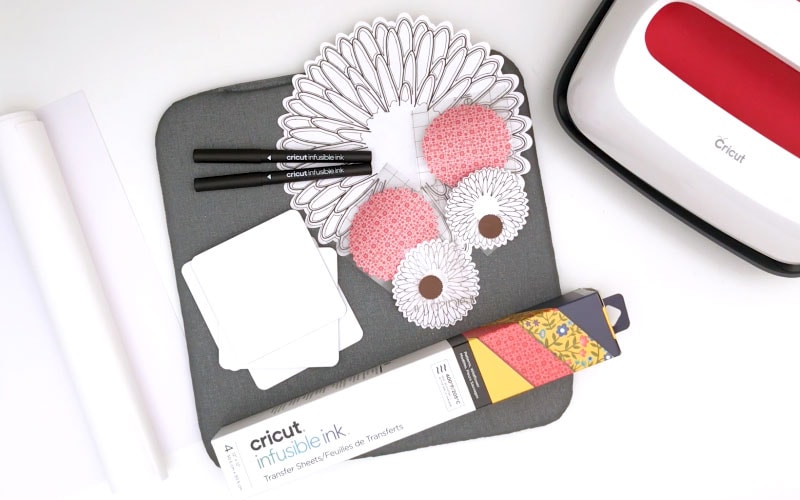
Materials
- Cricut Machine and Cricut Design Space
- Tile Art Design Canvas by Jen Goode
- Black Infusible Ink marker and black Infusible Ink pen
(optionally, the entire design can be just marker or pen) - White copy paper
- Infusible Ink Wildflower transfer sheet – small red flowers
- Infusible Ink Black transfer sheet
- Cricut EasyPress 2
- Cricut EasyPress Mat*
- Cricut Square Coaster Blank
- 5 pieces of butcher paper (some butcher paper is included in packaging with transfer sheets)
- Cardstock (80 lb), White (or 4 layers butcher paper)
- Lint-free cloth(included in packaging with transfer sheets)
- *Not recommended without Cricut EasyPress Mat
Instructions
- Go to the art canvas for the tile art and follow on screen instructions to draw and cut each design.
- Preheat Cricut EasyPress 2 to 400°F
- Cover mat with cardstock to protect surface.
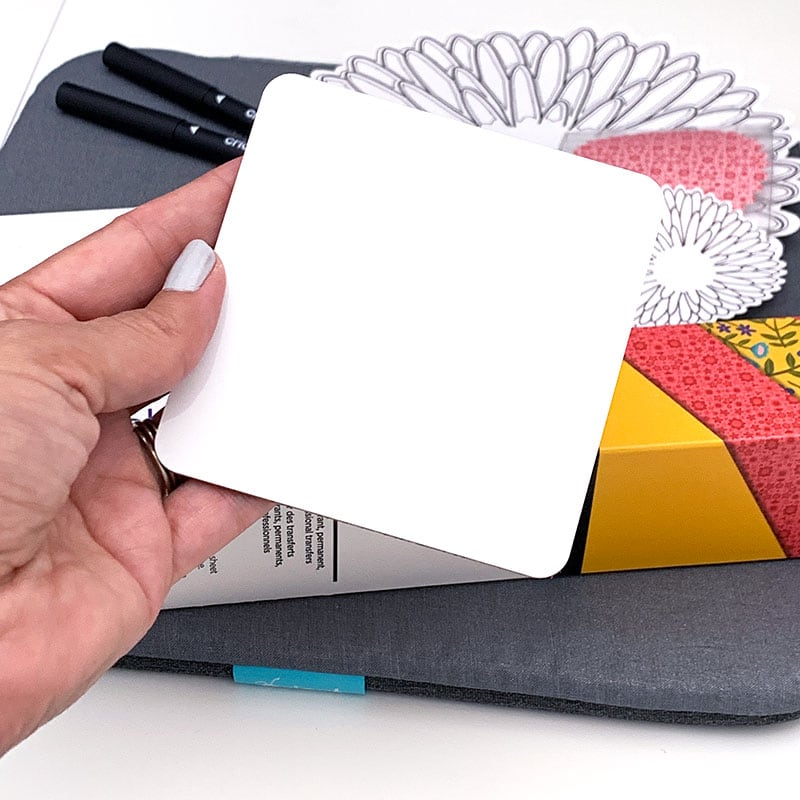
- Wipe each tile coaster with lint-free cloth.
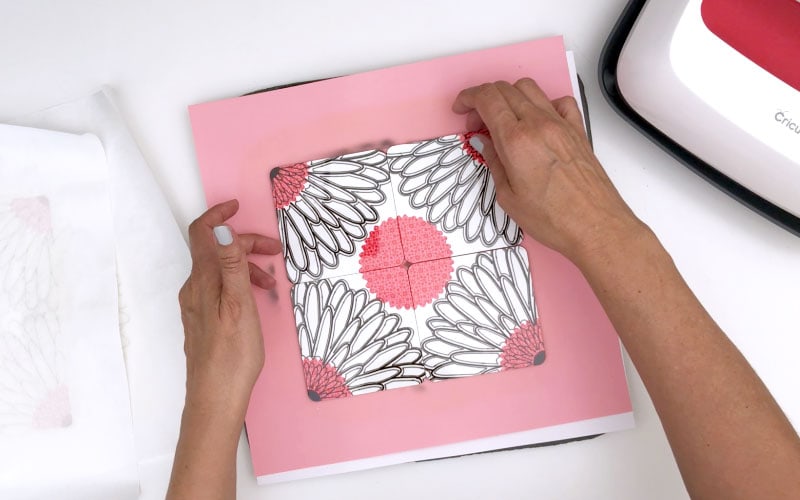
- Lay the coasters out together in a 4 tile block, glossy side up.
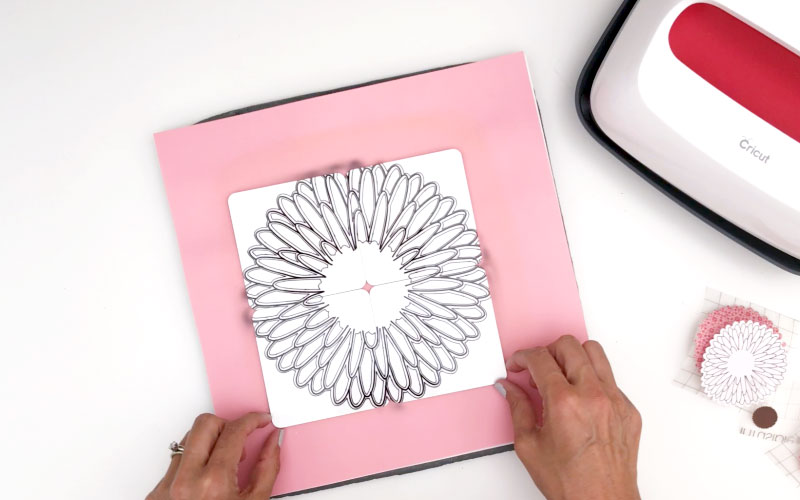
- Place the larger pen drawn flower design face down on the coasters, centering over the middle of the entire block.
- Cover with cardstock. I used butcher paper which creates a little more of a bleed effect instead of a crisp line. Make sure you use cardstock when transferring the pen/marker art with the square coasters unless you want the softer, bleed, look with your art.
- Center machine, press with no pressure at 400°F for 60 s
- Carefully lift press. Sometimes the heat makes the butcher paper slightly stick to the EasyPress, just lift slowly and your design will be fine.
- Remove cardstock/butcher paper. CAUTION: Coaster will be very hot. Let cool completely (about 5 minutes). Remove coaster from design.
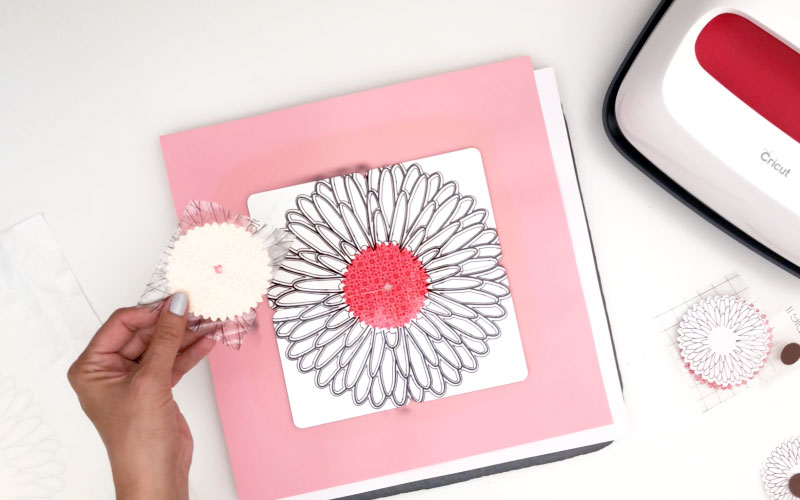
- Without moving the coasters, transfer the red flower cutout to the center of the coaster block, following steps 7-10.
- Remove the black circle cut out from the backing, place in center of block. Add the small drawn flower on top of the black cut out and again follow steps 7-10 to heat transfer this remaining art.
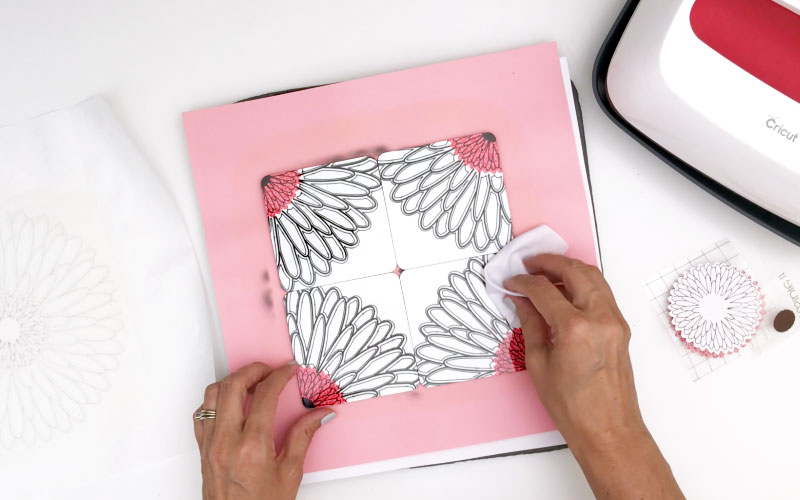
- Once the coasters have cooled to the touch, move them to create a blank space in the center of the coast block again. Wipe off each coaster with the lint-free cloth again. Then follow steps 11 and 12 to create another red flower design in the center of this new layer.
- Allow to thoroughly cool and adhere coasters to a decorative backing board to display and enjoy.


Get Crafting with Cricut Infusible Ink
So there you go. Two different projects you can create using layers of Infusible Ink transfer sheets, pens and markers. If you are looking for projects you can personalize easily, consider adding layers of pen or marker art with pretty heat transfer patterns. Infusible ink is a great material to create all kinds of projects. The next time you are looking for a way to make a customized gift or a fun shirt to show off your personality, get creative with Infusible Ink.