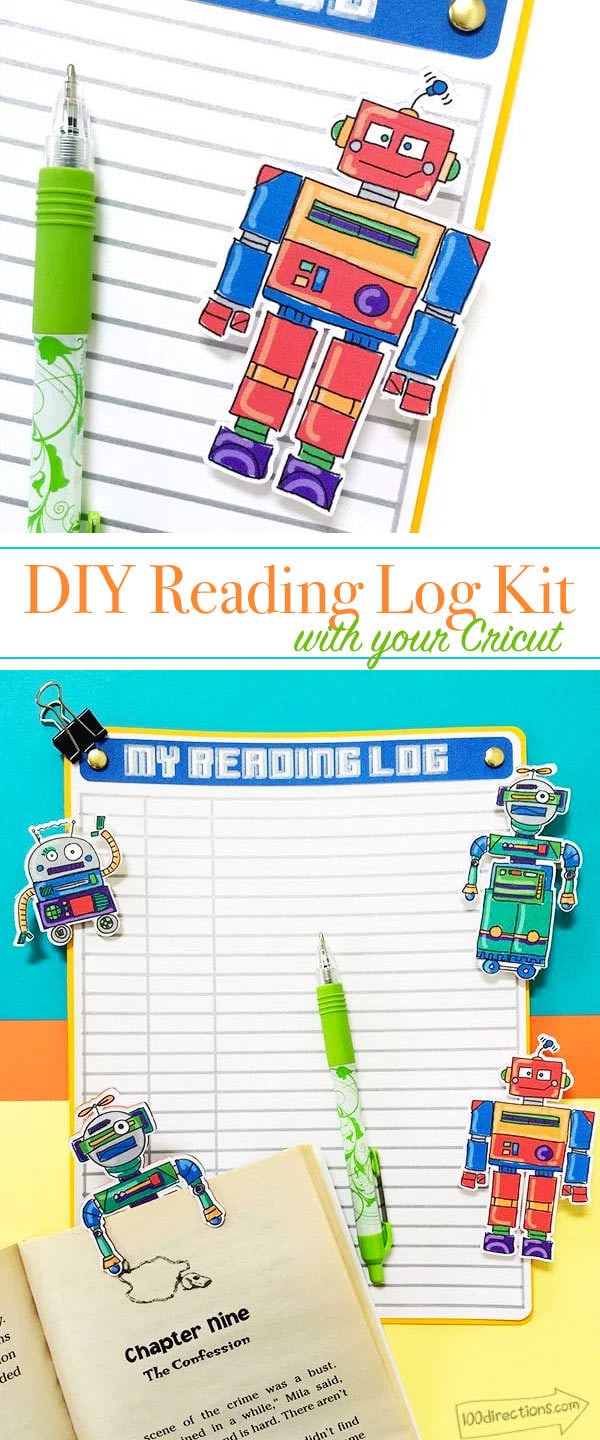
Get the kids excited for the school year with this fun Robot Reading Kit. Make your own re-usable reading log and coordinating robot bookmark (too cute, right!?). This is a fun Cricut project You can create yourself.
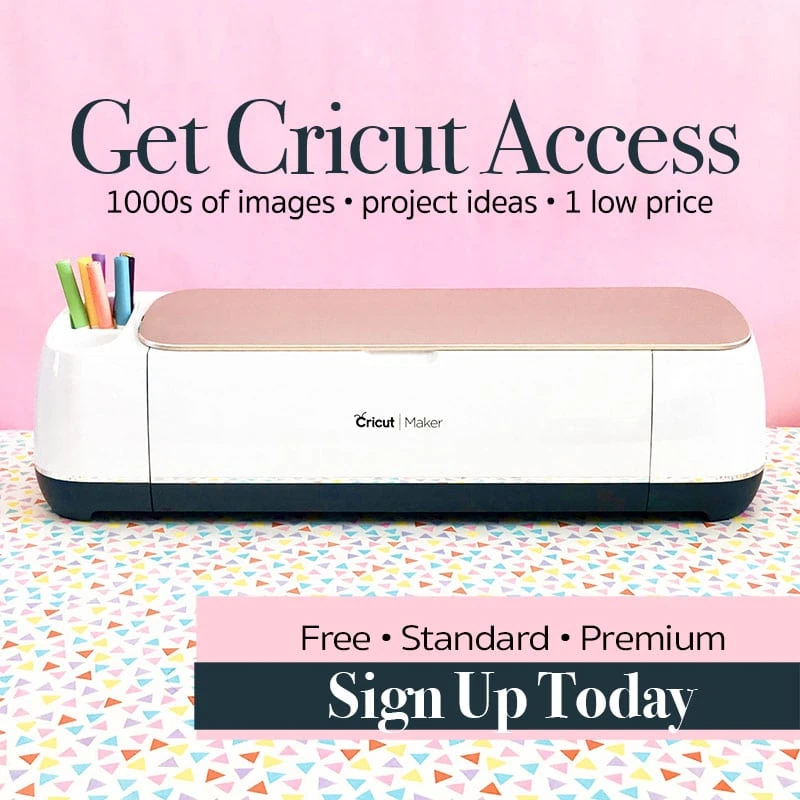
Mix and match the robots designs to decorate however you’d like. Use them as magnets to hang the log on the refrigerator or add clips to the back. Choose paper colors to match your child’s favorites, these robots are designs to fit a rainbow of colors!

If you have a Cricut machine, the bookmark in this project will only cost $1! If you don't have a Cricut machine, I hope this project inspires you to create your own reading kit… make whatever characters you like!. You'll find more great book craft ideas to make with your kids at the bottom of this article.
Make Your Own Robot Reading Kit
You can make this entire robot reading log set in under an hour. Customize it for each of your kids with favorite colors and the robot style they like most. Little readers will love the robot bookmark!
Materials
- Robot Reading Kit Cricut Design Space project Designed by Jen Goode
- Cricut Explore™ machine
- Cricut Design Space™ free online design software
- 12″ x 12″ Standard Grip Cricut® cutting mat
- Cricut® Cardstock – White, Blue, Red and Yellow
- Weeding tool
- Glue
- Hold punch
- Brads
- Cricut Image names
- Robot #M525304
- Skinny Robot #M52527B and Cut/Draw set #M5253EA
- Small Robot #M525237
- Reading Log Kit #M5253AC
All the images are included in the Cricut Access memberships. Learn more…
How to create a Robot Reading Kit
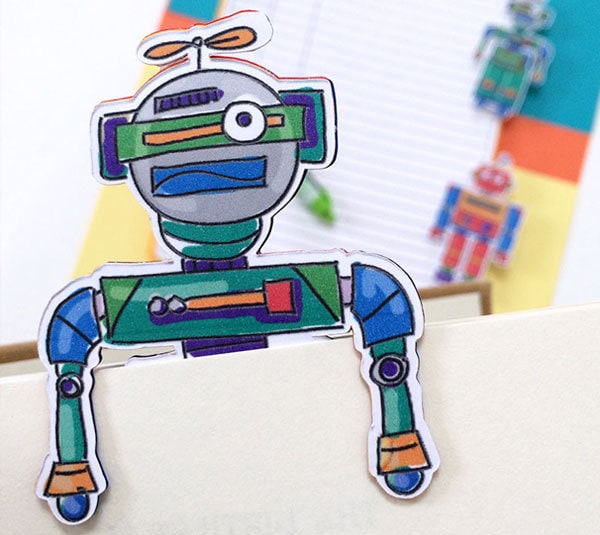
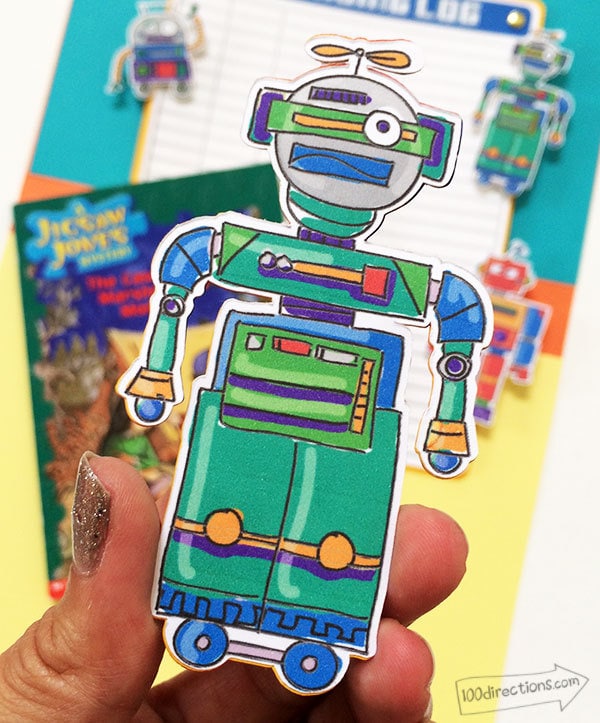
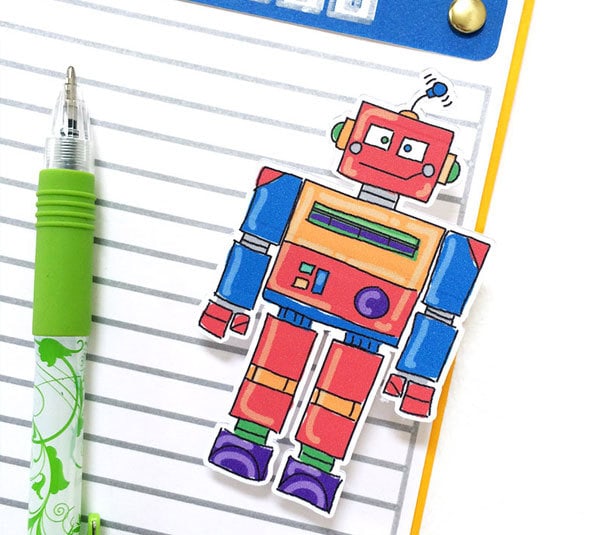
Make a robot bookmark – this bookmark is super cute and easy to create. He sits on the top of each page and holds on with his little robot arms. You can layer more cardstock to make a more sturdy bookmark. I layered 3 pieces of cardstock.
Instructions
- Head to Cricut Design Space, I've set up a canvas to help you get started with all the images you need.
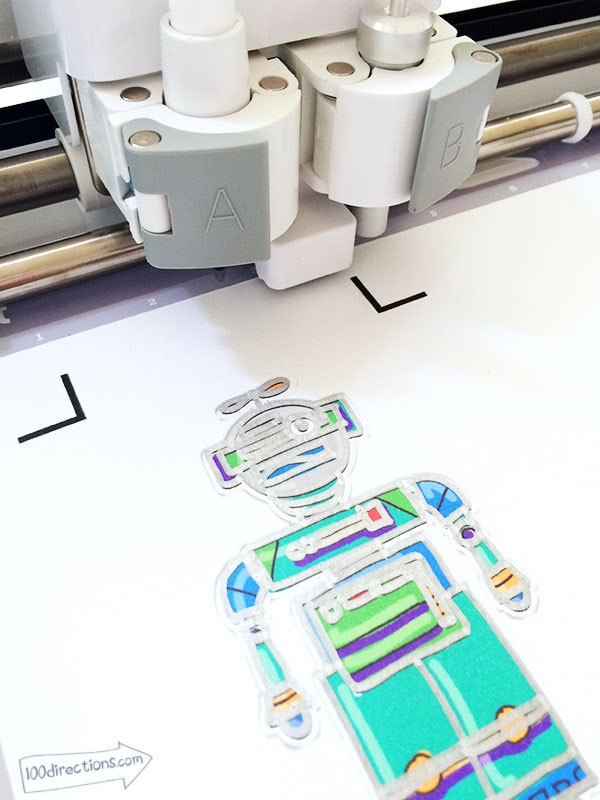
- Cut design following on screen instructions for the Skinny Robot draw, cut and mat changes.
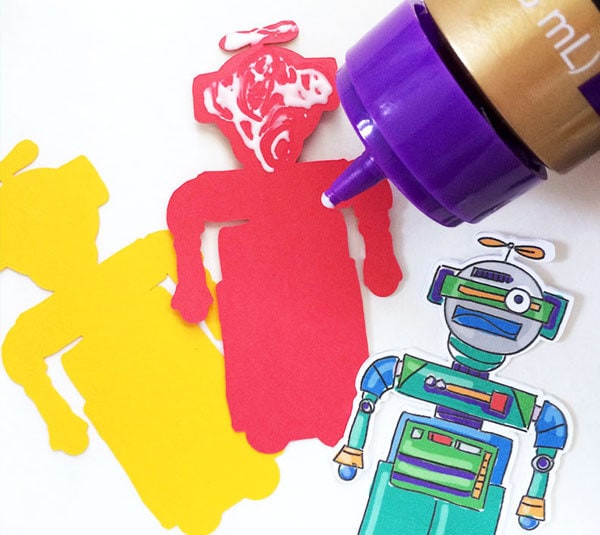
- Layer each robot cut out, applying ample glue between each layer. Don’t worry about glue leaking out, you can wipe it off before it dries. The excess glue will help seal the edges of your bookmark. Allow to dry.
Hint: You can add more than 4 layers of cardstock if you would like a thicker bookmark.
When you make this bookmark…
Robot Reading Log – this reading log consists of multiple layers of custom designed cardstock and paper. The lined paper is hand-drawn lines, detailed by your Cricut machine and the pen too. You can do this by hand if you prefer. The header of the reading log used a Cricut font, so you can customize the design to use different words if you'd like. Simply ungroup and then unflatten the header image and customize to display the words you prefer.
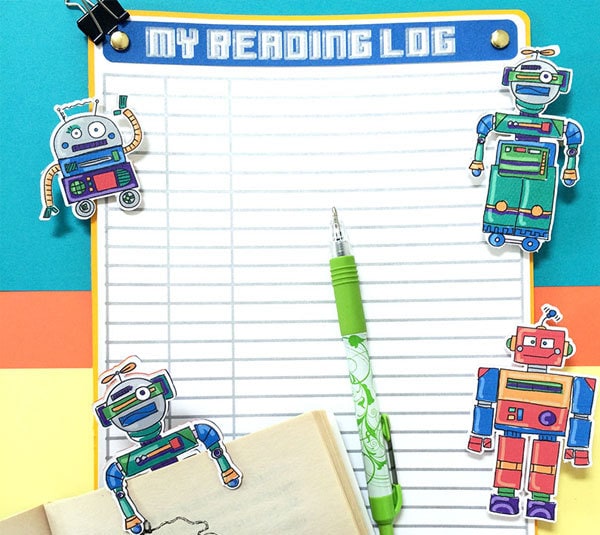
You can create the basic set of pieces to create the reading log, but don’t glue the pages together. Instead, use brads so you can reuse the set, just replacing the lined log sheet as needed. You can also make the lined page just once with your cricut, and then make photocopies of it if you don't want to use your Cricut pen just for lined paper.
Instructions
- Cut design following on screen instructions for draw, cut and mat changes.
- Layer the background paper, lined sheet and title image how you’d like them placed. Using a hole punch, create a hole as each end of the title image. Attach a brad through each hole.
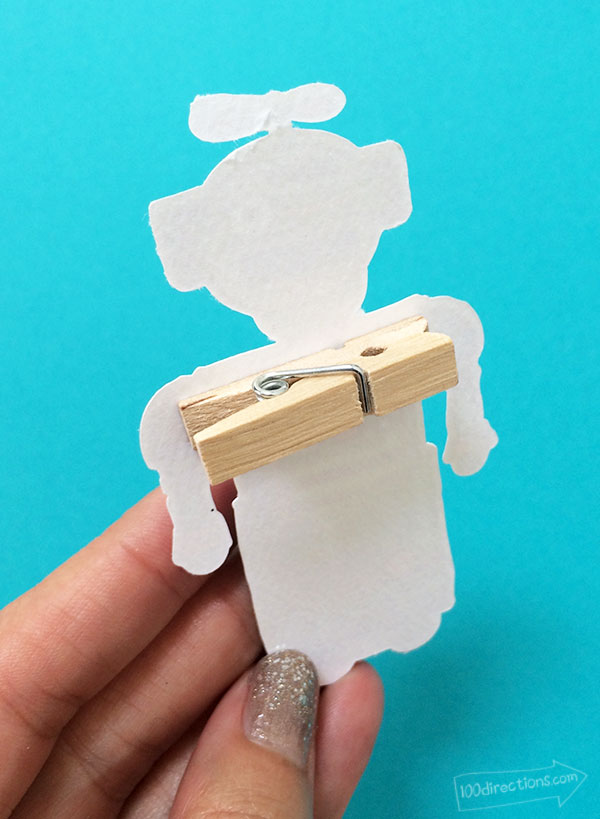
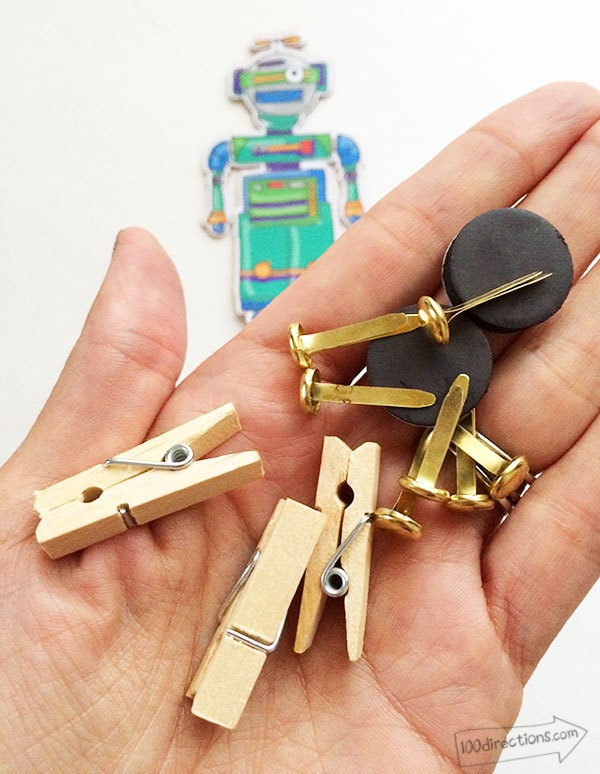
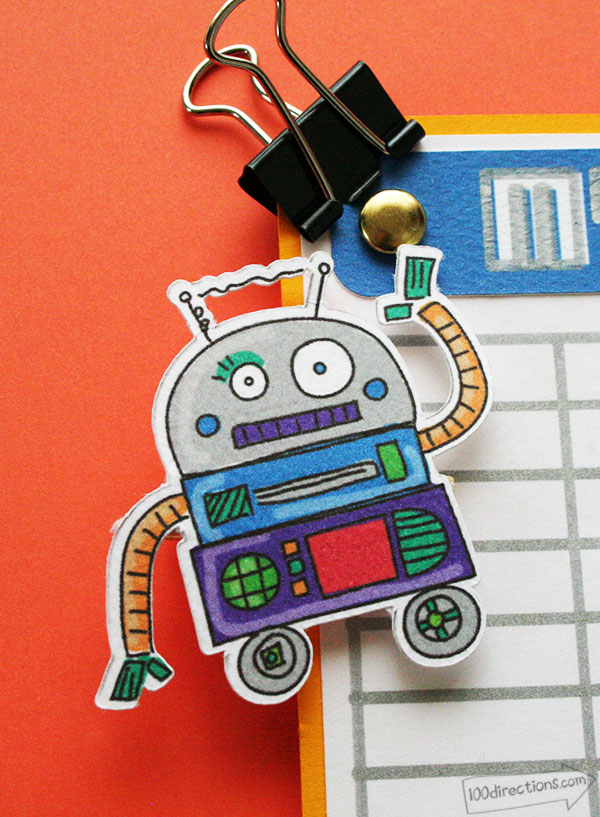
- Accent the log with the robot art pieces. Either add them as stickers or magnets. I added mini cloths pins with glue to the back of my robots so they could be clipped to the sides of the log.
- Use fun clips to hang the log.
Tip: Use the metallic Cricut pens to draw the art lines to create a fun robot accent to the set.
Would you like to change the text?
Use the reading log image set to create your own custom header image for this project. Choose the color of your header, the font, add your text and then flatten together to create a Print Then Cut header image.

Head to Cricut Design Space and make this Robot Reading Kit project Now
This Cricut project coordinates with additional Cricut images designed by Jen Goode:
- Robot Cut/Draw set #M525404
- Robot Accessories #M55865D
- Small Robot Cut/Draw set #M5253C8
If you make this project, I'd love to hear what you think! You can use these robot designs for so many other projects… t-shirts, birthday party sets or office decor. Tell me your ideas! Leave a comment below or head over to the 100 Directions Facebook page. I'd love to hear from you!