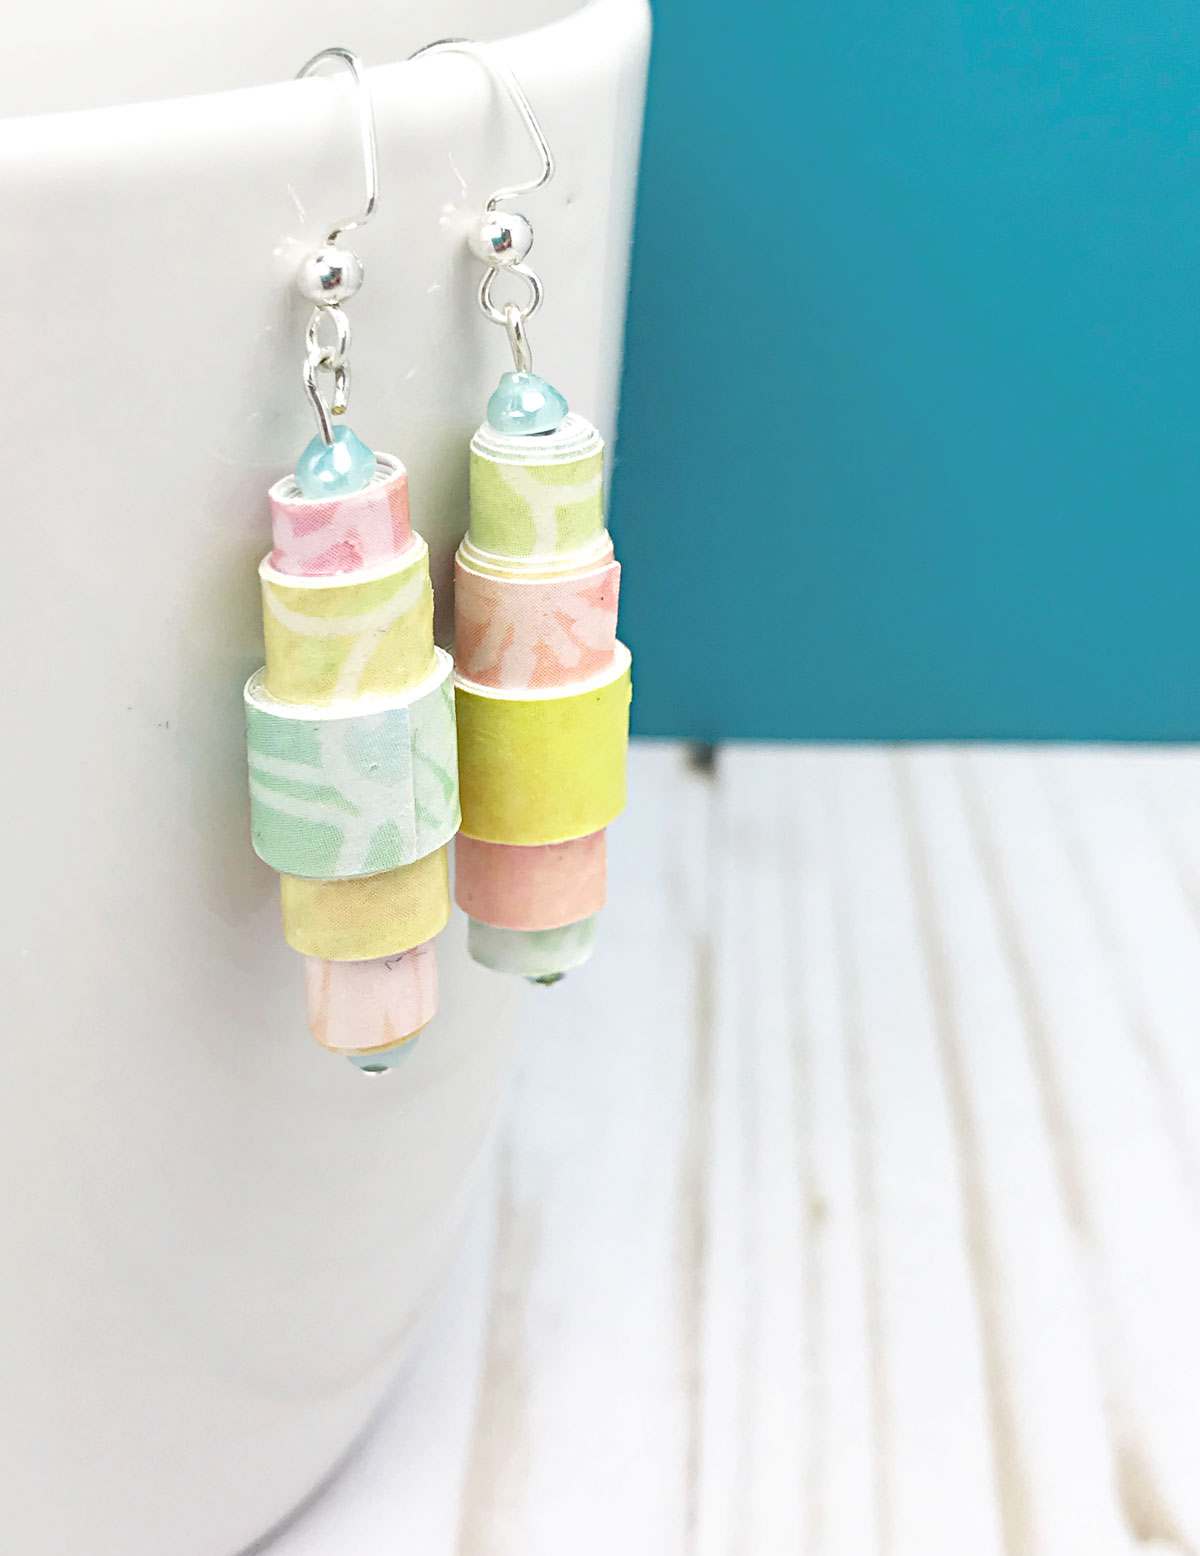
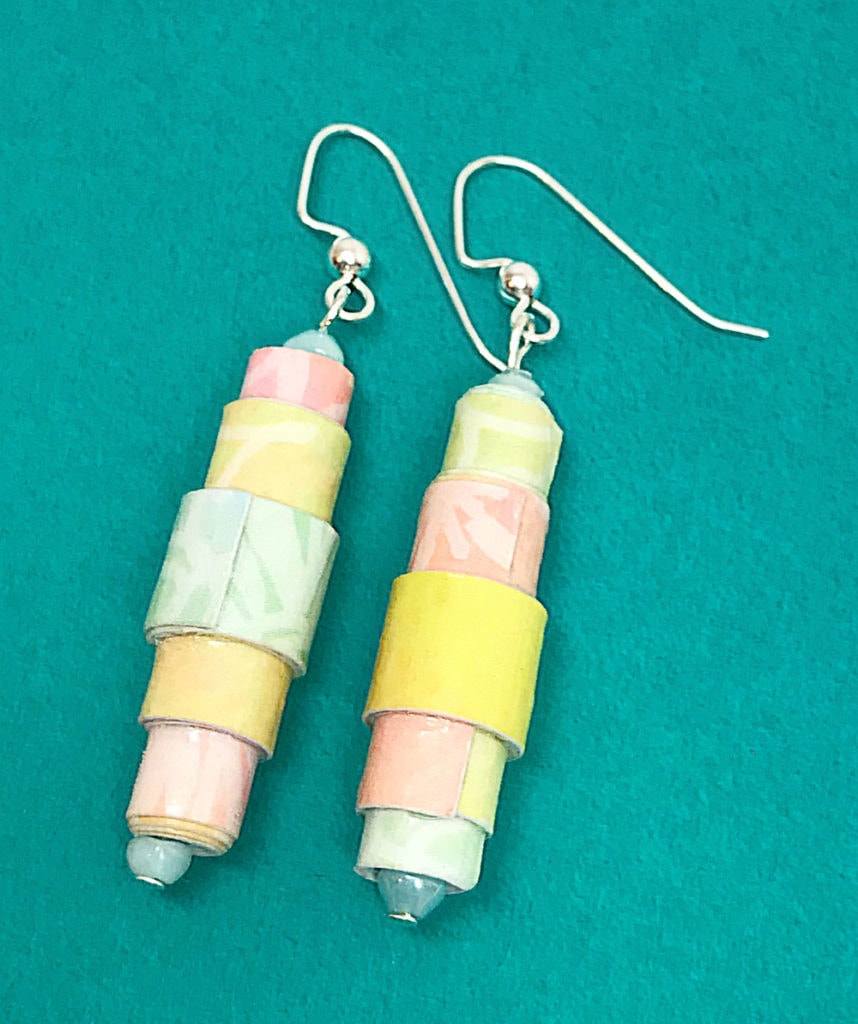
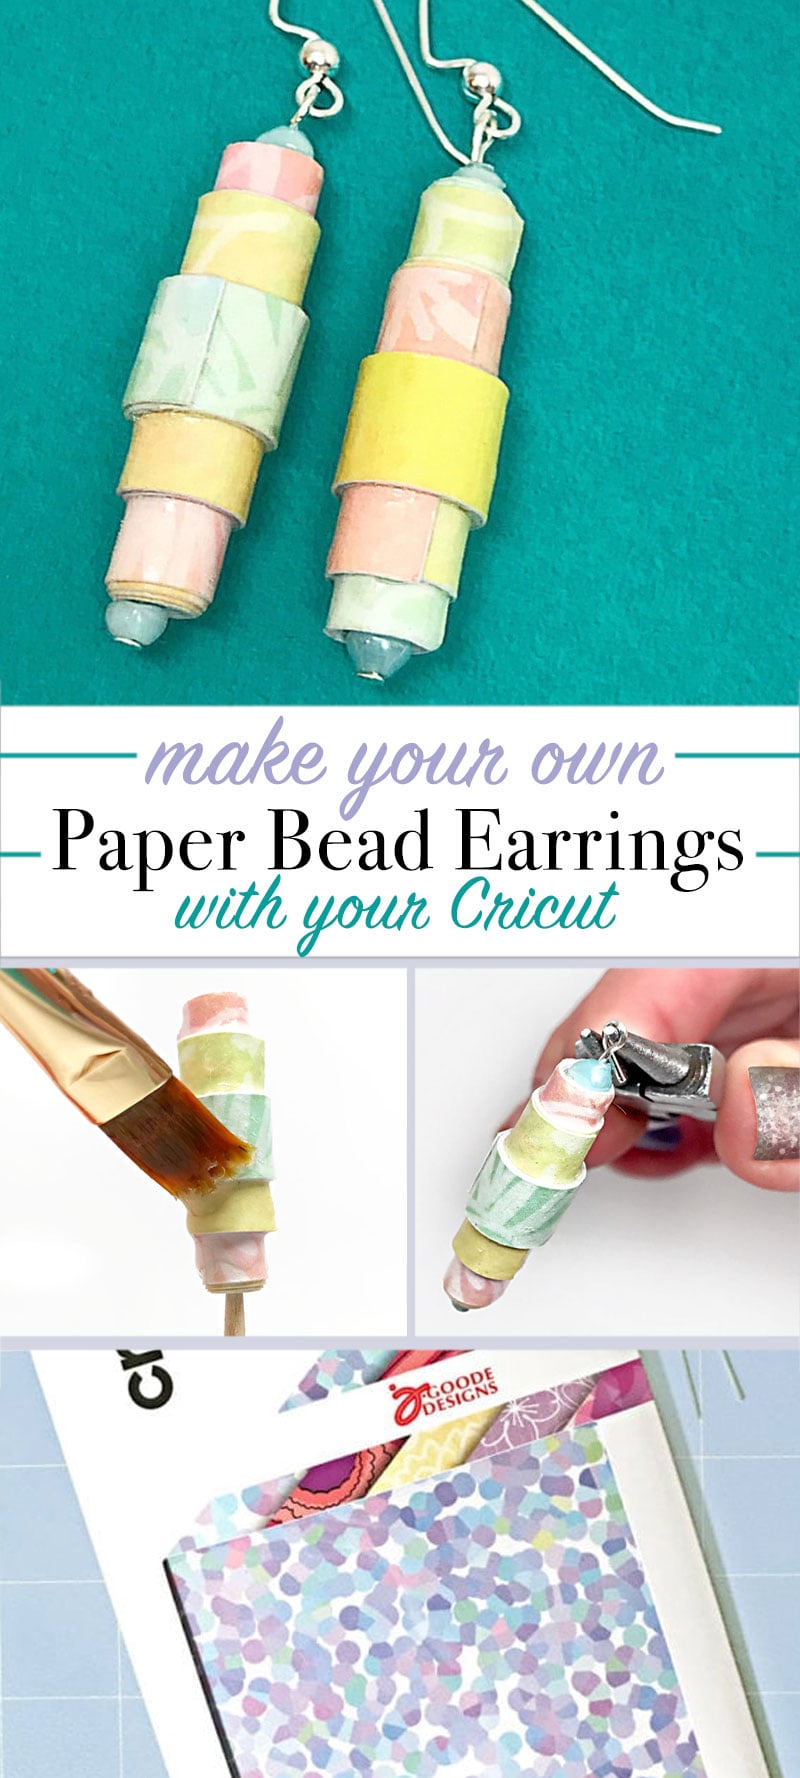
Create lightweight, custom paper bead earrings with a rainbow of color for Spring. Create DIY earrings for yourself or as a gift with this Cricut project. They only require a few steps to make. These little pieces of handmade wearable art make a statement wherever you go.
I'm Carla Schauer, and I share crafts, printables, fun things to make, and a healthy serving of puns at Carla Schauer Studio. When I saw this colorful new adhesive paper Jen designed for the Cricut Joy, I knew exactly what I wanted to use it for.
With a nickel allergy and a neck condition that makes heavy pieces hard to wear, I make most of my own jewelry. Paper beads are perfect for making lightweight earrings that still make a statement, and this new paper with adhesive on the back is perfect for streamlining the process and making it less messy.
How to Make Paper Bead Earrings
Making paper beads with adhesive paper allows you to skip the messy process of spreading glue over the entire back of the paper. Simply roll the bead as you peel off the backing and everything sticks perfectly without excess goo. Learn how to make my easy paper earrings below, and then make a coordinating paper bead necklace to complete the set.
Materials
- Cricut machine and Cricut Design Space
- Paper bead design set #M12227AE cutting file available through Cricut Design Space
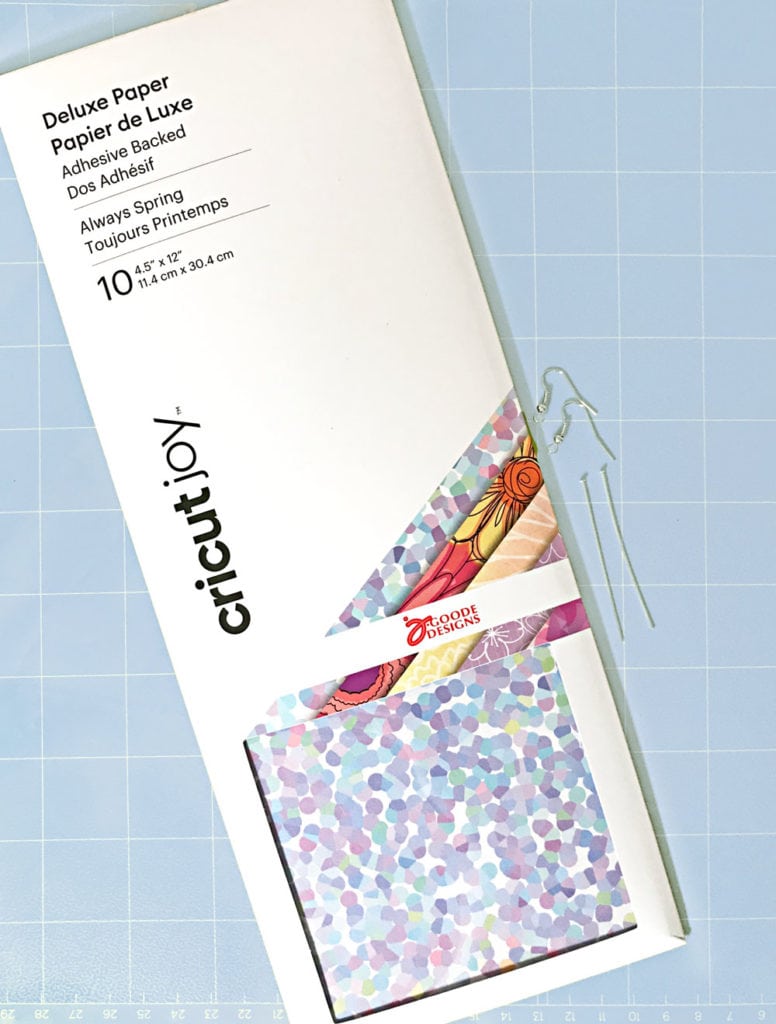
- 1 sheet rainbow floral adhesive-backed paper from JGoode Designs (from Cricut Joy Always Spring Paper Pack)
- 2 silver ear wires
- 2 silver 2″ head pins
- 4 small light blue beads
- glossy decoupage medium
- small piece of tissue paper or powder
- toothpick
- jewelry pliers and wire cutter
- optional-paper glue
Instructions
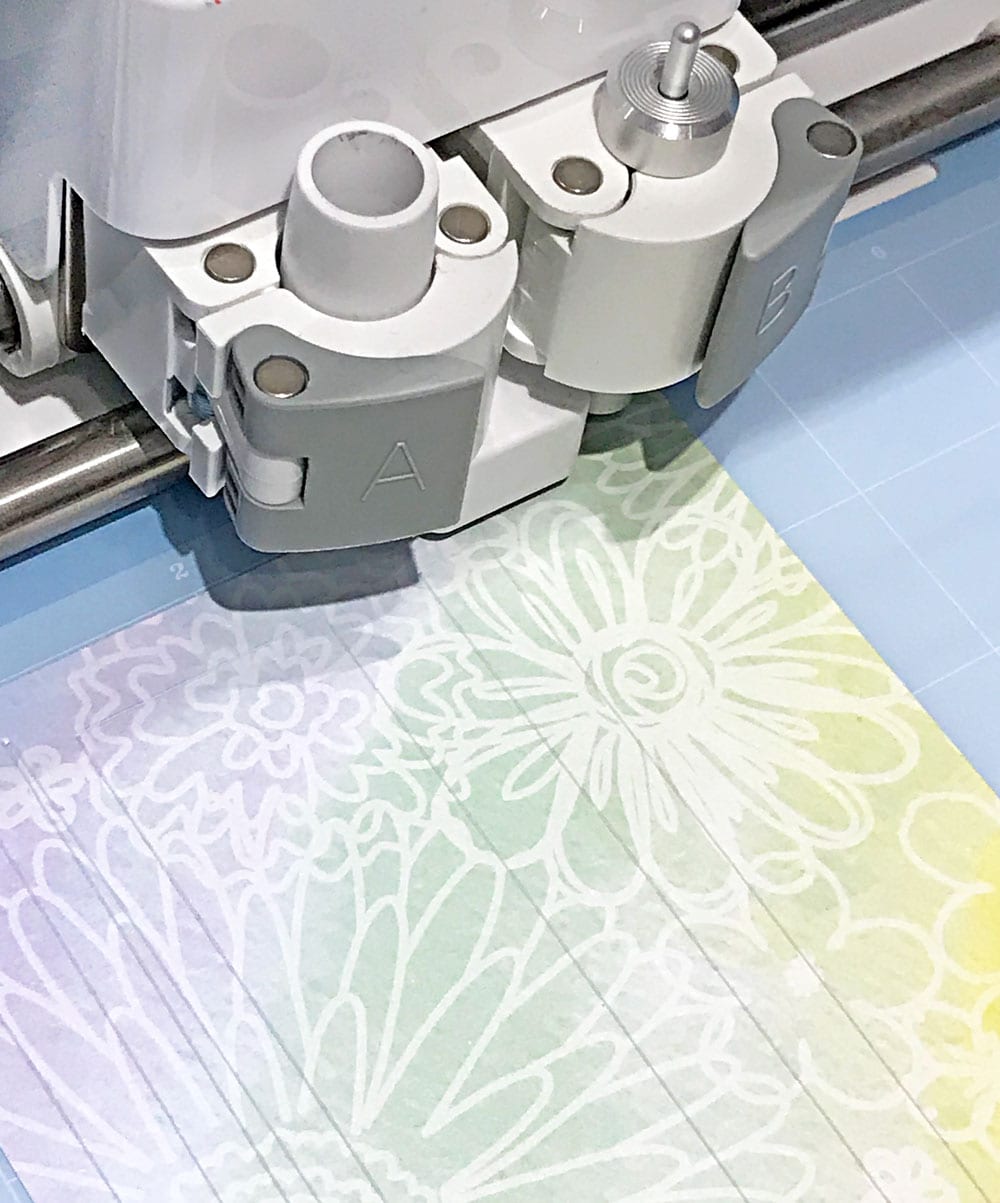
- Open paper bead template file in Design Space, then ungroup and turn off all layers except the 7th bead.
- Duplicate layer, rotate 180*, and arrange close to first layer as shown. Flatten Canvas.
- Cut out 2 paper beads using Cricut machine. Remove paper from mat, but leave the beads attached to the backing.
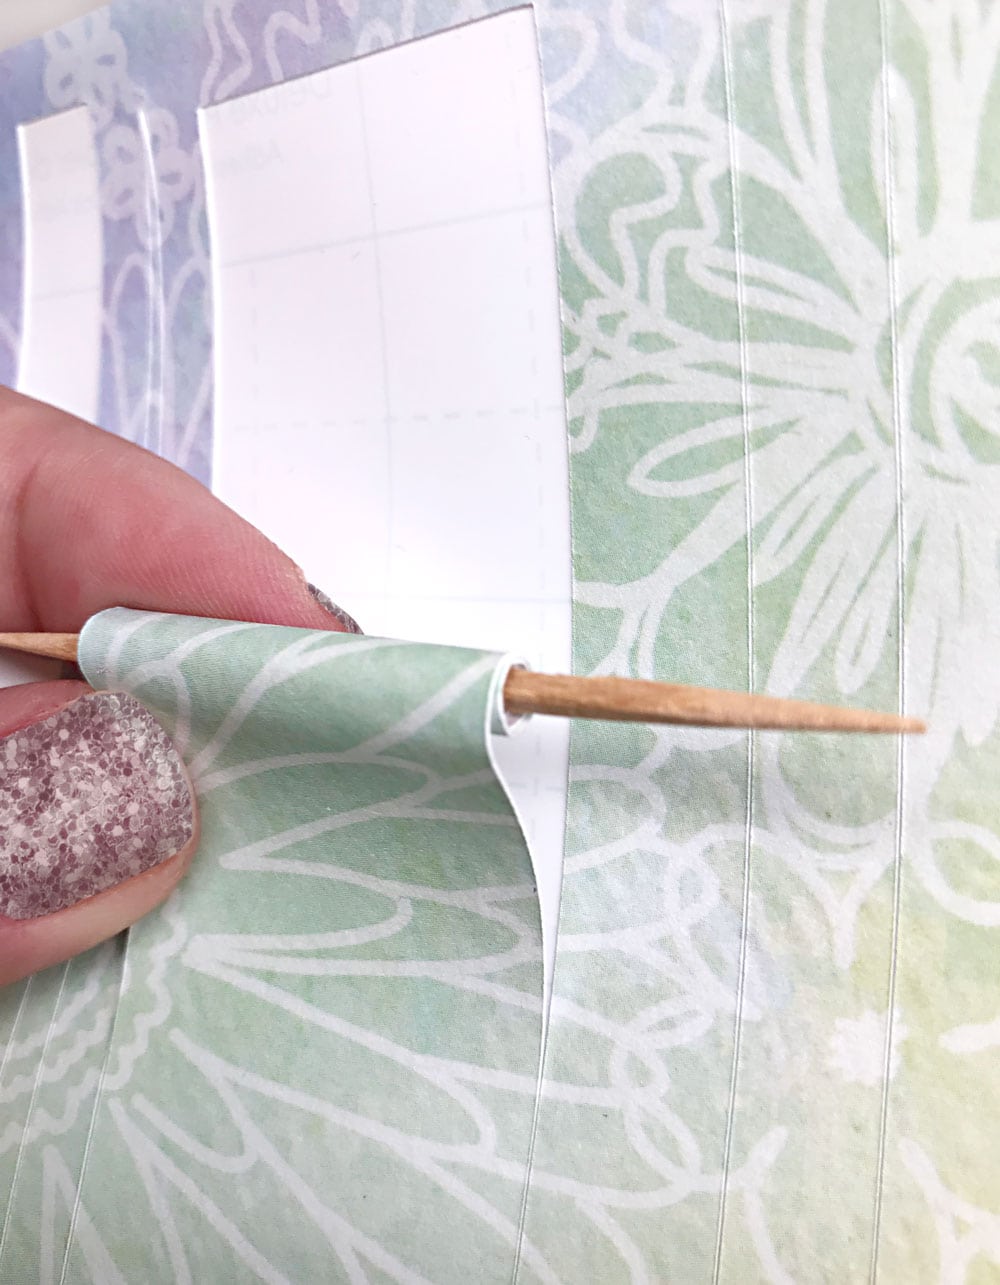
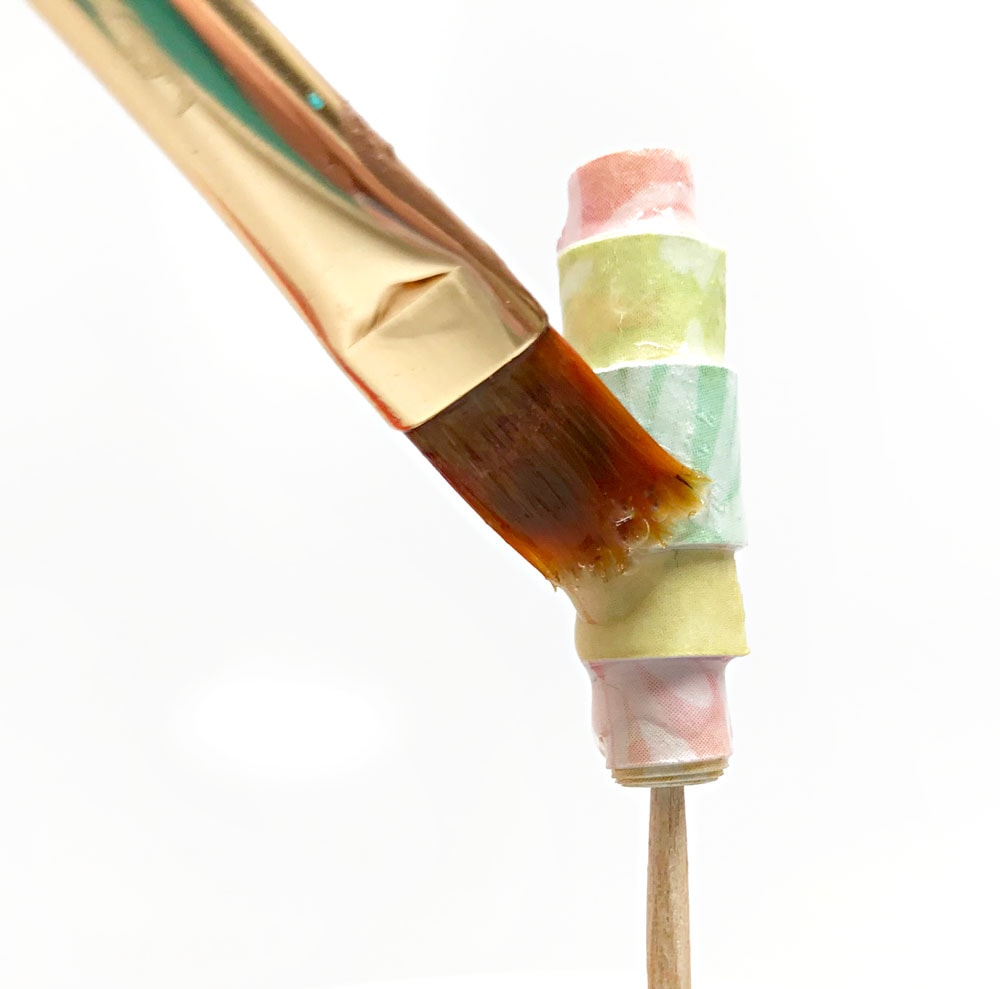
- Peel back around 1/2″ of paper from backing. Apply tissue paper or powder to peeled section. This will keep the inside hole from being sticky and allow threading on wire. Wrap end of paper strip around the toothpick and continue rolling bead snugly from large end to small end, securing with dot of decoupage medium or paper glue. Repeat for second bead.
- Brush rolled paper beads with glossy decoupage medium, adding a second coat if desired, and allow to dry completely.
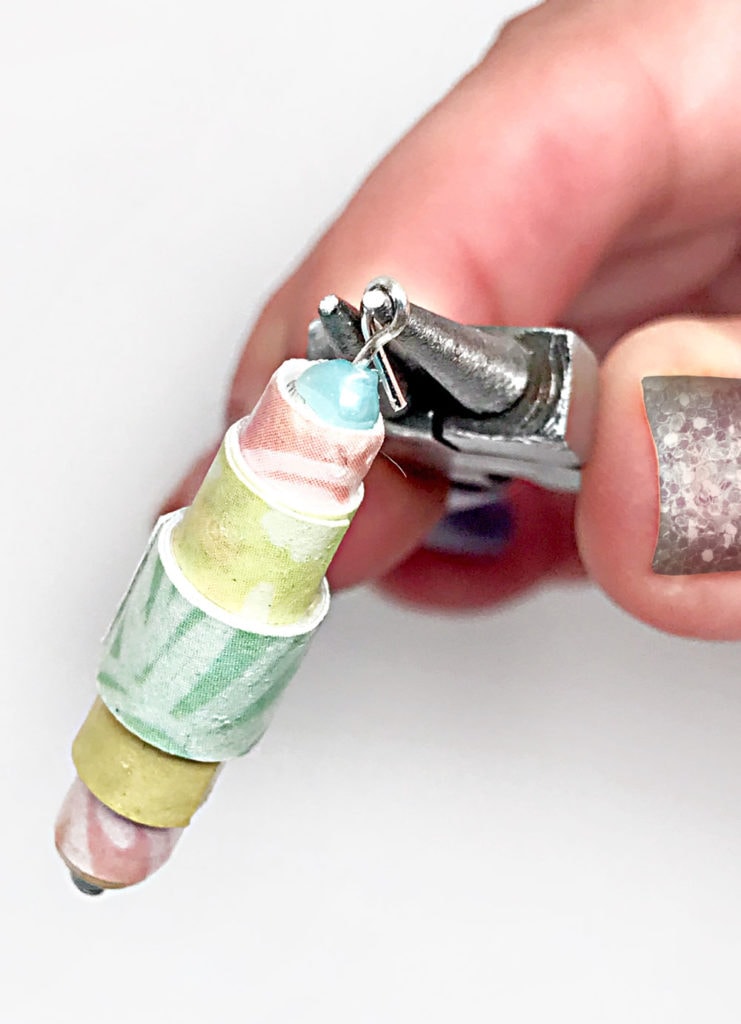
- For each earring, thread one small bead, one rolled paper bead, and another small bead onto head pin, and form a loop at the end using jewelry pliers. Trim any excess wire.
- Attach each ear wire to earring loop and close loops with pliers.
You can experiment with the style of templates to make different bead shapes, or switch the metals to gold or copper to create different looks. Make a pair of paper bead earrings for each of your favorite outfits!
I hope you've enjoyed crafting with me, and I'd love to see your paper bead earrings!


