Learn how to make custom Fall home decor with your Cricut. Making your own home decor items doesn't get any easier! This Fall Cricut project can be personalized with your favorite colors and made to fit nearly any picture frame!
How to make darling Fall home decor with your Cricut
My friend, Jessica Roe from Everyday Party Magazine is back again to share this fun Cricut craft, perfect for the Fall season! Jessica shares all kinds of fun party ideas on her site and today she's got this sweet Fall pumpkin decoration for you. J
Hi everyone! It’s Jess from Everyday Party Magazine, and I’m so excited to be back again! I’m a Cricut enthusiast, and I love using Jen’s cut designs for home decor, party favors, and more!
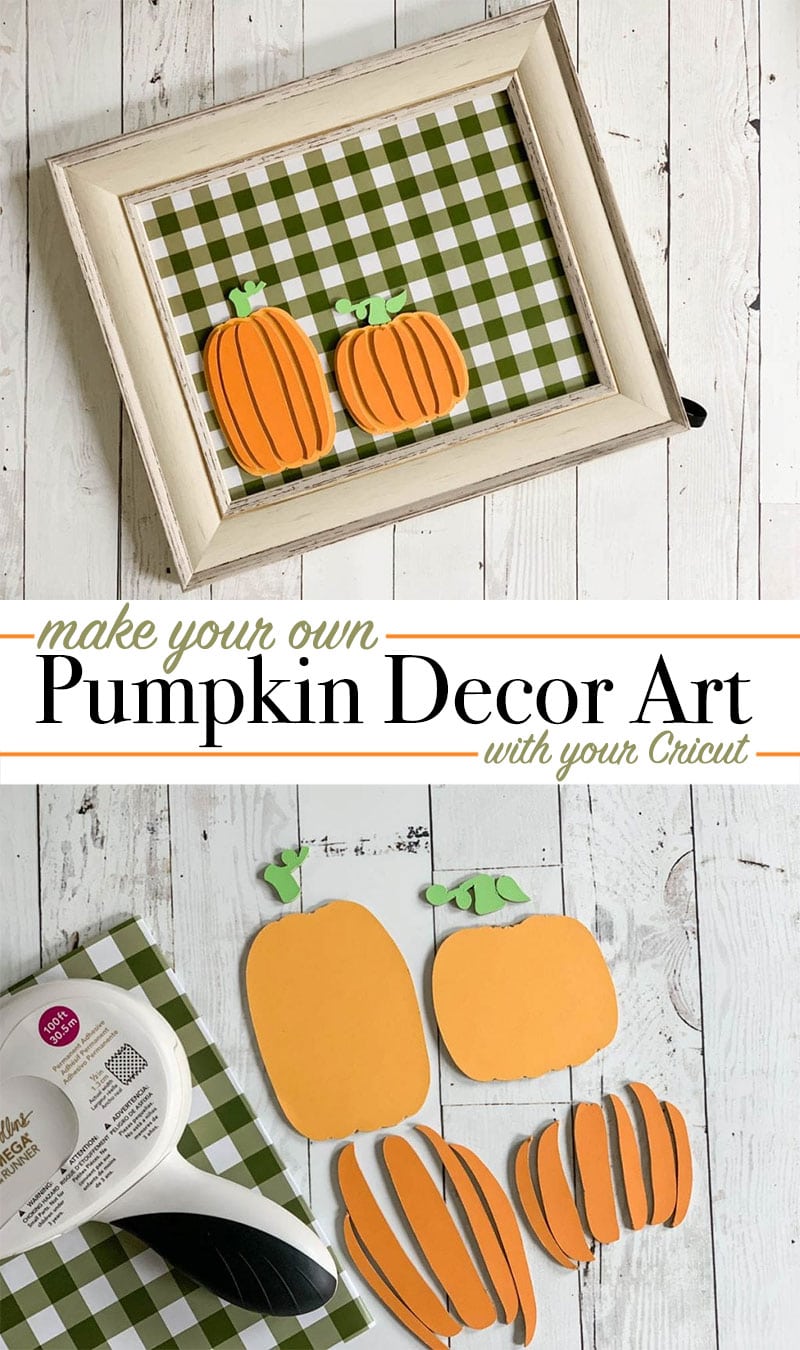
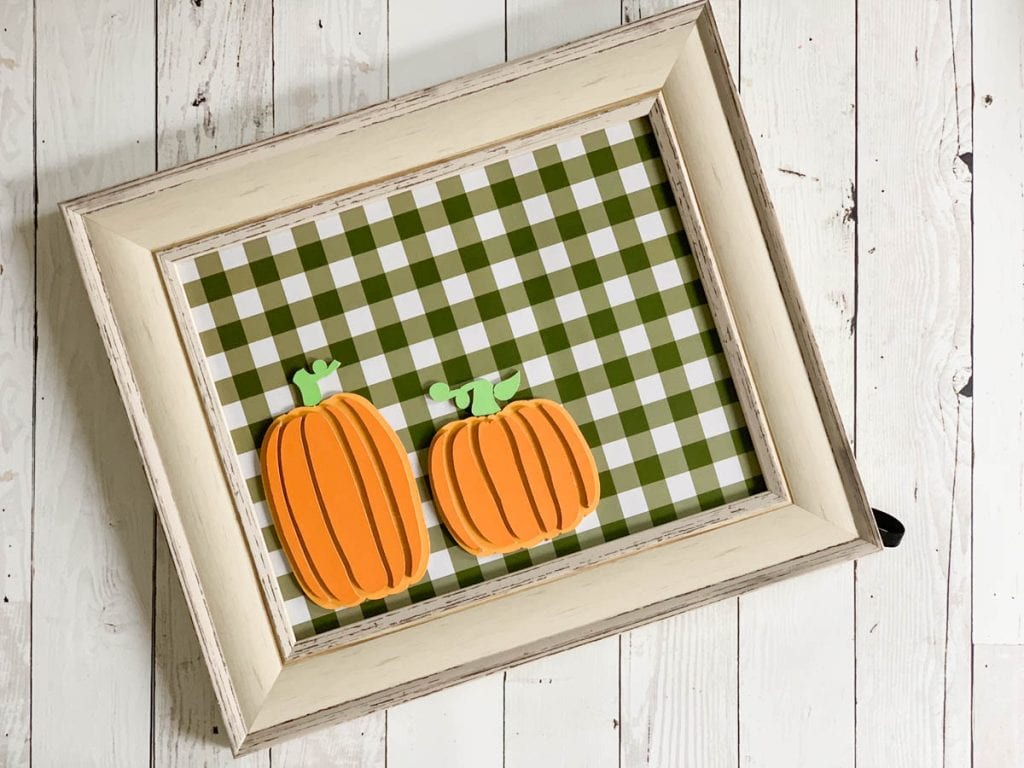
How to make a Fall Framed Pumpkin Art
Fall is (finally) here, and I could not be more excited to usher in cooler temps, beautiful fall colors, and all the buffalo plaid! When I saw Jen’s pumpkin designs in Cricut Design Space, I KNEW I needed to make a dimensional Fall frame for my home.
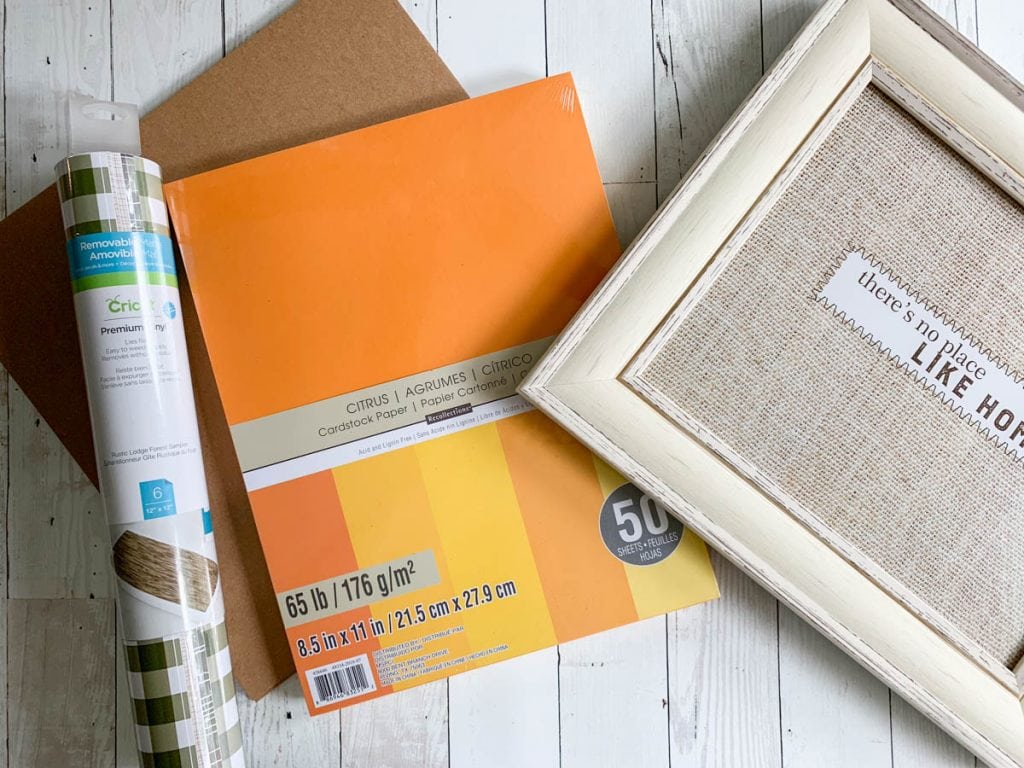
Materials
- Cricut Maker cutting machine
- Cricut Design Space account
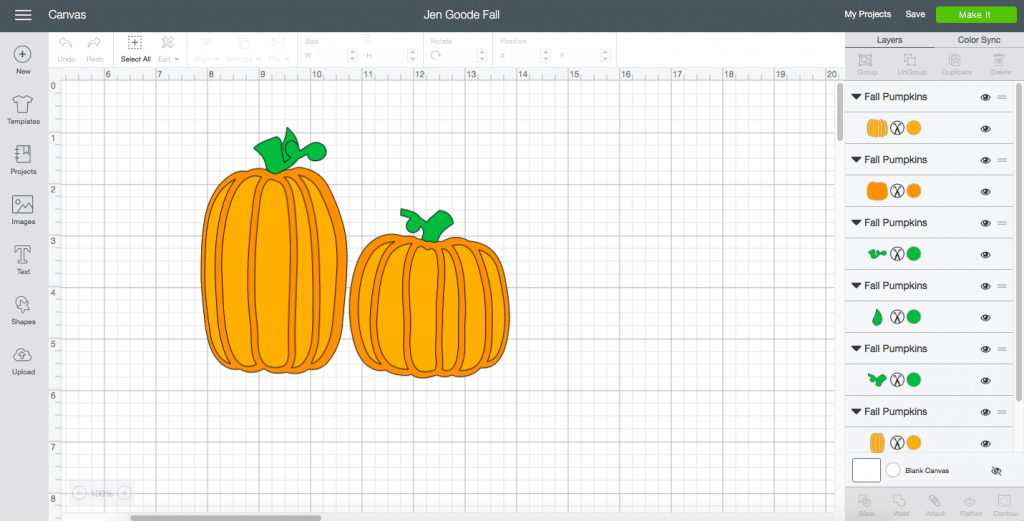
- Pumpkin cut design by Jen Goode (#)
- Cricut Knife Blade
- Cricut Design Space Access
- Cricut Chipboard
- Cricut Buffalo Plaid Vinyl
- Picture Frame
- Xyron Creative Station
- Xyron MegaRunner
- Orange Cardstock – Two shades
- Green Cardstock
- Masking Tape
- Scissors
Instructions
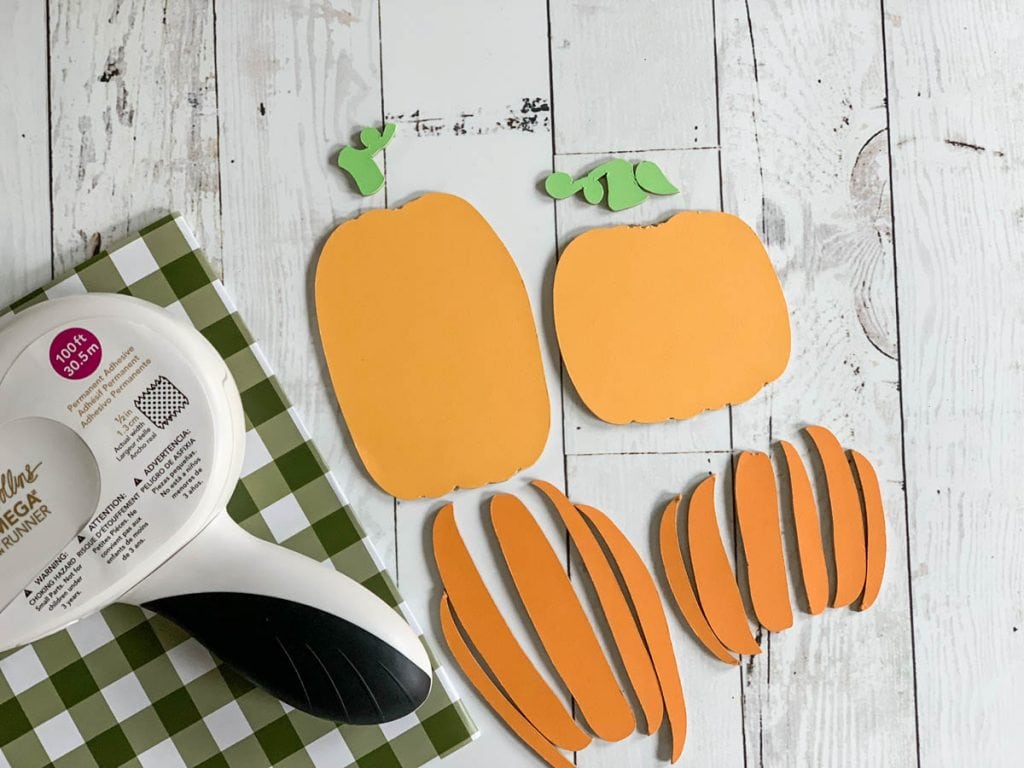
- Open the pumpkin cut file and then, size it to fit your picture frame. Run the card stock through the Xyron Creative Station to give it an adhesive back, and apply to Cricut Chipboard.
- Send the project to the machine.
- Place a sheet of chipboard with card stock stuck on onto a strong grip mat, and tape the edges with masking tape.
- Send the pumpkin cut file to cut on the Maker. (Don’t forget to change the blade)
- While the pumpkins are being cut, carefully remove the glass from the frame, and set aside. Cover the frame insert with Cricut Removable Plaid Vinyl and trim the excess.
- Reassemble the frame, but place the glass behind the insert. (This will keep the glass safe)
- Once your pumpkins are fully cut, use the Xyron Mega Runner to apply a line of adhesive to the backs of the smaller pieces, and apply to the pumpkins.
- Apply more adhesive to the backs of the pumpkins, stems, and leaf, and secure to the frame insert.
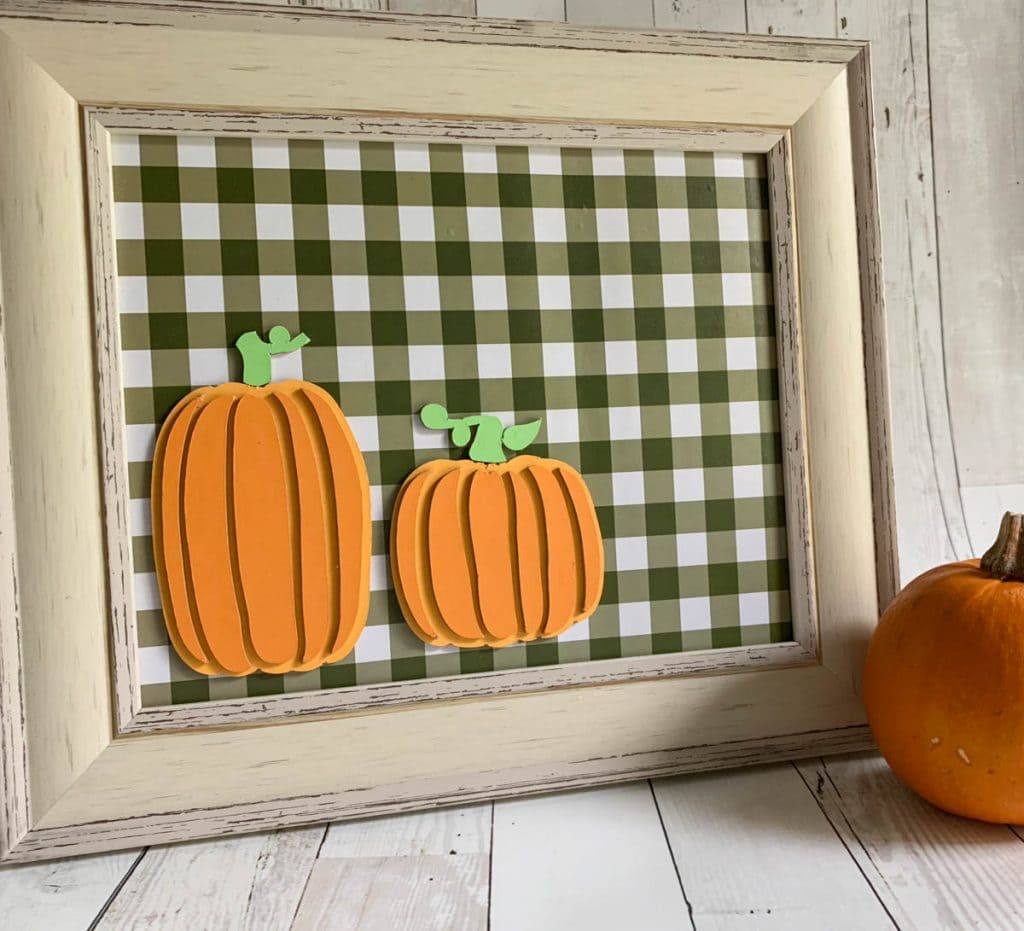
This project took about 35 minutes to create, but, I think it’s worth it!
This frame would be great in your home, or even as a gift. Have fun creating with your Cricut!
Make your own! We've set up a Cricut Design Space canvas to help you get started with this cute Fall home decor frame in Cricut Design Space.
More DIY Pumpkin Crafts You Can Make
- How to Make Mini 3D Paper Pumpkins with SVG Files
- Hand-stitched Halloween Pumpkin Tea Towel
- Pumpkin Coloring Page for Fall