Get out your Cricut and make adorable organizer labels for back to school in minutes. This easy DIY idea can be used for so many organizing projects. Today my friend, Jessica Roe, is sharing this fun DIY Cricut project. This is such a fun project. You can even pick your favorite colors to match your home decor!

DIY Back-to-School Labels You Can Make with Your Cricut
Create an organized back to school work station with your Cricut Maker and designs from Jen Goode – project design by Jessica Roe.
Hi everyone! It’s Jess from Everyday Party Magazine, and I’m so excited to be here today! I’m a Cricut enthusiast, and I love using Jen’s cut designs for party decor, favors, and more!
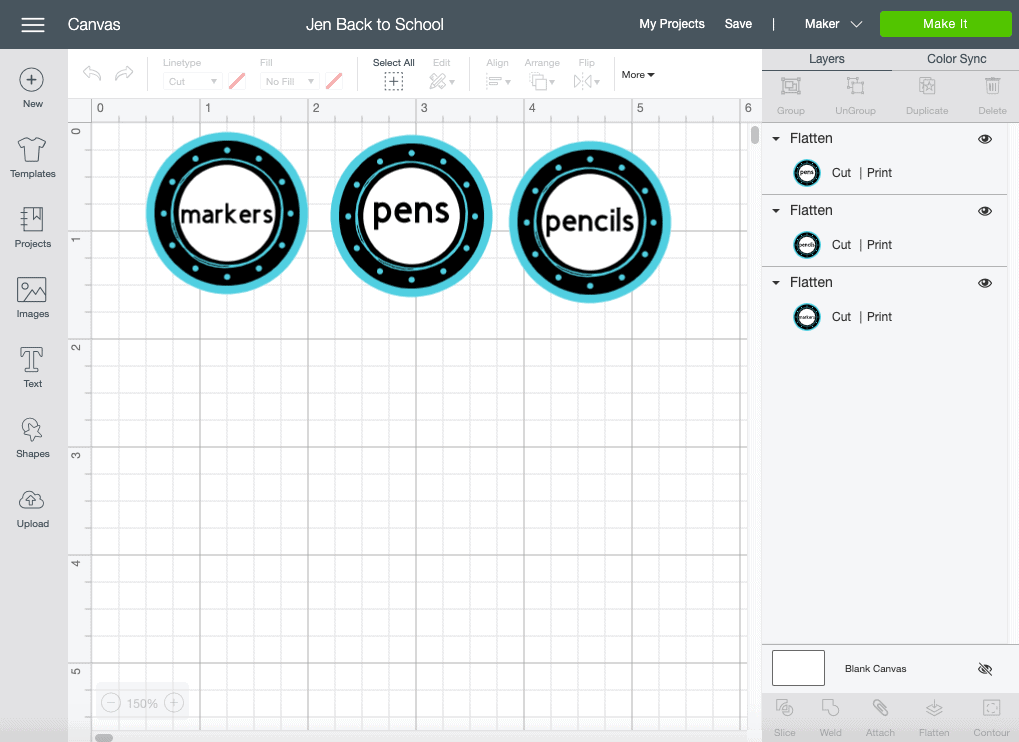
Make Organization Labels in Cricut Design Space
It is just about time to return to school, and no matter how that looks for you and your family this year, a little organization will certainly help!
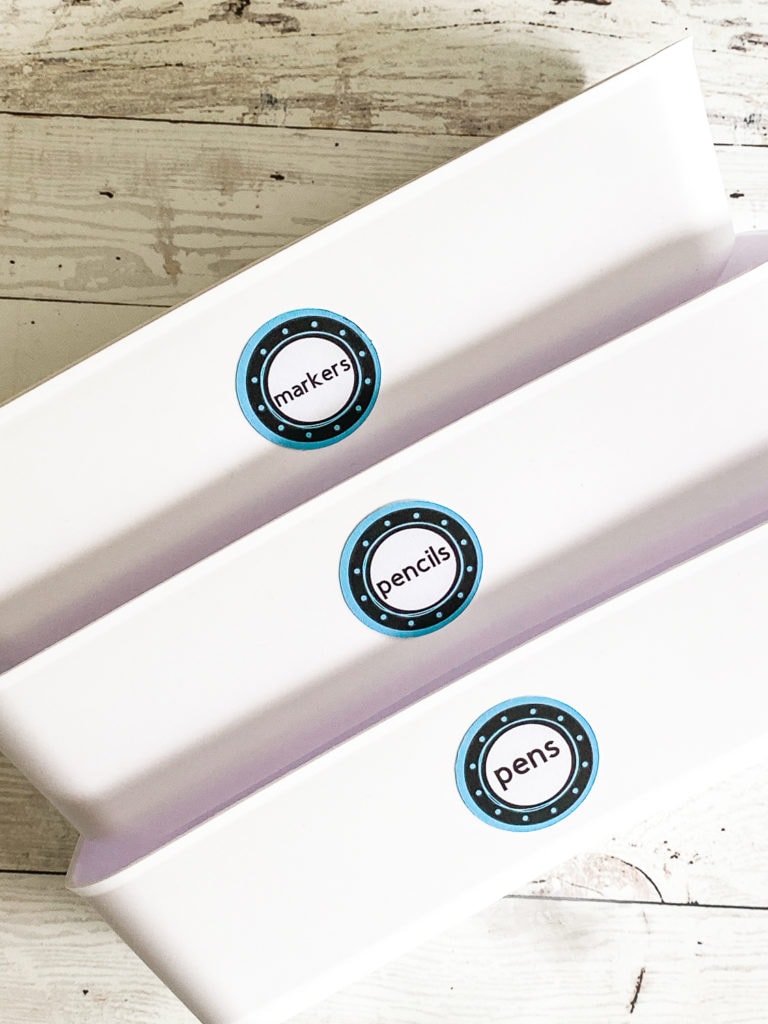
I quickly made several labels and supply trays for each of my boys. I ordered some drawer organizers for their pens, pencils and markers and added fun labels to match each of the boys’ learning spaces.
How to Make Your Own Organization Labels
Follow the below instructions to create your own sweet ice cream treats. These cute cardstock labels are the perfect labels for all kinds of supplies.
Materials
- Cricut Maker cutting machine
- Cricut Design Space account
- Ice Cream Circle cut design by Jen Goode (#M68E1EF)
- Cricut Fine Point Blade
- Cardstock Paper
- Printer
- Organization Trays or Cups
- Pencils, Pens, Markers
- Adhesive – I used a Xyron Sticker Maker
Make this Project!
We’ve set up a Cricut Design Space canvas to help you get started with these organization labels. Click here to open up this organization label project in Cricut Design Space.
Instructions
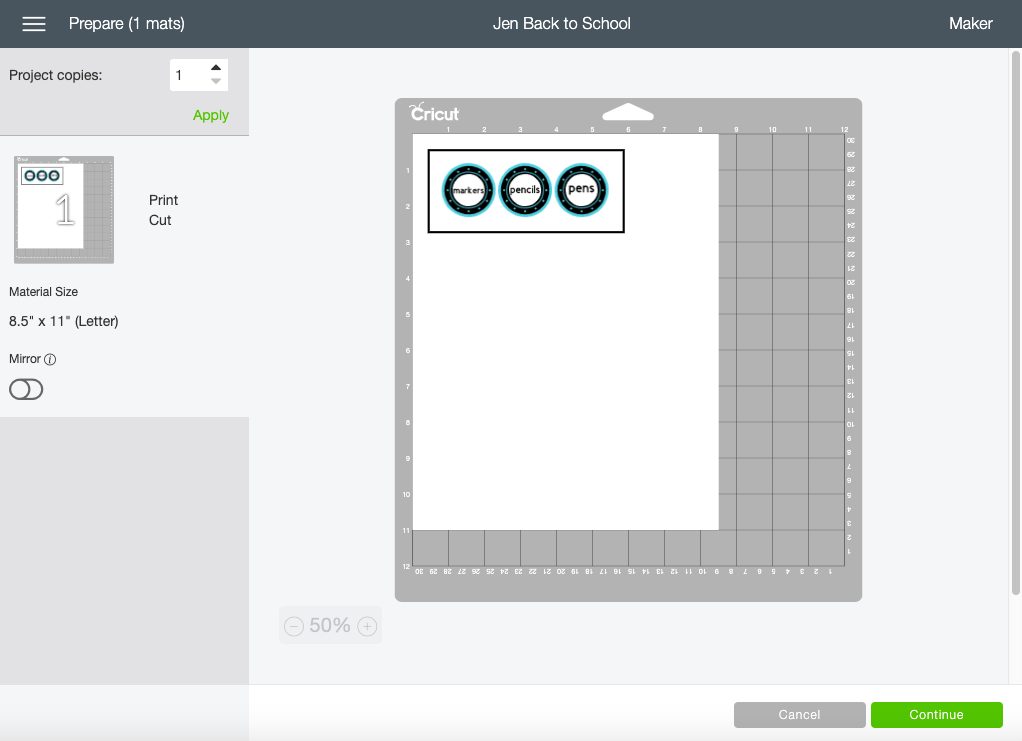
- Open the Design Space Cut File and size it to fit your organizer trays or pencil cups.
- Send the projects to print.
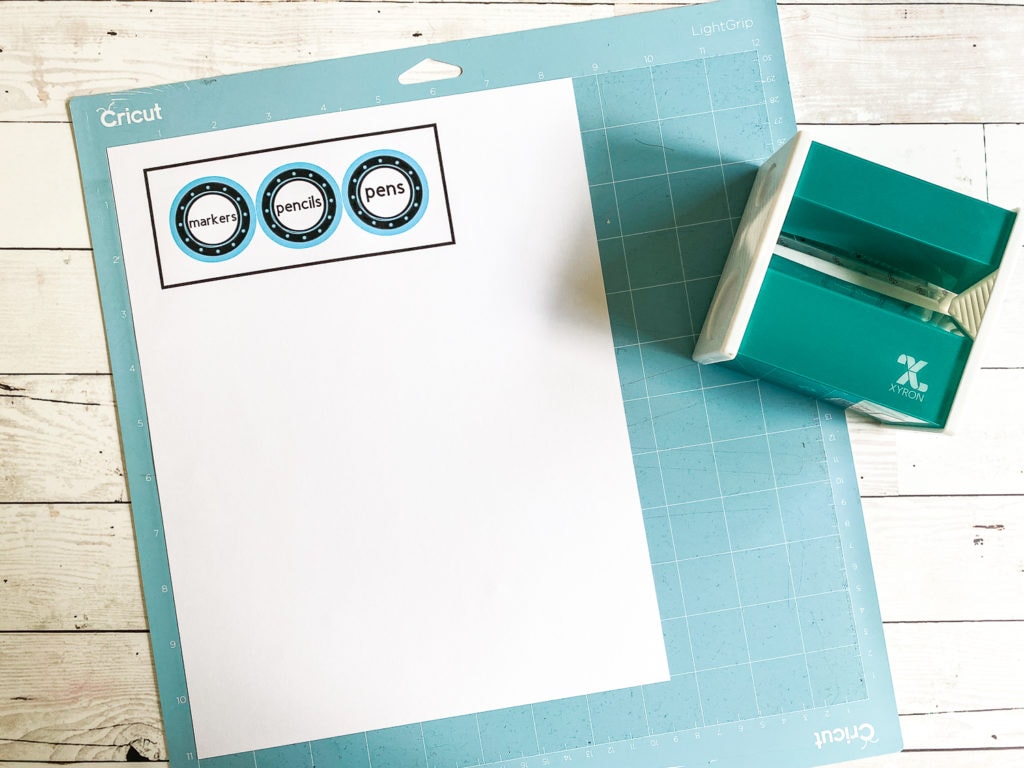
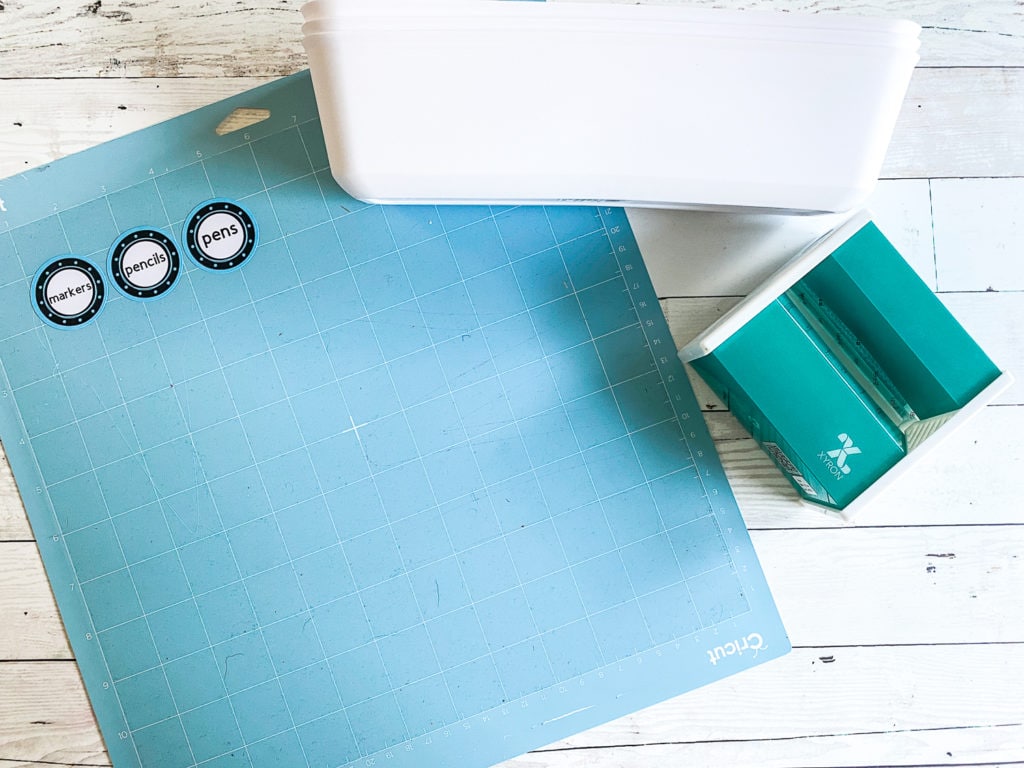
- Place the printed sheet of cardstock on a cutting mat.
- Send the project to cut.
- Remove the excess paper.
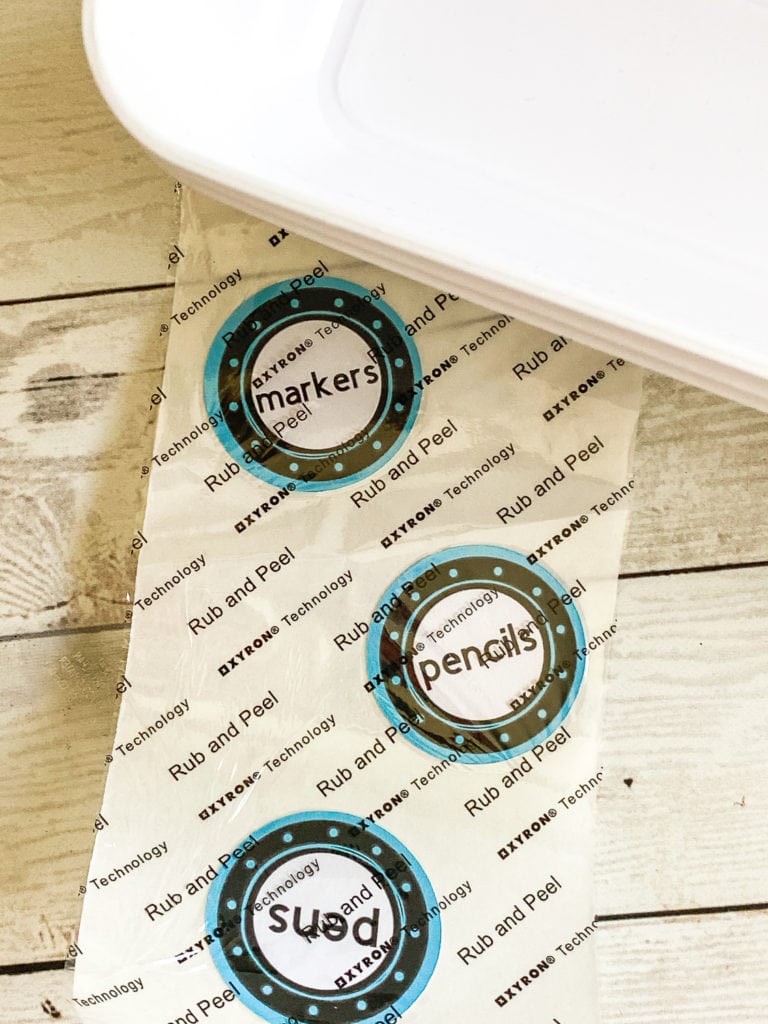
- Remove the labels from the cutting mat. *Keep the tags from curling by removing the mat from the tags. The mats are very pliable.
- Use a Xyron Sticker Maker to create a sticker label.
- Apply the labels to your trays or pencil cups.