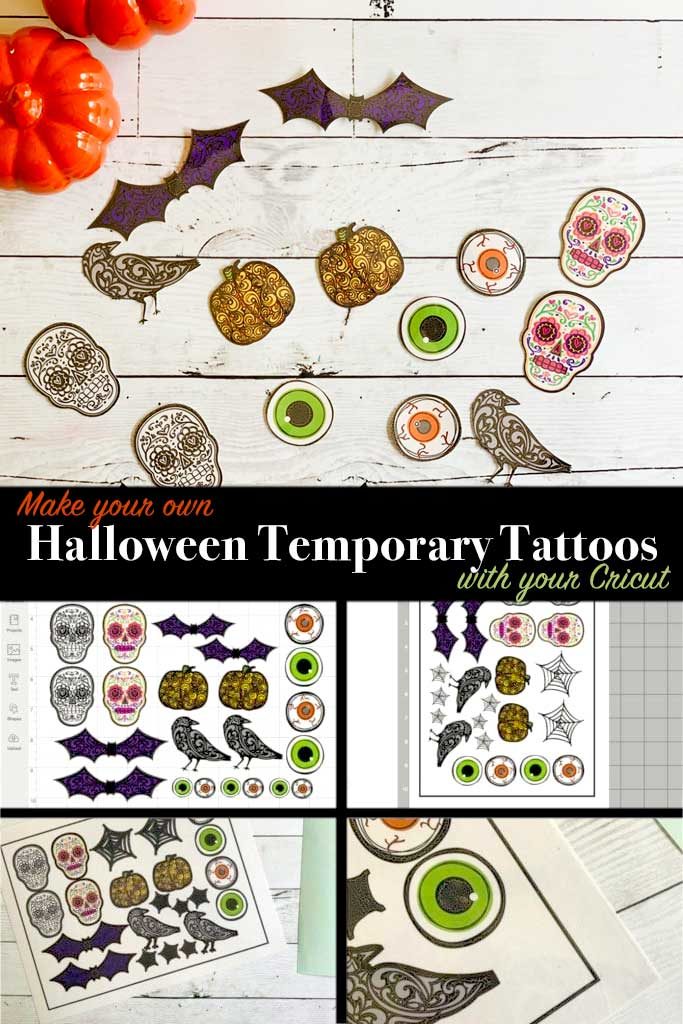
Get out your Cricut and make DIY Halloween Temporary Tattoos in minutes. Today my friend, Jessica Roe, is sharing this fun DIY Cricut Halloween project. This is such a fun project for Halloween parties. Make adora-BOO-le Halloween tattoos for favors, or party decor. Did you know you can put a temporary tattoo on glass, wood, or even candles…too cute, right!?
DIY Halloween Temporary Tattoos you can make with your Cricut
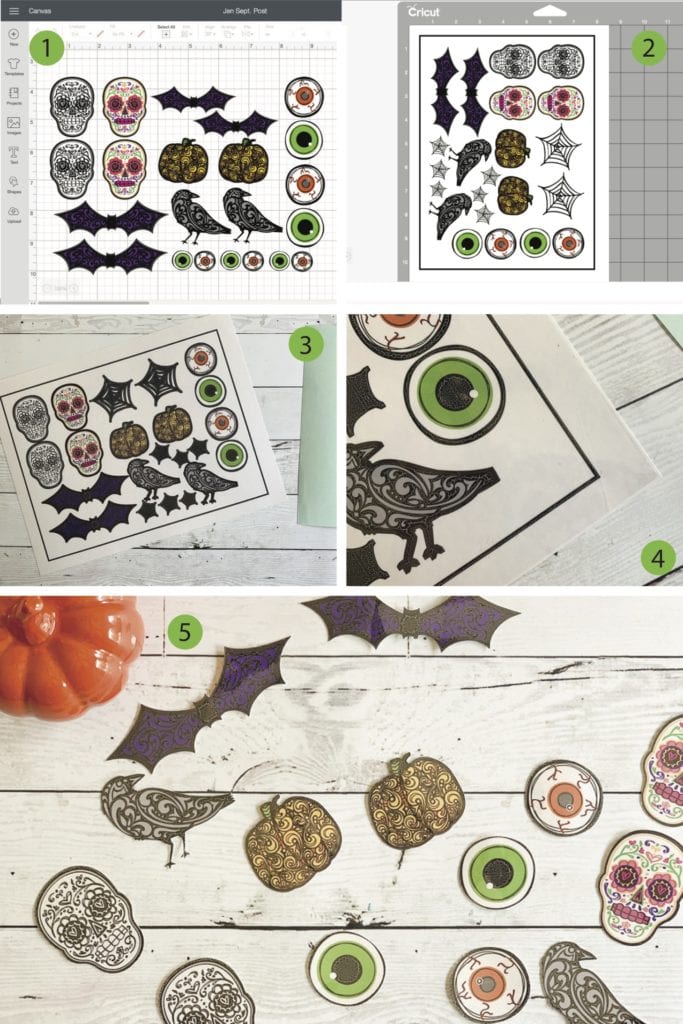
Create adorably spooky Halloween Tattoos with your Cricut Maker. This cute project idea was designed by my friend Jessica Roe.
Hi everyone! It’s Jess from Everyday Party Magazine, and I’m so excited to be here today! I’m a Cricut enthusiast, and I love using Jen’s cut designs for party decor, favors, and more!
How to make Halloween Temporary Tattoos
We love all things Halloween in my family. My boys love spooky and creepy, and I like the sweeter less scary decorations. We all love a good haunted house though!
My boys and niece and nephew all love the silly Halloween temporary tattoos you can buy at the store, and will actually wear them all year long. So, I thought it would be fun to use my Maker to create our own custom Halloween tattoos!
Materials
- Cricut Maker cutting machine
- Cricut Design Space account
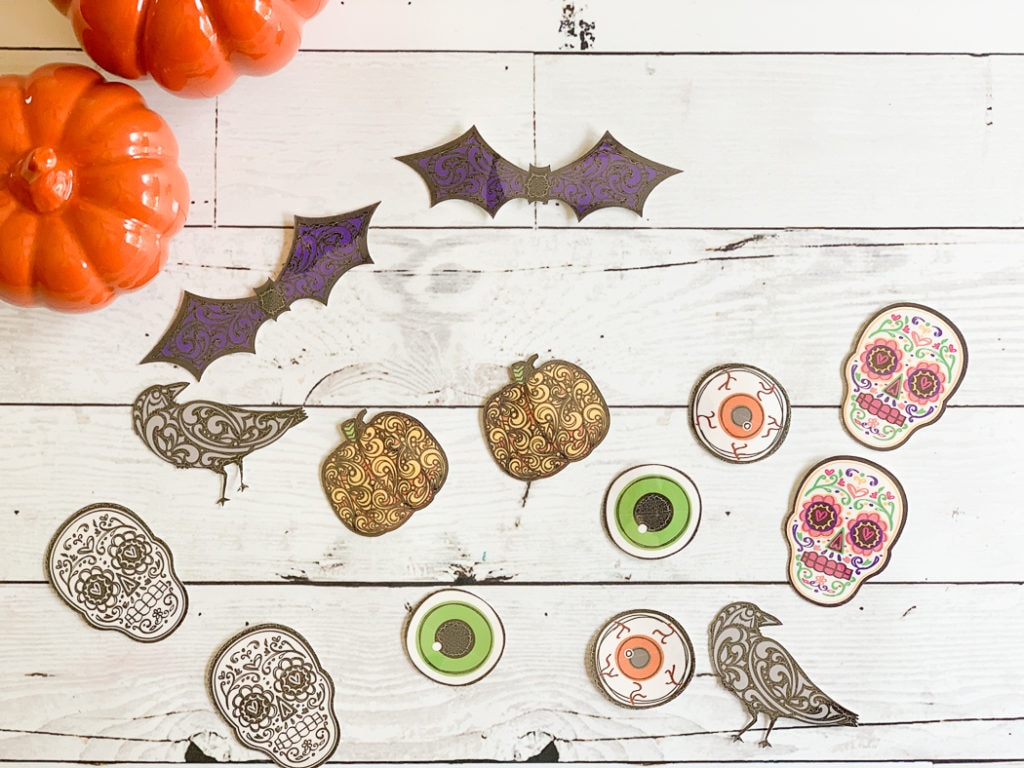
- Sugar Skull cut design by Jen Goode (#M77B6D4)
- Bat cut design by Jen Goode (#M77B755)
- Raven cut design by Jen Goode (#M77B78D)
- Eyeballs cut design by Jen Goode (#M3AA38FA)
- Gothic Pumpkin cut design by Jen Goode (#M3AA39C1)
- Cricut Fine Point Blade
- Cricut Design Space Access
- Printable Tattoo Paper
Instructions
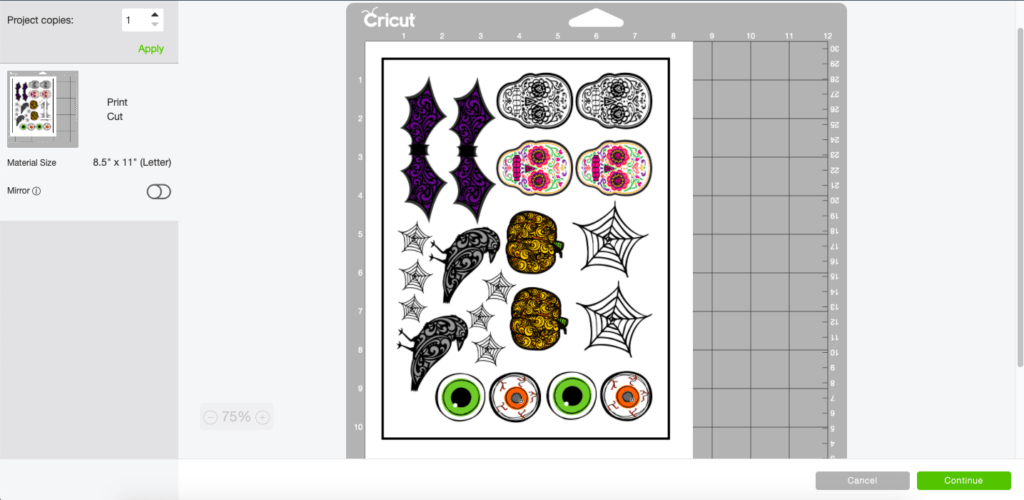
- Print the tattoo paper with your printer.
- Follow the instructions for the tattoo paper. The paper I used includes a clear adhesive sheet that needs to be applied to the top of the printed tattoo paper. I removed the adhesive sheet from the backing and placed it on a table sticky side up. Then, I placed the printed tattoos on top.
- Place the tattoo paper with the adhesive sheet on the cutting mat.
- Send the project to cut. In some of the photos, I had a cool spider web, however they didn't cut well. I removed them and added other elements to the final project.
- Remove the tattoos from the cutting mat.
- Be the coolest tattoo artist on the block.
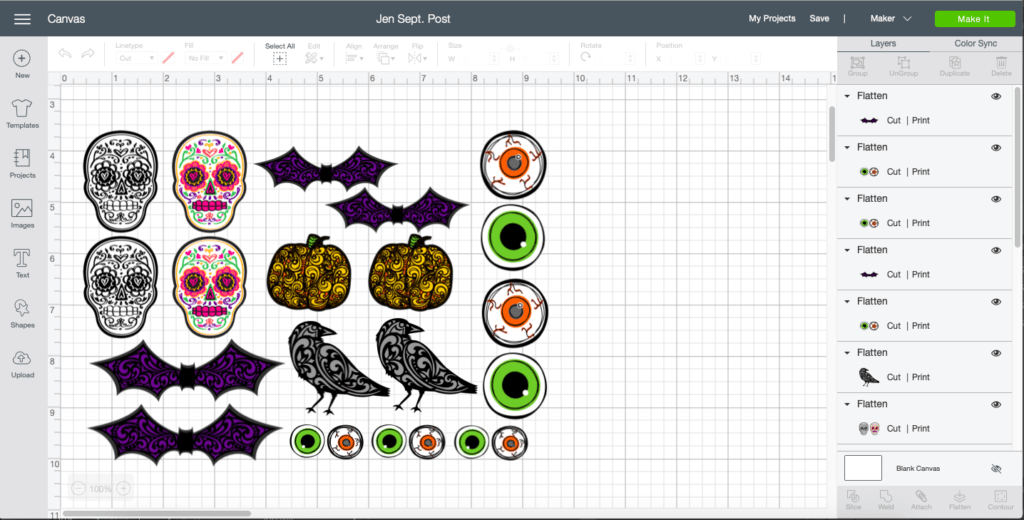
We've set up a Cricut Design Space canvas to help you get started with these fun Halloween Tattoos. Click here to open up this Halloween tattoo project in Cricut Design Space.
Make cute Halloween Temporary Tattoos with Cricut
Who wouldn't love these fun Halloween Tattoos? These temporary tattoos would be the perfect Halloween party favor for any size group. Check out Jessica's other Halloween party ideas. Have fun creating with your Cricut!