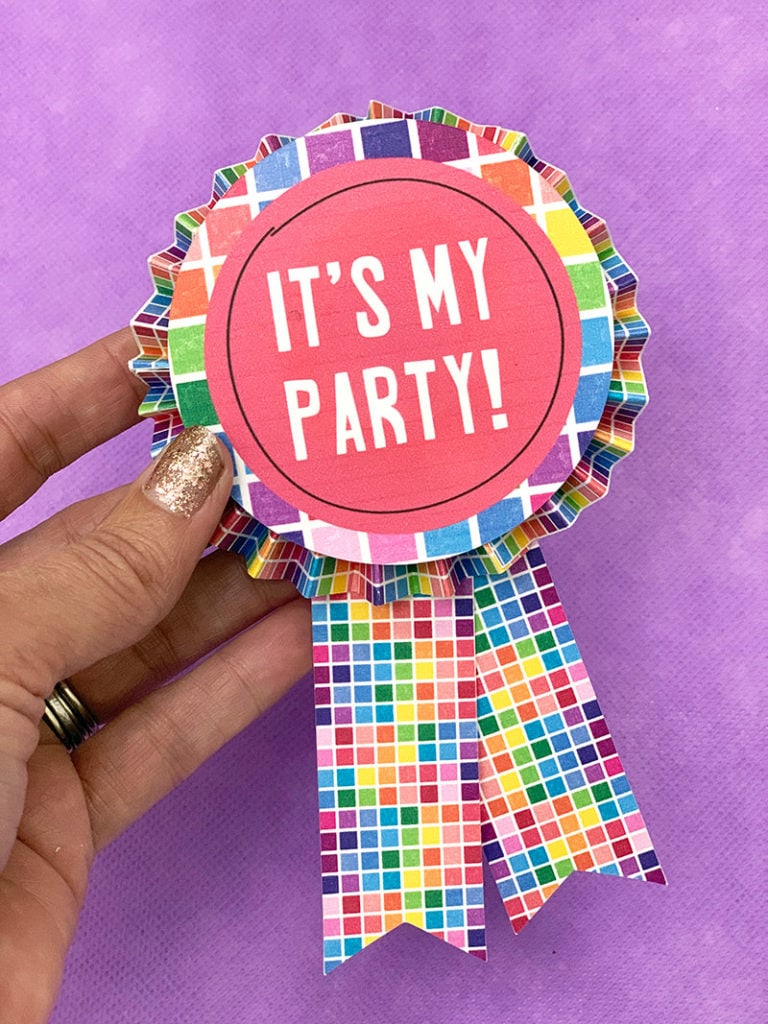
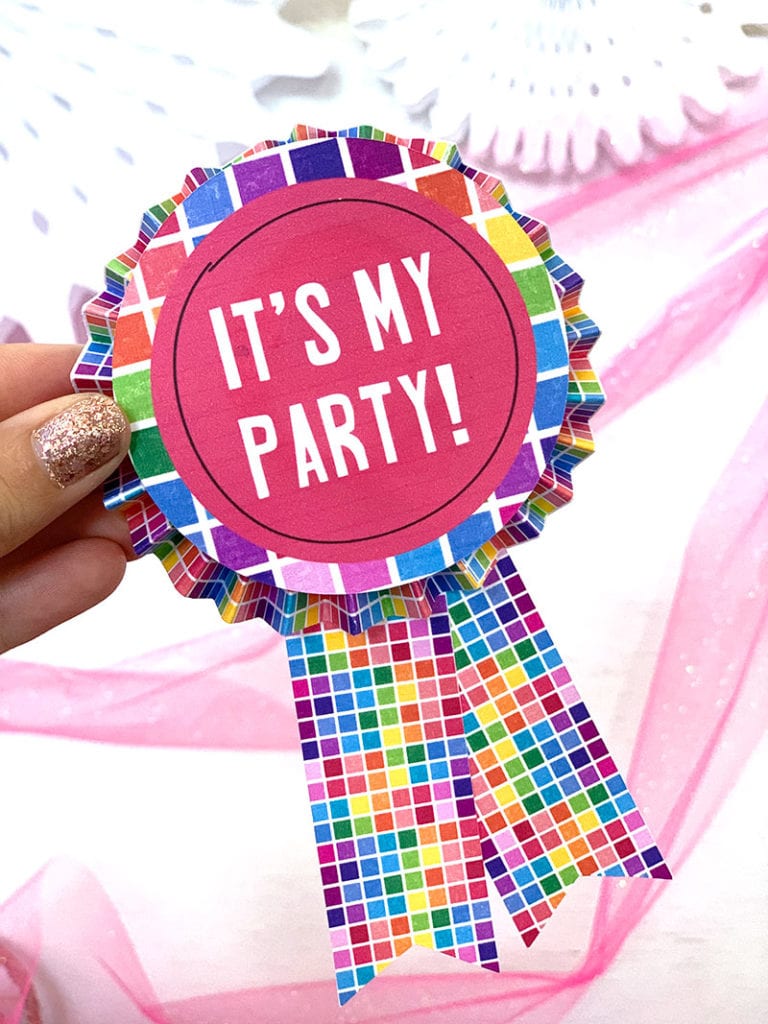
Let's make a DIY party button in under 15 minutes! You can make all kinds of cute party accessories with your Cricut. Grab a piece of white cardstock, your printer and your Cricut cutting machine and we'll get crafting! This is a fun accessory you can make in minutes! Plus, because this is a Cricut project, you can custom your button with your own personalized words, colors and even patterns.
How to Make a Cute Birthday Button
You can make this easy party project as is, or add your own personal touch. In Design Space you can personalize the words, colors and even the pattern for this printable project. Follow the instructions below to see how I made it.
If you don't have a color printer, don't worry. You can simply use your favorite colored cardstock or paper and hand-write the words after you cut the pieces with your Cricut.
Materials
- Cricut Machine
- Cricut Design Space
- Printable party accessories SVG cut file by Jen Goode
- Color Printer
- White Cardstock
- Glue
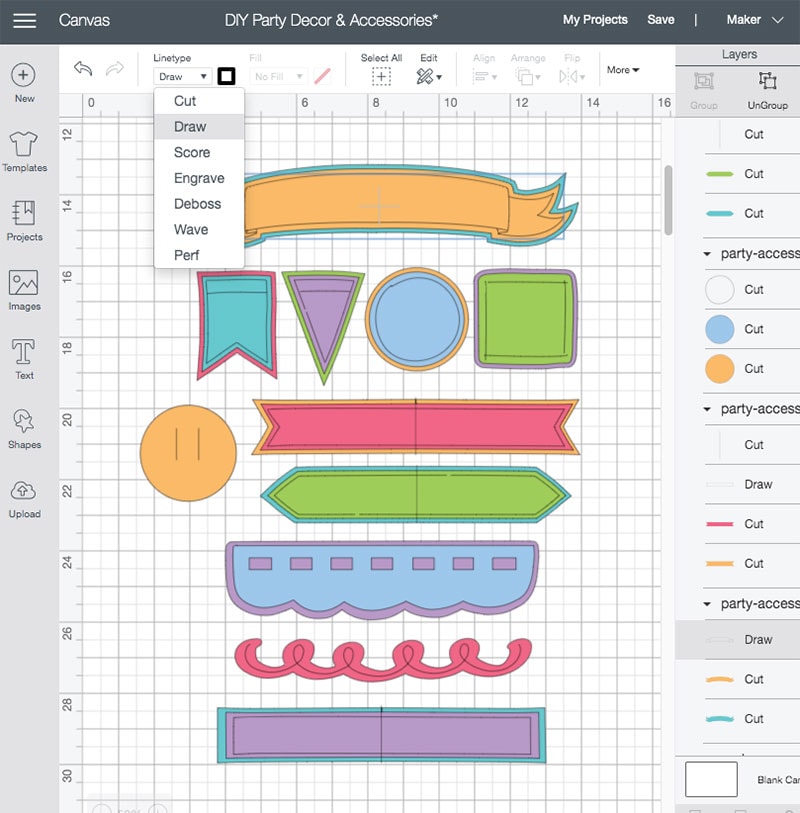
I've created a printable party accessory kit you can download below. It includes some different cut shapes with draw lines that you can customize and decorate with. I used the circle and banner shapes for this project. Alternatively, you can simply use a circle and rectangle from Cricut Design Space to make this birthday button.
Party Accessories SVG
FREE
When you first upload this set to Cricut Design Space, some of the layers will appear black. This is how a drawing/writing line will look when it's not completely closed.It's not broken. That's how this set was created.
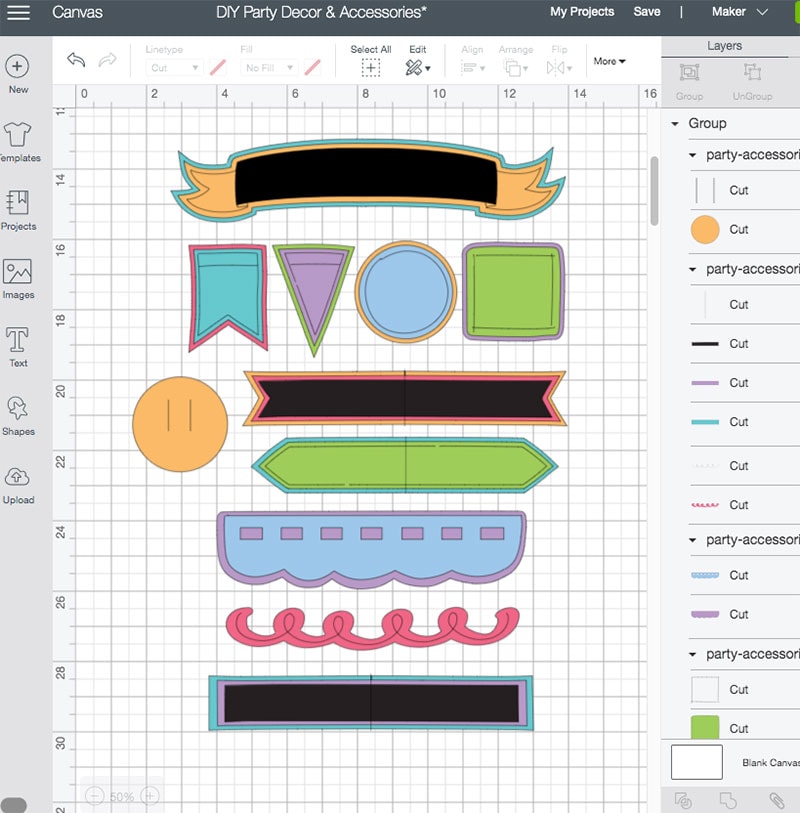
So, all you need to do is select each of these layers and assign it as a “draw” line.
Instructions
- Upload the SVG file I've included below. Separate out the circles, the ribbon banners. Hide the rest of the pieces for now.
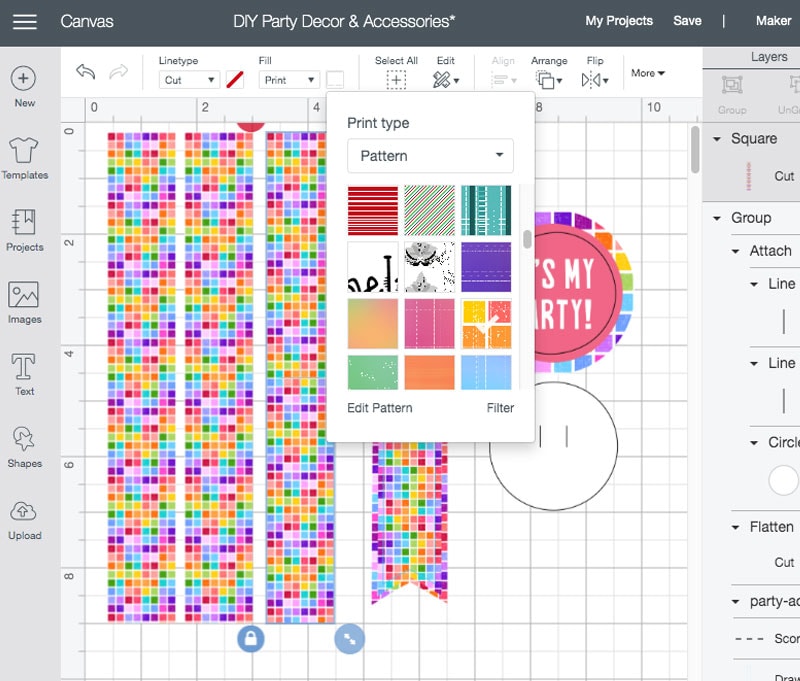
- Ungroup the cut shapes, apply a pattern or color to each layer. To apply a pattern, you just set the shape to “print” and then choose “pattern” from the print panel options. I used my own multi-colored checker board style pattern and a variety of printed colors for these pieces.
- Size the shapes to your own preference. I made the circle 3″ wide and the banner and rectangle ribbon 8″ tall by about 1″ wide.
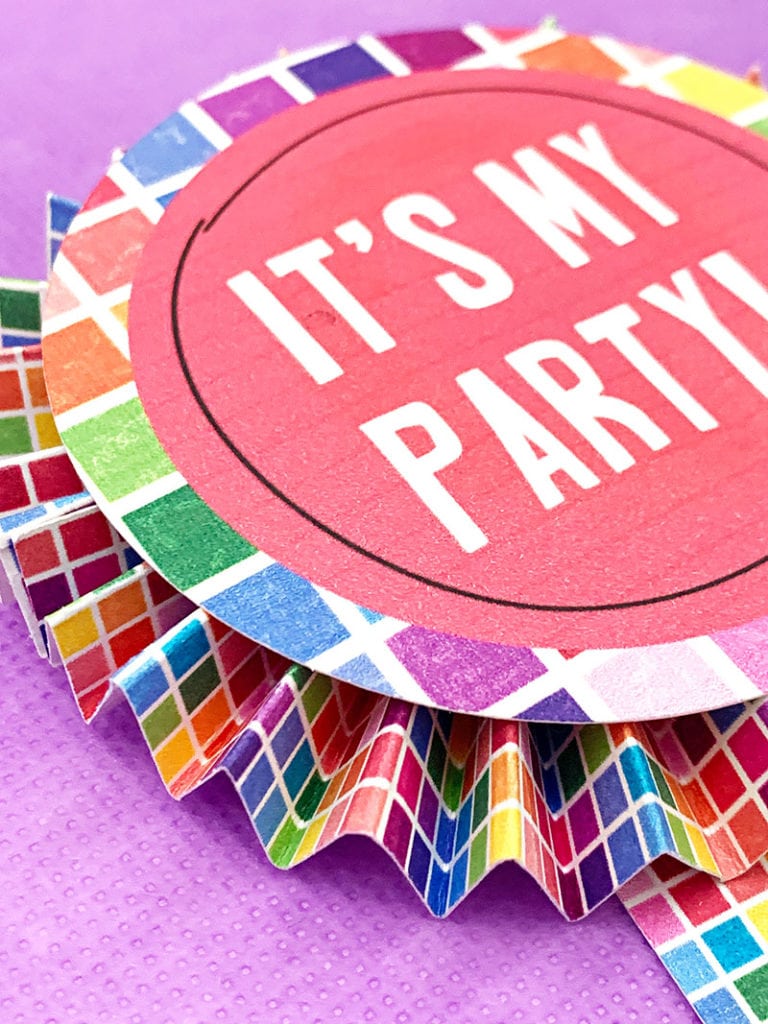
- Add whatever text you'd like to the circle.
- Make sure to include the circle with the cut lines, this is your button back.
- Flatten each piece together. Make sure you've removed whatever score lines.
- Send to the mat and follow onscreen instructions to cut the pieces.
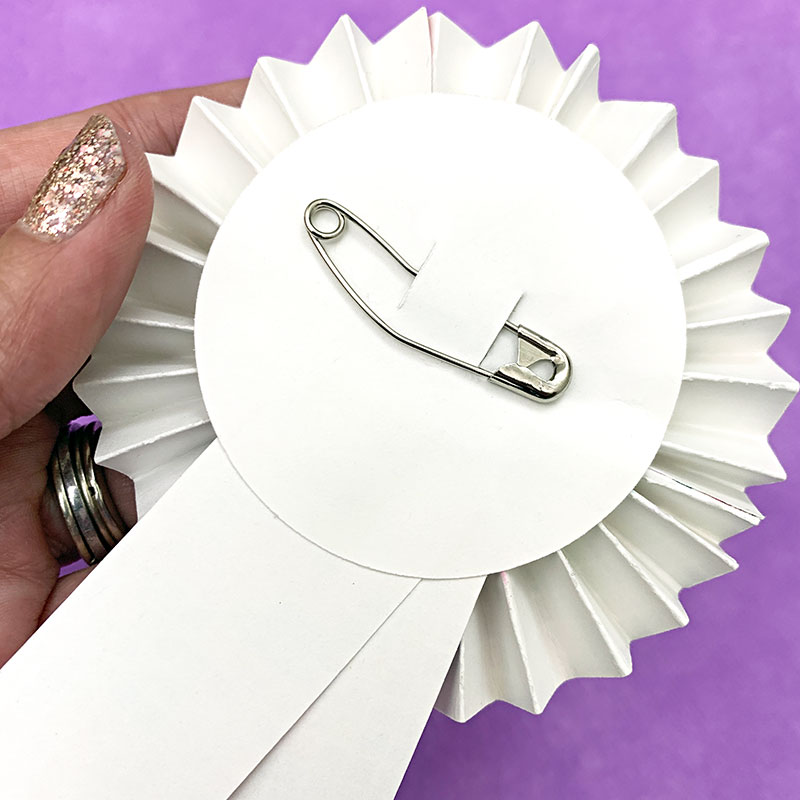
- Add a safety pin to the plain circle.
- Fold the banner ribbon in half, at an angle and glue to the bottom end of the pin back.
- Fold the rectangle ribbon like a small accordion. Glue it to the pin back, leaving the safety pin on the outside.
- Glue the button front on top of the accordion piece.
- Add any extra embellishments, glitter or whatever you'd like to add extra bling to your button.

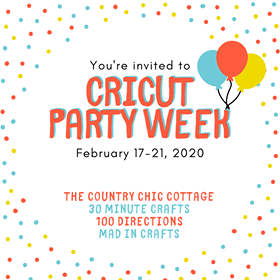
Today I've partnered with some of my favorite crafters to share some fun party project ideas you can make with your Cricut. The Country Chic Cottage, 30 Minute Crafts and Mad in Crafts are all co-hosting this week long event with me! Check out the project ideas below for more Cricut Party ideas and inspiration!
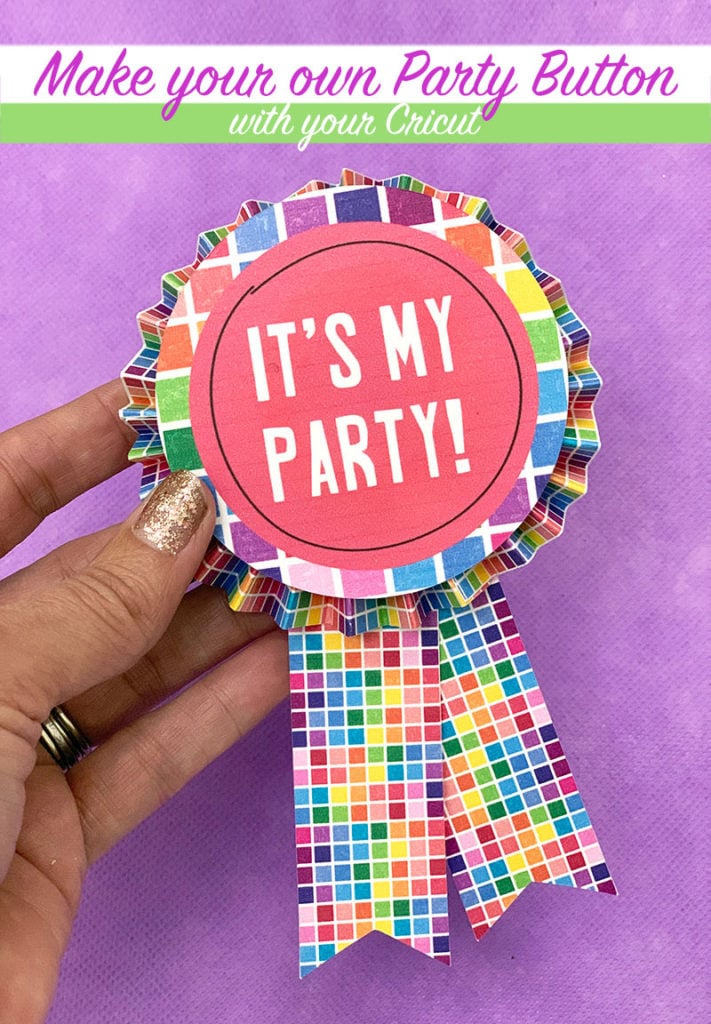
You can change the text on this fun party button for any occasion. Make a birthday button, graduation button or maybe a special “I'm fabulous” button for your favorite human. Have fun with it and don't forget to check out today's other party projects you can make with your Cricut.


