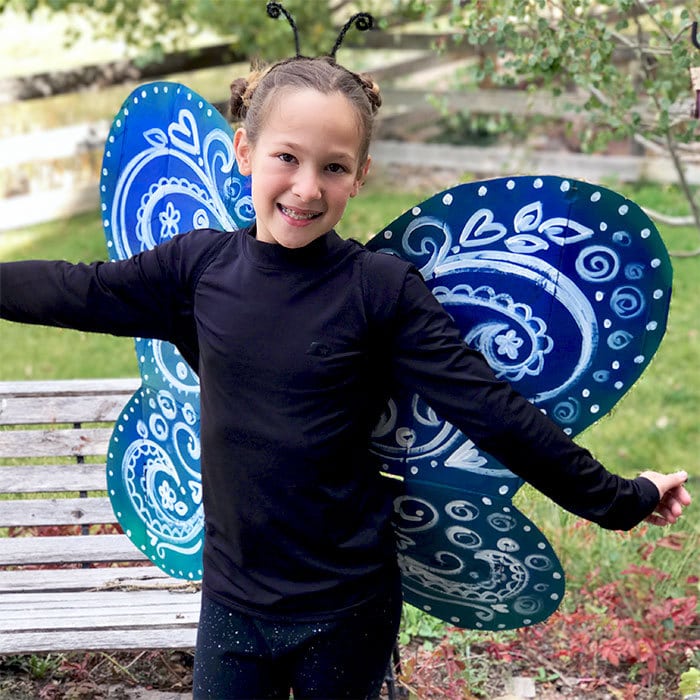
It's Boxtume time! Use a cardboard box and paint to make a pretty DIY butterfly costume for Halloween! With all the Amazon Smile boxes that come into my house, we can DIY cute costumes for everyone in the family. Re-use one big box or combine a whole bunch of little boxes to make all kinds of fun Halloween costumes.
Today I've partnered with Amazon to share ideas and show you how to make cardboard box costumes. I'll show you how to make your own Butterfly Halloween costume that you can customize with your favorite designs and colors.
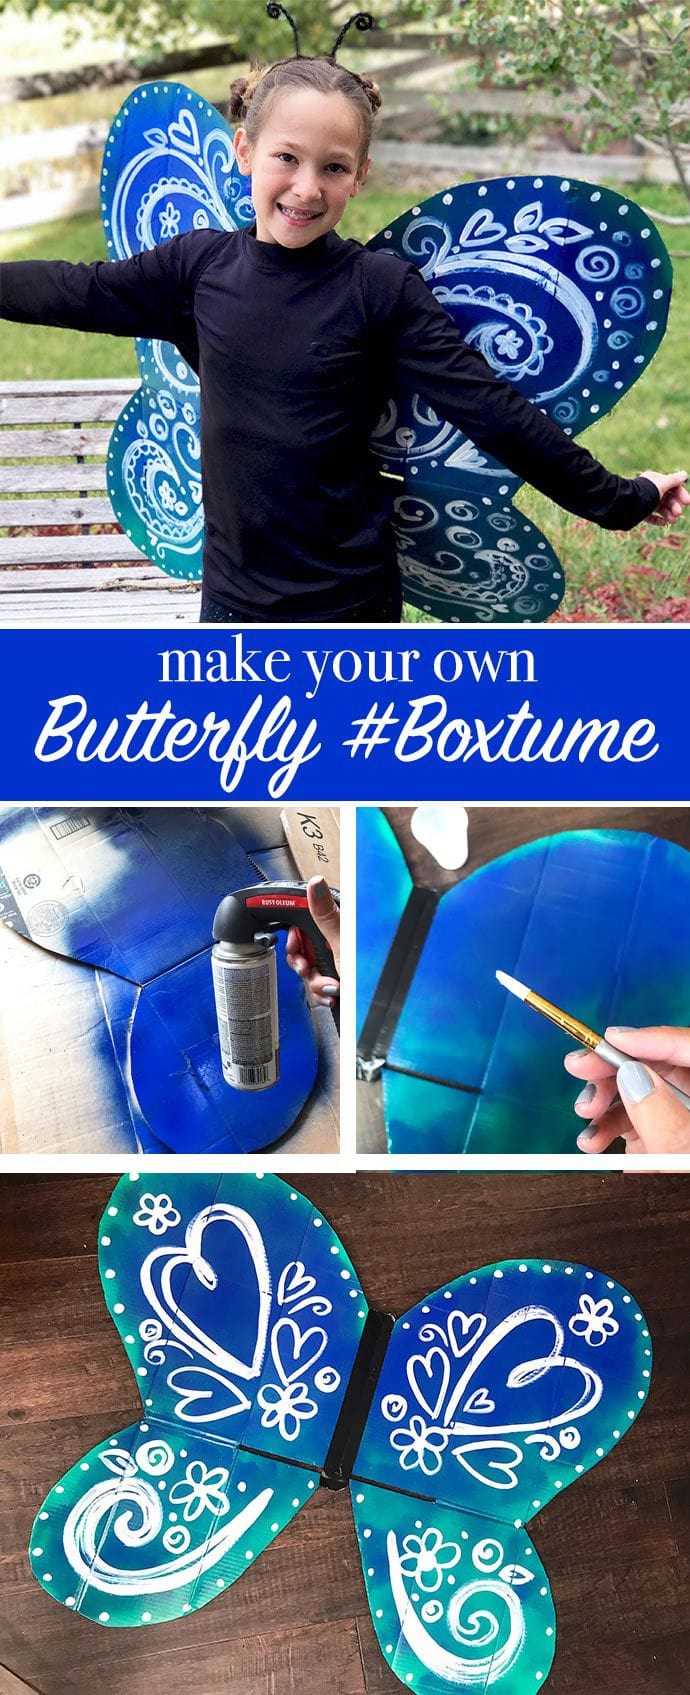
DIY Butterfly Costume #Boxtumes
Don't throw out those boxes you get from all your fabulous Amazon orders! Instead, make a costume or two… aka #boxtumes!
I've created these hand-painted butterfly wings with some of my favorite paints. However, you can use your own preferred paints and colors to customize the look of this as you'd like.
Materials
- Empty Amazon Smile cardboard Box
- Paint – I used both blue and green spray paint and white craft paint with a paint brush
- Small paint brush
- Scissors
- Tulle or 2-3″ wide ribbon
- Duct tape
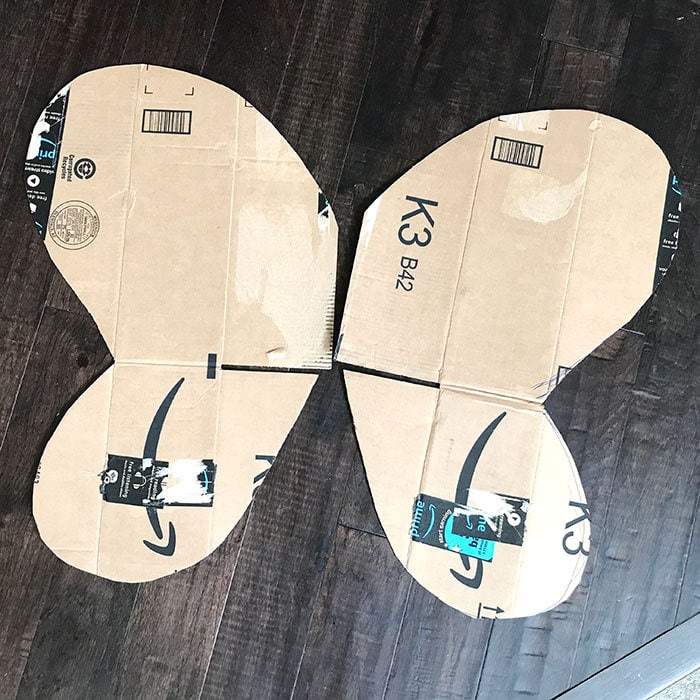
Cardboard Box tip: I used one big box, but you can also piece together smaller boxes if that's what you have on hand. Use duct tape to attach the pieces together and let the seams and folds of the box dictate how and where the butterfly wings fold.
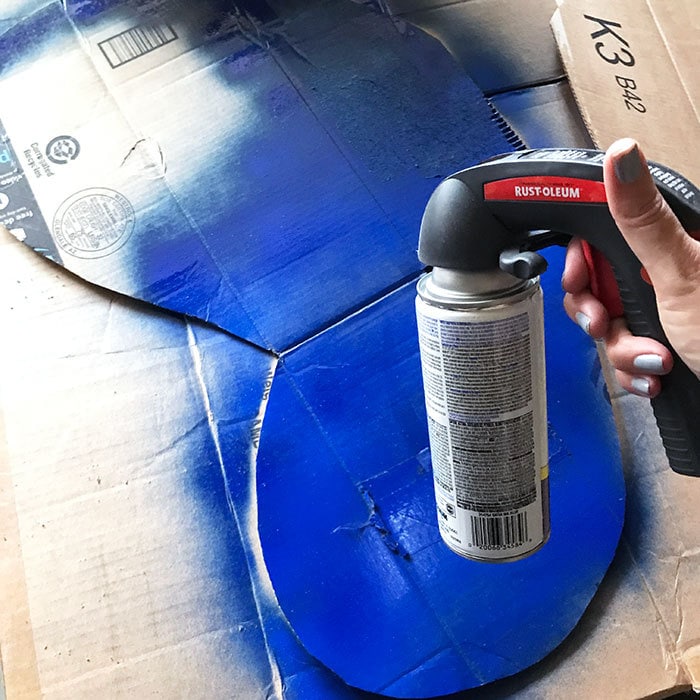
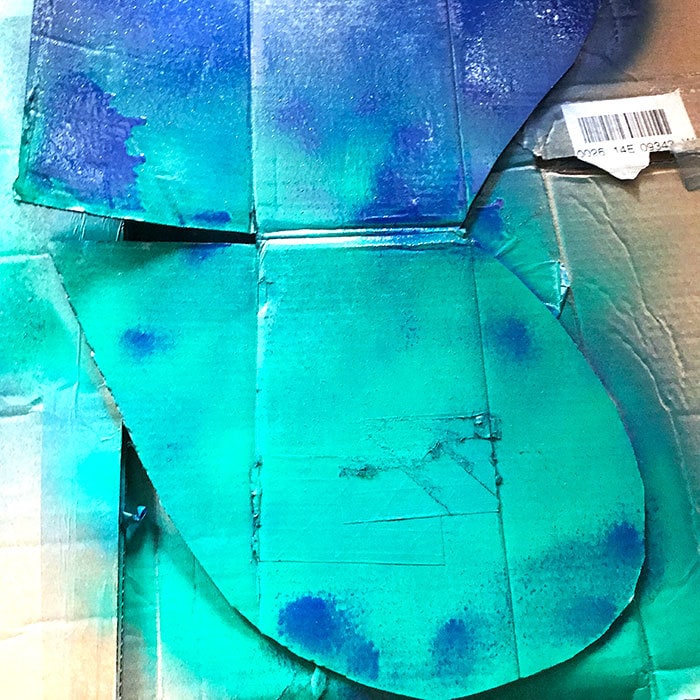
Spray paint tip: I like to use two different types of spray paint because when painted together, a chemical reaction causes a cool color effect and fun blend designs. Make sure to apply one coat of paint and then immediately spray the second color on top before allowing the first to dry. It's almost a marbling effect that is created.
I used: Rust-Oleum Ultra Cover Blue spray paint & Rust-Oleum Green Protective Enamel spray paint. I like using a spray paint comfort grip too.
Instructions
- Cut wing shapes from the cardboard. I used Fiskars mixed media scissors to cut the cardboard. You can also use a craft knife if you prefer.
- Prep your work space. Cover a work surface outside or other well–ventilated area.
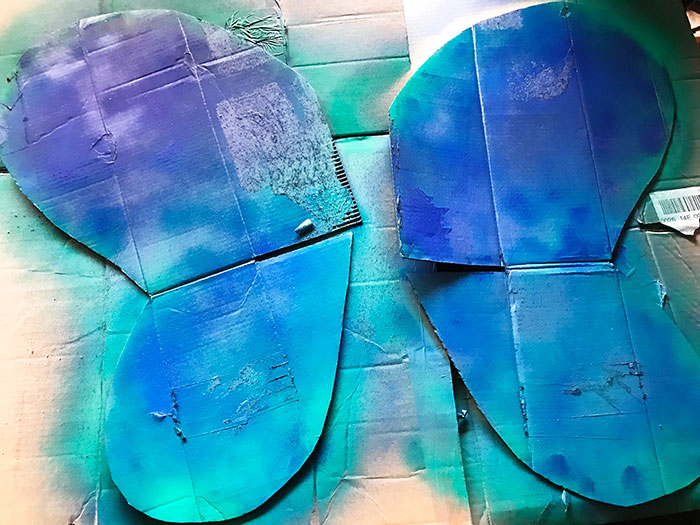
- Add base color to the wings. Spray paint one side of the wings blue. Then immediately spray paint the lower half of each wing green, covering lightly and allowing the two paints to mix a bit before drying. Let wings dry. Repeat the painting process on the second side of each wing and allow to dry thoroughly.
- Attach the wings together. Once the spray paint is dry, tape the two wings together down the center using duct tape. I taped both the front and back of the wings to ensure a good bond.
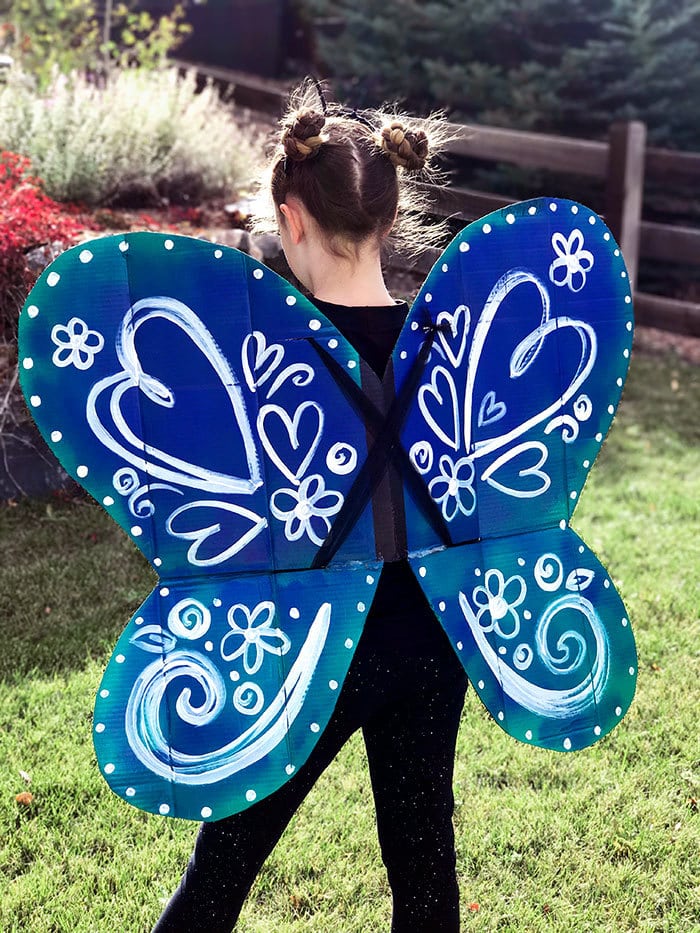
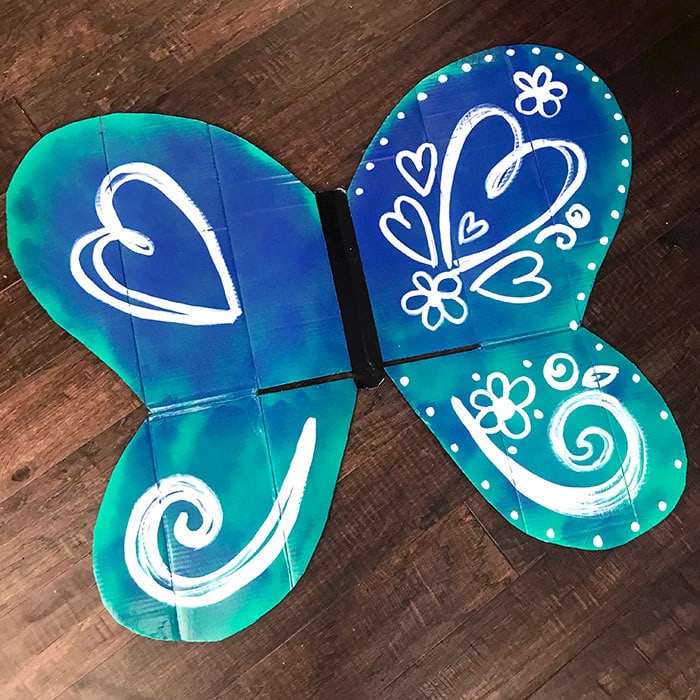
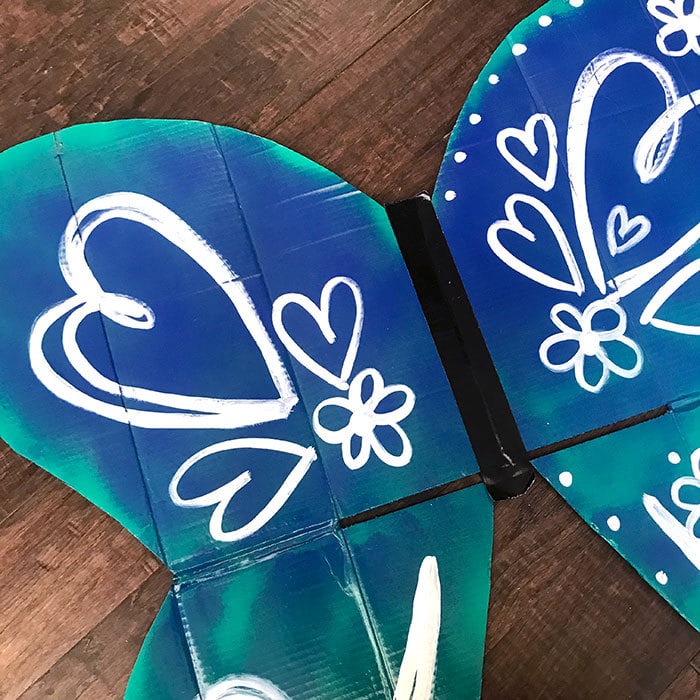
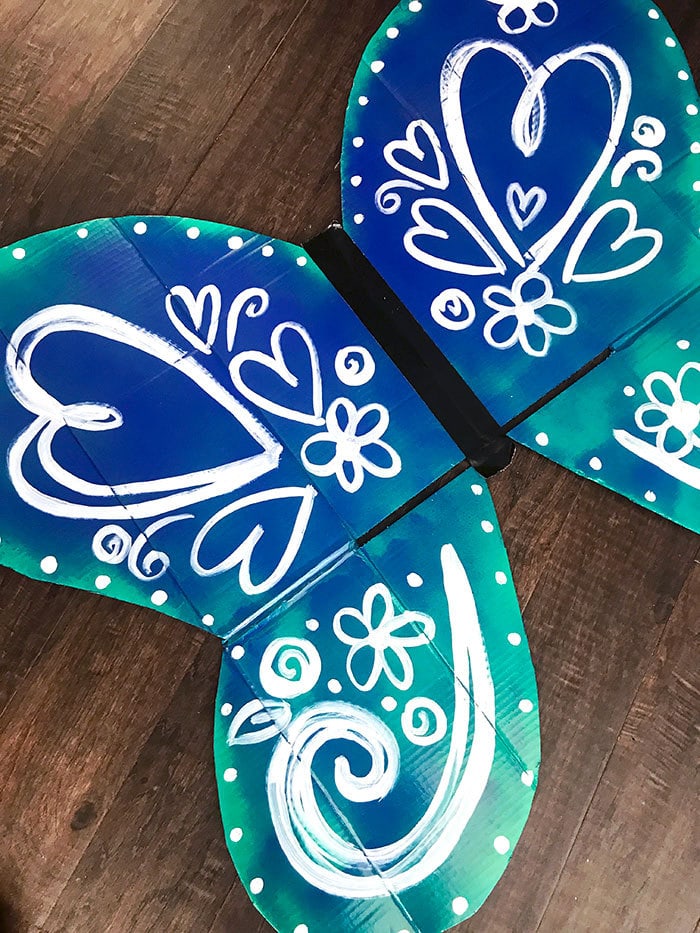
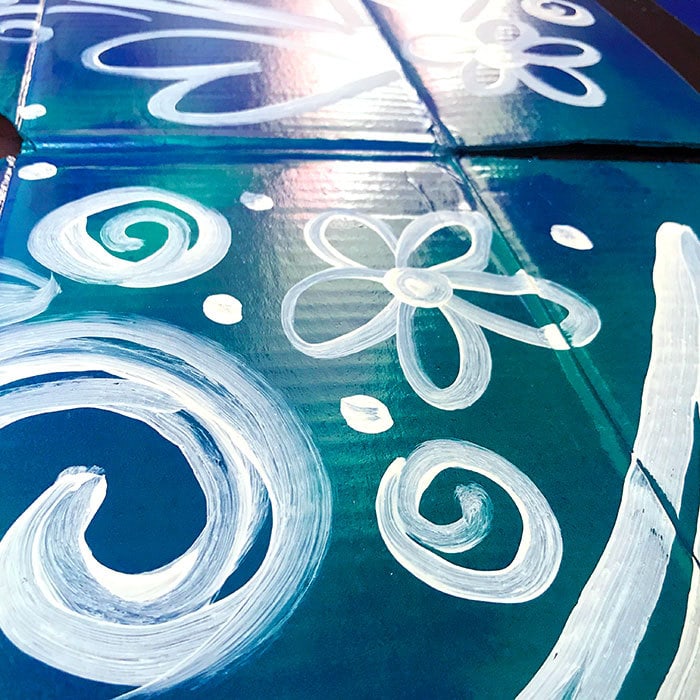
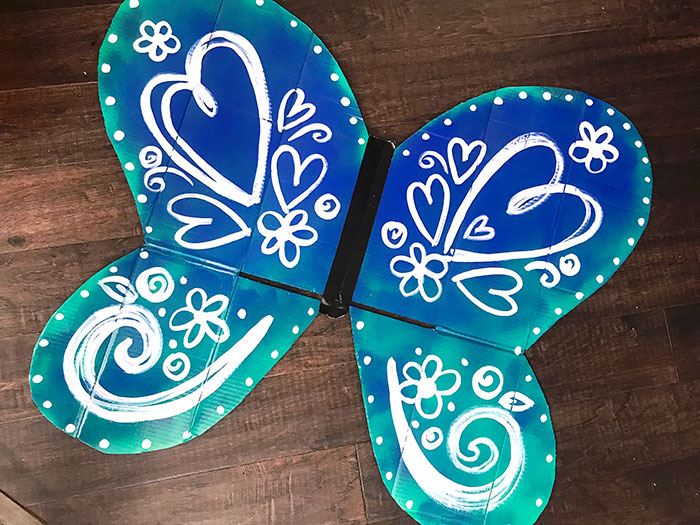
- Add art designs to the wings. Use your paint brush and white craft paint to paint designs on one side of the wings. Allow to dry. Repeat design painting on the second side of the wings, again dry thoroughly.
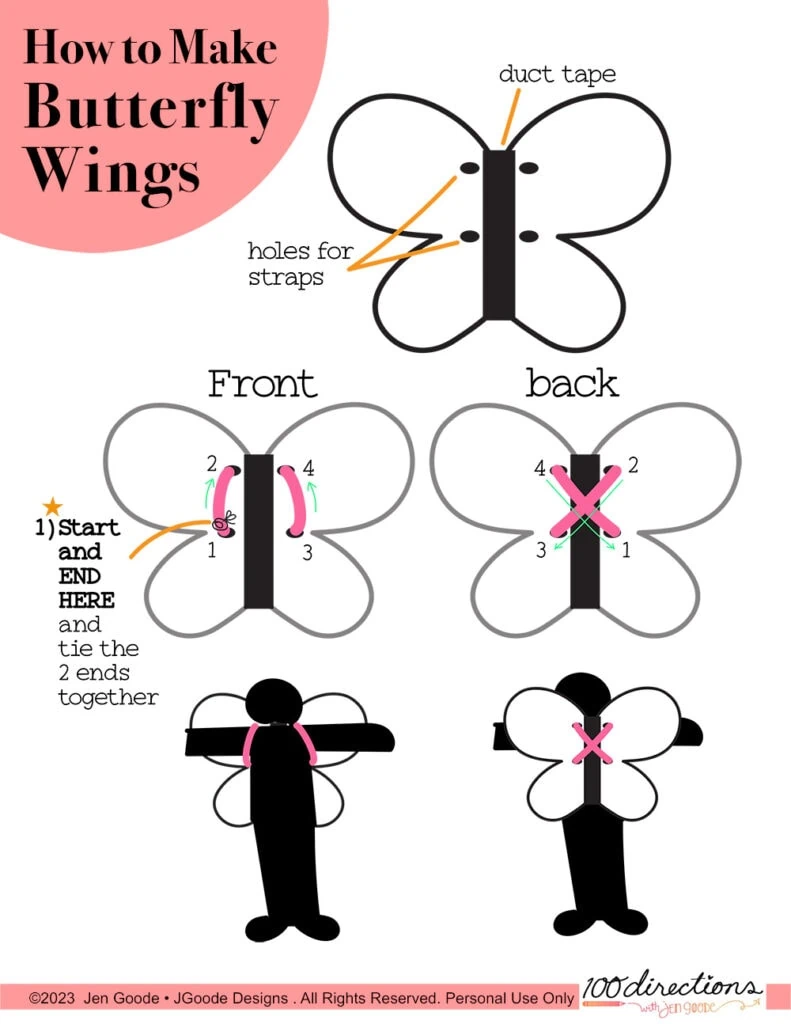
- Add straps to wear the wings. Cut a slit near the top and middle of each wing – toward the center seam of the two wings. You should end up with 4 slits. My box had some gaps where the box flaps were separated, so I hot glued the flaps together, leaving a slit in the middle of each wing and then I cut the slits at the top of each wing. Run tulle or ribbon through the slits cross in the middle of the outer side – these will be the straps for the wings so they can be worn. It's important to ensure the cross is away from the body, so the straps fit over the shoulders of the person wearing the wings. See below for a diagram for these strap instructions.
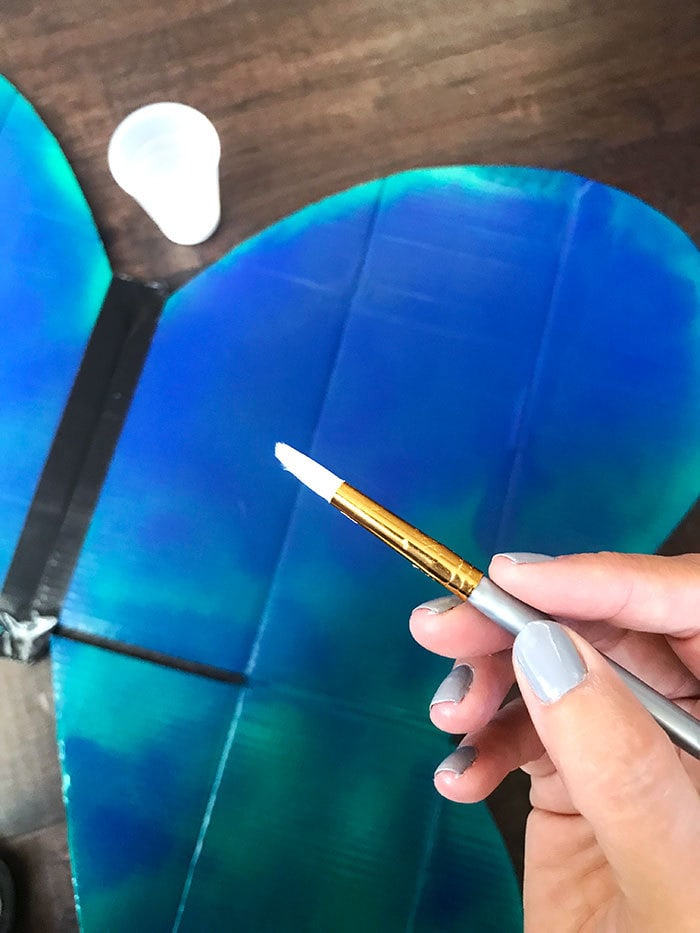
Let's paint some art designs to decor our DIY butterfly wings.
Here are my suggested steps to create this hand-painted design on our Butterfly Wings Costume (#Boxtume). I've already completed the right side to show you a completed design. I'll show you the steps on the left side that coordinate.

Add straps to the butterfly wings costume
To make the straps, I used a single piece of black tulle ribbon. Start at hole #1 in the front of the wings leaving extra ribbon to tie later. You won't be pulling the ribbon through hole number 1 until the end. Pull the ribbon through hole #2 from the front to the back. Then pull the ribbon diagonally across to hole #3 and pull through the hole to the front. Pull up the front of the wings to hole #4 and through to the back. Finally, pull through #1 on the back to the front and tie together in a knot with the start of the ribbon. I found it best to test and adjust the lengths of the straps by having your child wear the wings before tying the final knot in place.
Customize the butterfly wing design
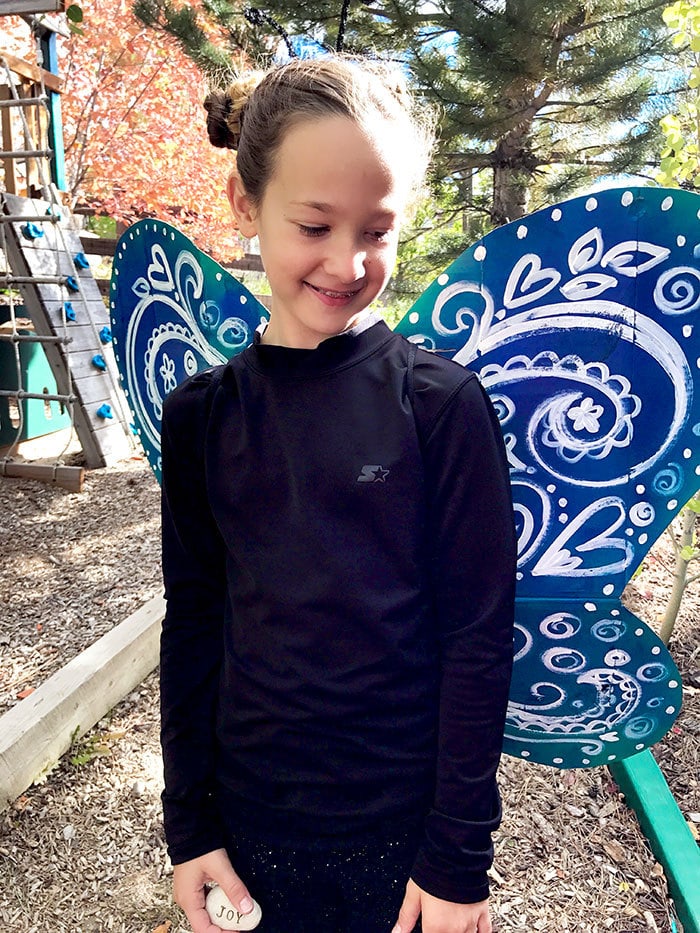
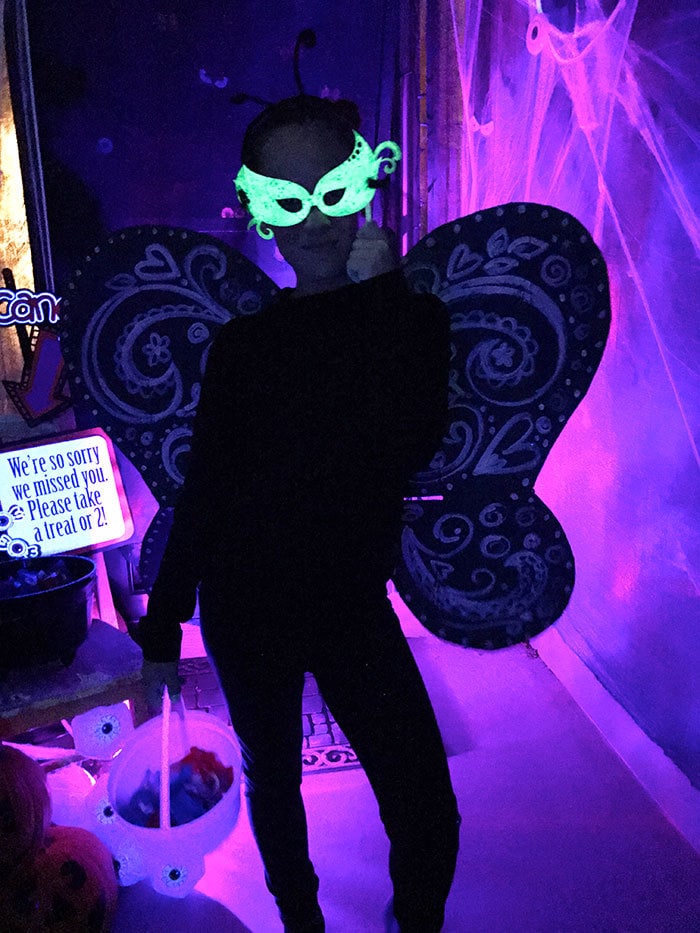
You can change up the colors, get more fancy or create something simple. These butterfly wings are completely customizable! I used white paint on a dark background so the white would glow with black lights for Halloween. You can add glitter or gems or even a glow paint if you'd like.

Add more art designs to the butterfly costume
Get creative and paint a different design on the front of the wings vs the back of the wings. Also, keep in mind, if you don't want to paint the design with a paint brush, you can always use a paint marker or pen and draw your design.
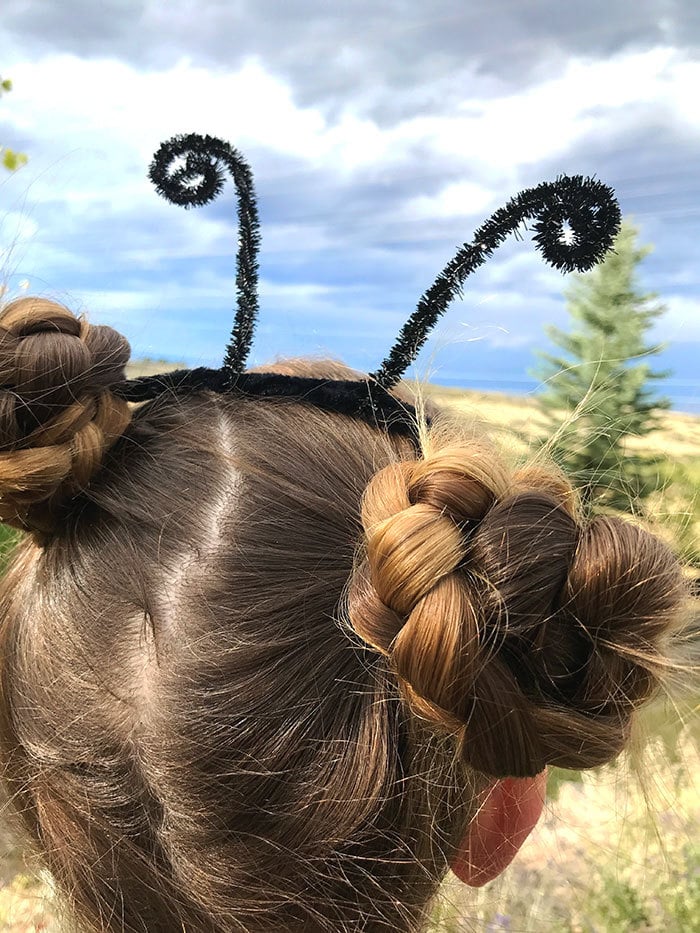
Don't forget the butterfly headband!
Here's an easy way to DIY a butterfly headband to go wth your pretty butterfly wings. I used chenille stems (pipe cleaners) and just twisted them together to make a cute little antenna headband.
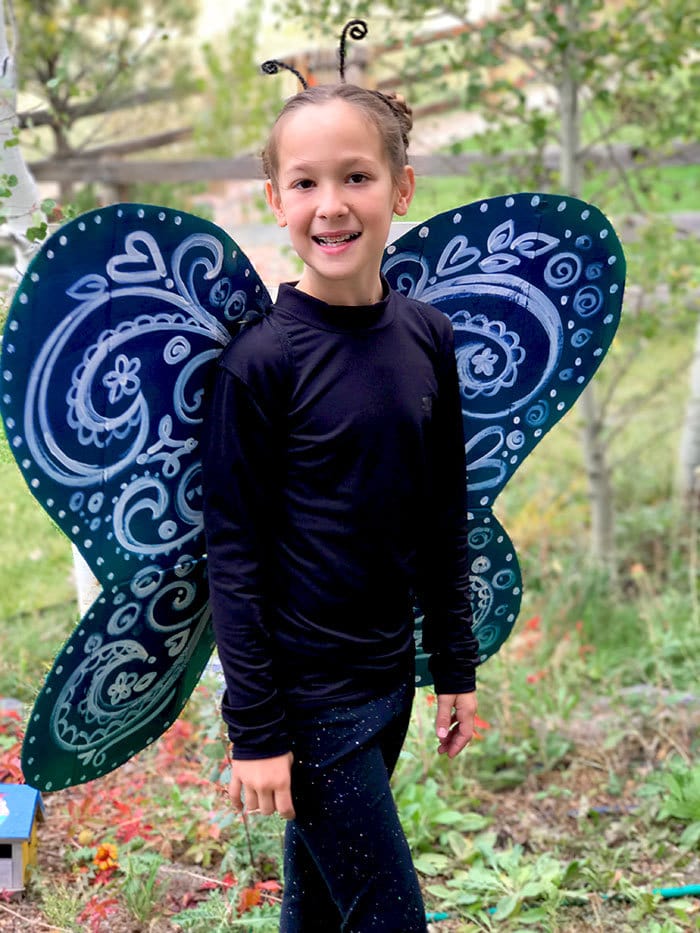
Finish the butterfly costume with black leggings or pants with a black shirt. That's it! You can add other accessories or accents if you'd like. Decorate a candy bucket or make a pretty mask, or just go with beautiful hand-painted wings and a headband. You decide!
If you make this project I'd LOVE to see how it turns out! Share your own DIY #Boxtumes on social media by either tagging me and using the hashtag #Boxtumes or posting to the 100Directions Facebook page.


Can you share a bit more about how you made and attached the straps? I read the directions but am still a bit confused! Thanks in advance!
Hi Carrie, thank you for the note. I’ve updated the instructions to include more details for adding the straps. I’ve also added a graphic that demonstrates how where to put the holes and how to thread the ribbon through. I hope this clarifies a bit more. Thank you for stopping by!
Thank you SO much! The updated instructions and the graphic were both super helpful. Thank you!!
I can’t believe that is made out of boxes. I thought it was material. Wow! So cute!
Thank you so much Jyl! I think painting on cardboard is soooo much easier than fabric. Just need a brush and a bottle of paint!