Learn how to make your own colorful birthday button. Add a personal touch to birthday celebrations with a colorful party printables. Plus, find a free printable birthday button kit you can use to make this cute rainbow button.

Birthdays are a big deal in our house. You get to eat cake for breakfast, pick where the entire family gathers for a dinner party and sometimes Mom makes a special birthday crown, t-shirt or button to wear.
Follow the steps below to create your own cute birthday button. Then, scroll below to find even more fun party printables designed by some of my crafty friends.
DIY Birthday Button
You can use the printable kit as is or use the pieces you cut out as a template for your own favorite printed papers and pictures. You can change out the center circle and make all kinds of cute buttons or personalize with your own message.

Materials
- Printer
- Free button printable kit designed by Jen Goode
- Glue
- Scissors
- 1 Regular sized safety pin
Instructions
- Download and print the birthday button printable on to regular white printer paper.
- Cut out all the individual pieces on the printable.
- Fold the two rainbow strips, accordion style. There is a dashed line at one end of each strip as a guide for the size of your folds.
- Glue the ends of the strips together.
- Add glue about 1/2 from the edge on the large purple circle.
- Wrap the rainbow folded strip to the glue on the circle. You should create a rosette style circle. Press in place and hold for a moment to ensure the paper adheres together.
- Add glue to the back of the Happy Birthday circle and place in the center of the rosette, press into place.
- Before the glue dries, add each of the small message flags between the birthday circle and the rosette.
- Use the small orange paper rectangle to attach the safety to the back of your pin. Add glue to the paper of the paper piece, place the paper through the safety pin. Glue in place to the back of the button.


Tip: Customize the button with your own center circle. Change the text or add a number, year or a fun saying.
This quick party craft is fun to make and so super cute! In about 15 minutes you'll be able to create an adorable rainbow birthday button ready to wear!
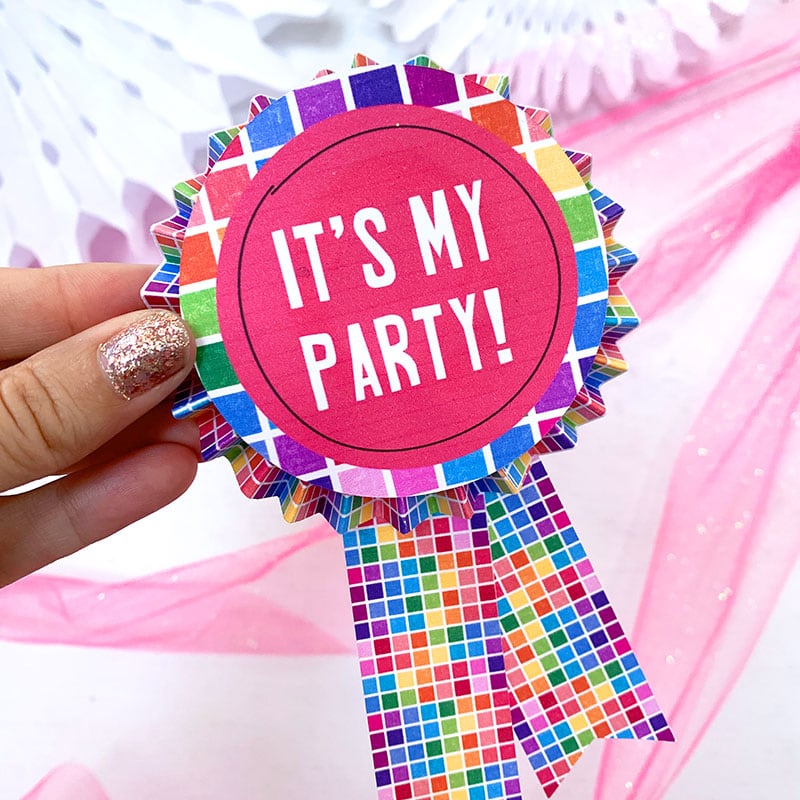
DIY Birthday Button
FREE

More Party Printables for DIY Celebrations
- Printable cupcake / cake toppers – Brooklyn Berry Design
- Birthday activity placemats – Hello Creative Family
- Birthday crossword – Crafting in the Rain
- Balloon cupcake toppers – The Country Chic Cottage
- Birthday banner – Everyday Party Magazine
- Video game birthday cards – Happy Go Lucky
- DIY birthday button – 100 Directions
- Birthday coloring page – Mad in Crafts
- Birthday interview – Artsy Fartsy Mama
- Birthday cards set – Pineapple Paper Co
- Birthday scavenger hunt – Fun for Litte Ones
- Birthday banner – Liz on Call
- Rosette badges – Persia Lou
- Multicultural kids thank you – Tried and True
- Doodle flower cupcake toppers – Creatively Beth
Fun ways to customize your birthday button:
- Print a photo of the birthday boy or girl and glue that to the center of the button.
- Include stickers, glitter or other embellishments to add a personal touch.
I hope you have fun making this birthday button. The kids love to show off their birthday happiness and this button is a great way to wear their happy with pride!


