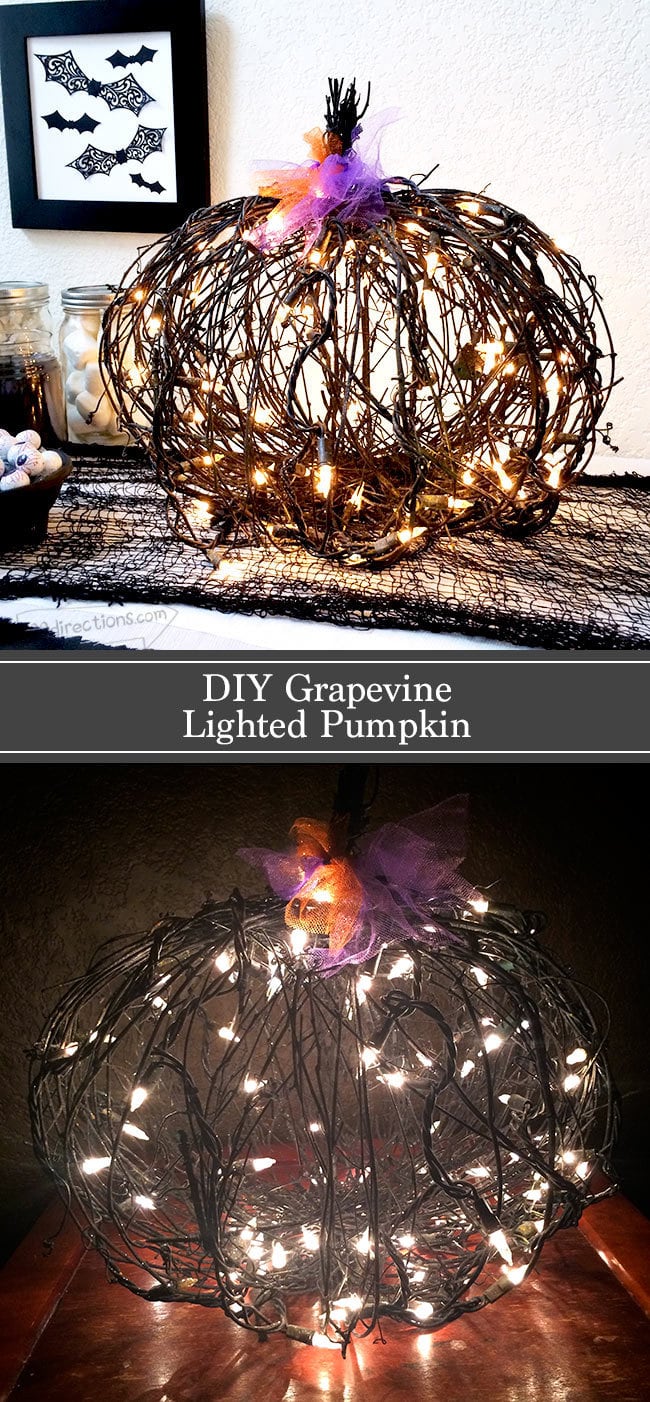
I've been seeing these really cool black grape vine pumpkins all over the place this but was shocked at the prices.. anywhere from $39 up to over $100 but a pumpkin made of sticks and lights. So I set out to make my own. You need a little patience, the steps require drying time so the project takes a few days, but I'm loving the end result and the price can't be beat. I'll show you how…

Materials you need:
- Grape vine wreath
- Black spray paint
- Craft string or twine
- String of lights
- Painters tape
- Black craft wire
- Optional: glitter and clear spray sealer
- Additional tools: wire cutters and scissors
Make sure the grape vine wreath you choose is not woven or twisted. You will be unraveling the vine so make it easier on yourself by finding the wreathes that are just bunched together.

Making the grape vine pumpkin
Soak the wreath in water for 24 hours.
Unwind the vine carefully. Use wire cutters if there are wire rings holding it together. You want to divide the vine into 3-4 loops of vine. make sure to cover work area for this step as the vine will create a bit of a mess on the table.

Insert one vine ring into the other intersecting in the middle so you create a 3 dimensional x. Add a 3rd loop of vine into the 1st and 2nd loops, you'll start to see the “wire frame” of your pumpkin take shape as a bit of a sphere.


Tie the vines together at the central intersection of all the loops at both the top and bottom of sphere. If you're sphere isn't sitting upright well, press down on the top while tying one piece of string to the top center and tightly pulling through and tying secure to the bottom center. This will create a bit of a base of your pumpkin.


Carefully separate the vines and spread out the various pieces to fill in your sphere. Readjust or add new string ties to help the vines stay in place.Once you are happy with the shape of your sphere, create a stem using remaining vine, cut and tie with string. Secure in place on top of the sphere using craft wire. Create a cork screw curl for extra detail.
Spray paint the entire pumpkin and let dry as directed. Add a second coat as necessary to ensure all visible areas are black. Set aside.
Painting the lights – if you can not find decorative lights with black cords, you can paint your standard lights black. This is what I did…
- Using painters tape, carefully cover every light bulb of your light string (this is a great activity to do while you're on a conference call!) – Don't forget to cover the metal of the plug and the holes on the other plug.
- Spray paint the light string until all areas are black. Remove tape. Voila.. black cords on your string of lights!

Finishing Touches
- Add lights to the pumpkin by carefully weaving the light string in and out of the vines. Make sure to leave enough excess so you can plug the cord in.
- Optionally spray a little clear varnish on the entire piece and lightly sprinkle with glitter. I also added a little extra sparkle by spraying some Smooch Spritz in both orange and purple.


Oh Jen
Beautiful! I also went shopping and saw the black trees with roots showing painted black with a string of lights for 50.00 I came home and made one last night with a tree in my woods. Now I will be back to the woods to get grapevine today I have to have a pumpkin to go with my tree.
Thank you I had not thought of doing a pumpkin.
So much fun!
Katy
Thank you SOOO much!! I’ve been searching hi and low to find information on how to make this. I was just about to order the grapevine itself and have a go. This looks MUCH simpler and I LOVE the way it looks in comparison to the others!!
Love, Love, Love this!!
Happy Holidays to you!!
=0)
how fun is this idea! love it.
This is so cool! Love that it’s black – makes it that much more spooky! 😀
Thanks for the tutorial, I love this!
Wow! What a clever way to use those grapevine wreaths! I LOVE how the pumpkin turned out!
Totally fantastic! I have been wanting some of these but the price tag keeps me FAR away from them. I am so going to try this!!
Fantastic. You are so creative. I hope mine turns out as great as yours has. But, nevertheless, the idea is awesome, and so great to be able to make something with the stuff I have here at home-rather than buy someone’s. Thank-you!
I just pulled some dead grapevine out of the trees! I’m going to have to try this! Thanks for showing us how.
Wow! Got here via CraftGossip, btw-Congrats on being featured! I can sure see why, what great ideas your 100 directions take you to! 😀 Thank you – susan
What a fun project! I can’t wait to try to find the wreath to make one for myself. Thanks so much for sharing the tutorial!
Super idea and great tutorial! I’ve pinned this to my autumn/fall board, so I can find it again. Thanks so much!
xoxo
Joy
Love this pumpkin light decor, it is a great idea!!!
Thank you so much!