Making new clothes for girls from stinky boy's shirts is a favorite challenge of mine. Usually I grab t-shirts my boys have outgrown and turn them into fun girly skirts for my pink glitter-loving daughter. Today I'm doing something a little different.
I was invited to participate in the Summer Of No Pants series with Marigold at Hideous! Stinky! Dreadful!… and I'm so excited to share! Here's the catch, while my t-shirt skirts for kids are great, Marigold wanted grown up projects.
WHAT!? I need to make something that would fit me??? That's never happened… I like it, it's about time!
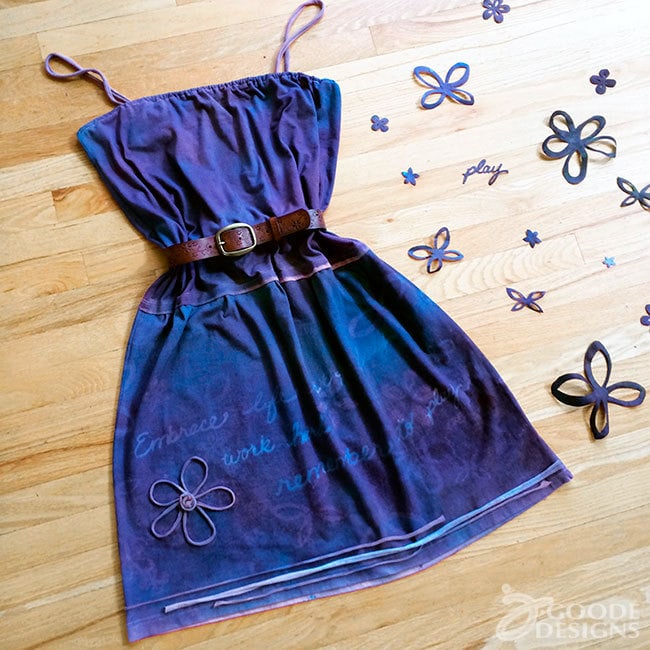
So today I'm sharing how I made a dress I've created using 2 old t-shirts I picked up at the thrift store. I added a collage of dye color and stencil designs, I'm taking this challenge and running with it! Plus (big bonus), the dress actually fits me and I'm excited to wear it!
Get ready to get creative and show off your legs, welcome to the Summer of No Pants!
A little head's up
I'm not going to give you an exact step-by-step tutorial for this T-shirt dress. However, I will give you enough information to make your own version. I hope this project inspires you to make your own dress with your flair. Experiment with your own art style, add your own personality, be brave and explore what you can create. Today I'll share techniques and give you some ideas to get started.
Let's make an art dress!
Materials you need:
- Cotton t-shirts – adult size at least 1 size larger than your own real size.
- Fabric dye
- Spray bottles
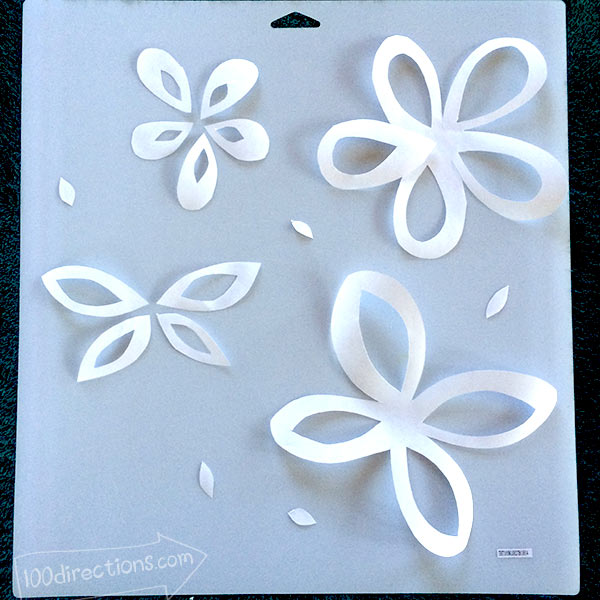
- Stencils – I made my own with freezer paper, scissors and an iron. I also cut some of the designs on my Cricut.
- Sewing machine
- Cricut machine – optional
Before you sew your dress, you need to make the art on the fabric. When using the fabric dye, if you color the fabric before you sew, the seams will come together better. There isn't a lot of sewing needed to make this dress. The art is the centerpiece. So grab your blank t-shirts and get ready to create a masterpiece!
Make the Art for your dress
- Cover your work area to prevent dye-color ruining furniture. I like to spray dye on a card table on my deck.
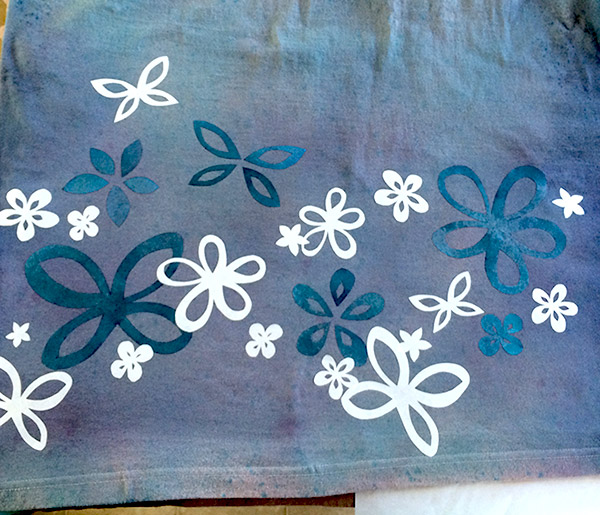
- Start this art project by deciding on elements you want to include in the art piece. I wanted to include both words and flower cutouts. I wanted to use my art and handwriting, so I created stencils. I hand-cut flowers from freezer paper and then ironed the freezer paper flowers on. I also duplicated more of these flowers on my Cricut. To create the words I used my Cricut machine again. I'll share a Cricut how-to tutorial for making your own stencils later.
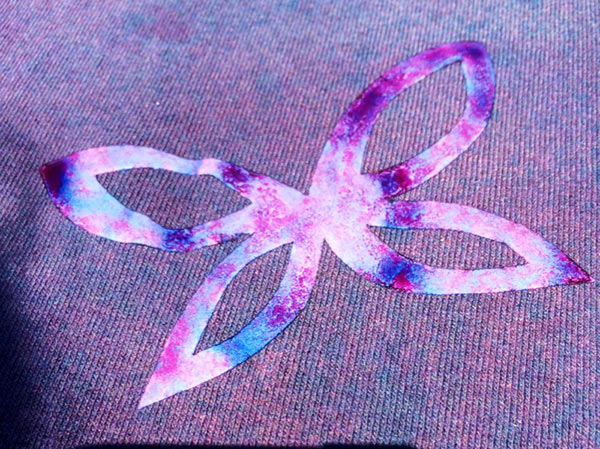
- Once your art pieces are ironed on to the fabric, spray dye color over the fabric. To created a layered color effect you want to layer the color. Spray one color and then another. Sometimes I let the color dry before adding another color. Sometimes I removed some art pieces between color changes and sometimes I added new art pieces.
- Make sure your fabric is completely dry before ironing on new pieces or you may end up with a funky iron stain… We are going to pretend I didn't stain my skirt… Can you see the iron mark?
- Continue adding art stencil and color layers until you are happy with the look. Rotate the shirt around so you don't have any color edges. This is not a quick process… Plan on a nice sunny day – all day – to create this color art. Remember this color effect is subtle and you can't really remove color. So, don't over color. But don't be afraid to add bright color.
- Experiment! You might want to try the dye effect on a plain Tshirt just to see how the dye reacts.
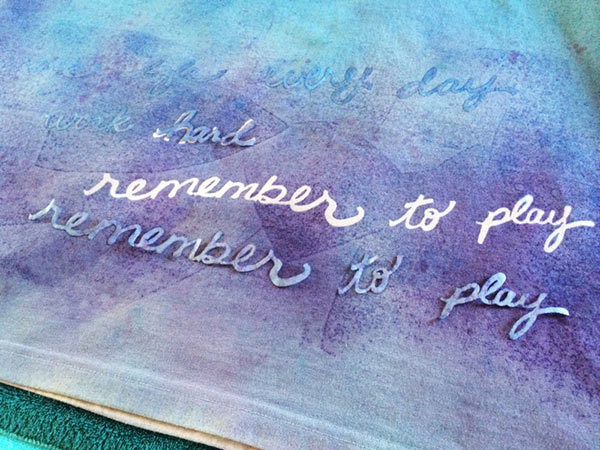
The words say:
Embrace Life Every Day
Work Hard
Remember to play.
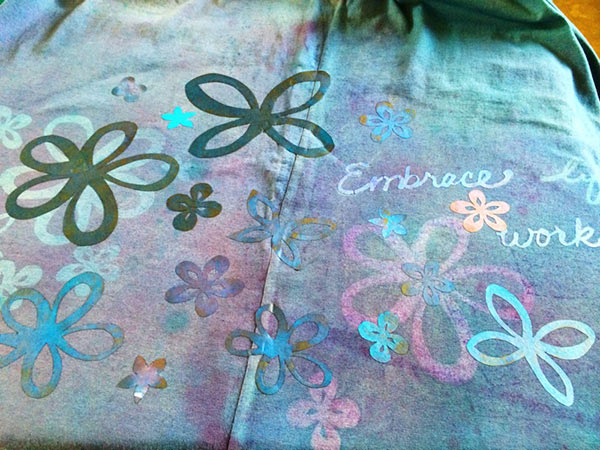
I love how the colors mixed on the freezer paper when I first started. Once I was finished they were nearly black. I think I'll reuse them in another project… more fun later.
Now that you have added color to your repurposed t-shirts and created art you'd love to wear, it's time start sewing. I'm definitely not a professional sewist, I do not do a ton of sewing. So this project fits right in the same theme.. it is not heavy lifting type sewing. If you don't have a sewing machine, you could even stitch by hand in no time! Let's get started…
Next Make Your Tshirt Art Dress
The dress is composed of two separate tshirts sewn together – a skirt piece and a slight drop waist strapless top.
Both pieces I cut the Tshirt just below the armpits. The skirt is a larger shirt than the top portion. I actually used a shirt that was a loose fit shirt of my own for the top and then a bigger men's Tshirt for the bottom.It's a bit easier for me to show
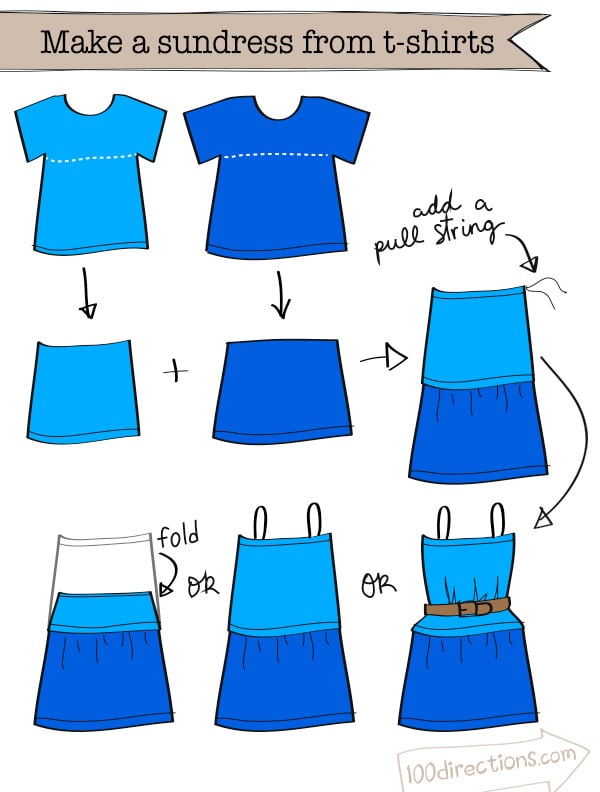
The beauty of this dress style is you can wear it a number of ways. Either finish it to be a stand along skirt or where as a tank dress. The waist can be folded down to wear the skirt alone.. if the waist is too big, use decorative pins to cinch it in place like a broach would be used. You can also wear the skirt a little longer if you'd like.
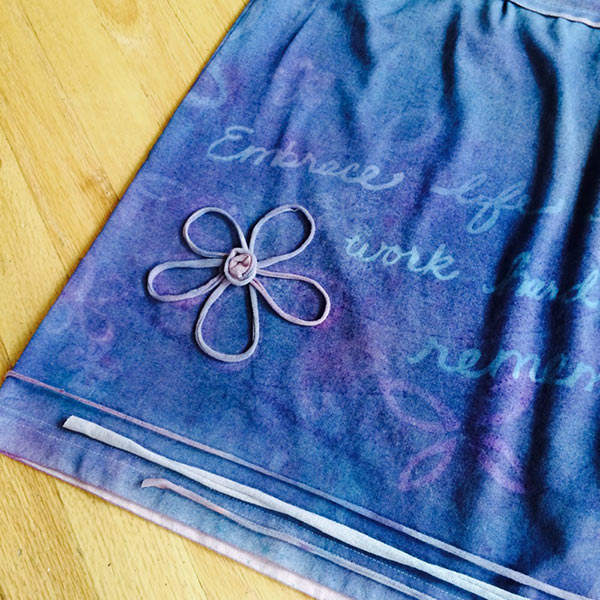
Use strips of fabric to make the shoulder straps. Use more strips of fabric to sew designs on the dyed art design to add dimension to your art. If you want to add some interest, consider adding buttons, other fabric embellishments, hand draw with fabric markers, and even use some fabric paint. You can keep your art dress as simple or make it as elaborate as you'd like.
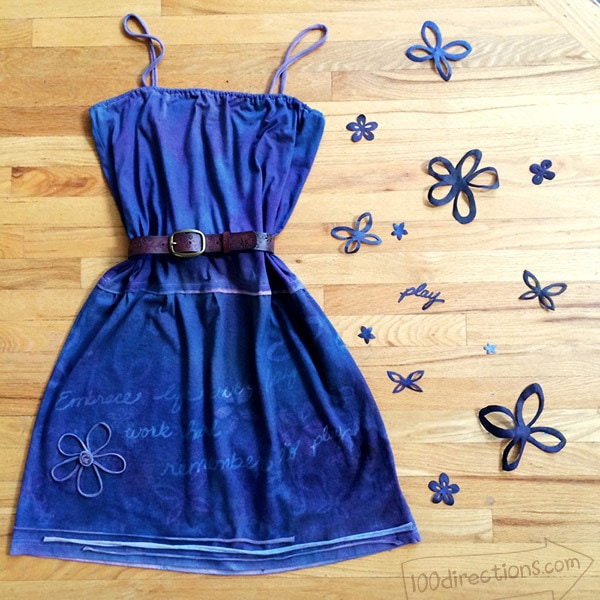
Inside secret – my dress isn't 100% finished yet. It's finished enough I could wear it today, but for now, I don't love the straps in the photo and I'd never wear the belt… But it's an idea that I love. 20 pounds and 10 years ago I would have worn it as is. But this cute dress sure does look adorable as a basic slight drop waist sundress too.
I still need to add the thicker straps I prefer. I'd also like to add more collage pieces to it too, maybe even hand paint something. This is just another example that Art is always an ever changing project… This is wearable art and no exception.
I dare ya – try it! Put your own art on something you can wear, I'd love to hear about it!
Now hop over to Marigold's and see what else is happening with the Summer Of No Pants !


So really… I want to come and have an art day with you! I love this dress!! I bet I could make a really cute one for the grand baby.. 🙂
we should have an art day! I should clean my studio… 😀
Love the stenciling in layers! Great process, beautiful result!
Thank you so much Liza Jane!
So pretty! I have trouble with thin strappy straps, too. I was looking at braided straps and thinking about adding those to a dress-maybe that would work for you?
Thanks for joining in on SONP this year!
I really like the idea of the braided straps too. Thank you so much for including me this year, I loved participating!