Make your own pretty canvas wall art with a reverse stencil. Use your cutting machine to create a stencil to make your own DIY Wall Art Canvas.
I created this Cricut project as part of this year's Secret Santa project with the Cricut.com blogger group and then sent it off to my gift partner, Amy from The Idea Room. You can make your own version and personalize the colors to fit your decor and add your own style.
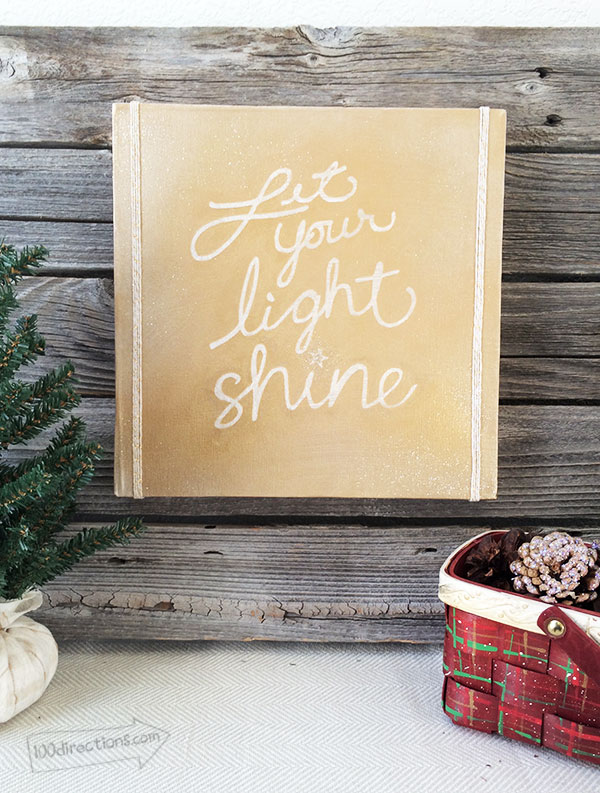
DIY Wall Art
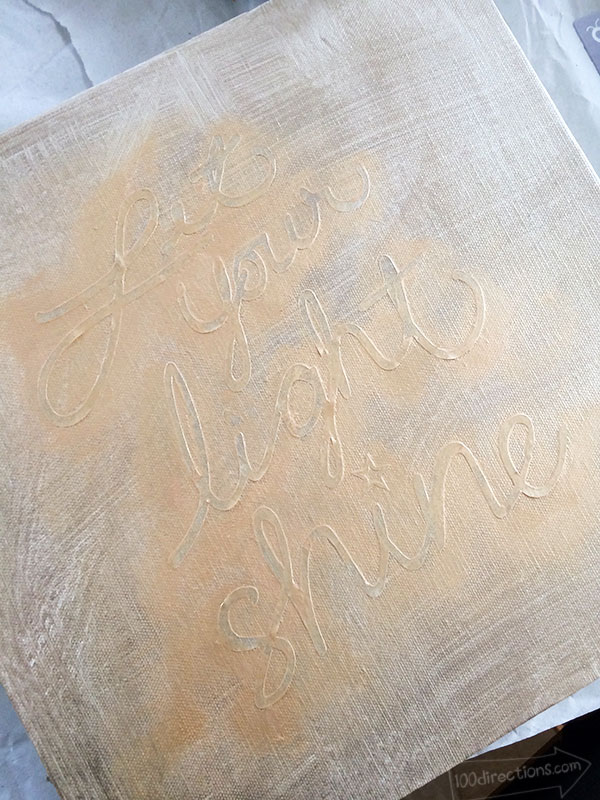
Making a reverse stencil is very simple in concept. Instead of painting on a stencil to create painted letters, the reverse stencil leaves the letters white (or your background surface). Place the stencil on your canvas, paint over it, and when you removed the stencil, the letters are the background material rather than the paint.
This technique creates some fun texture and dimension to the letters you don't get from traditional stenciling.
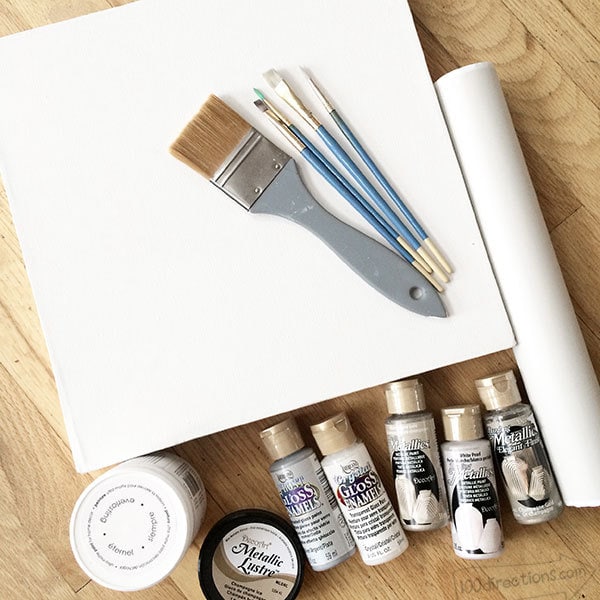
Materials
- Cricut
- Let your light shine word art by Jen Goode (see below to download)
- Contact paper
- Variety of paint – I used Decoart paints in a variety of metallic and pearl finishes
- Decoart Metallic Lustre – this is optional, but adds pretty shine and dimension to the word art.
- Paint brushes & soft cloth (tshirt fabric is fine)
- Twine – optional accent
- Weeding tool
Note: If you do not have a cutting machine, you can hand cut your stencil with a craft blade.
Instructions
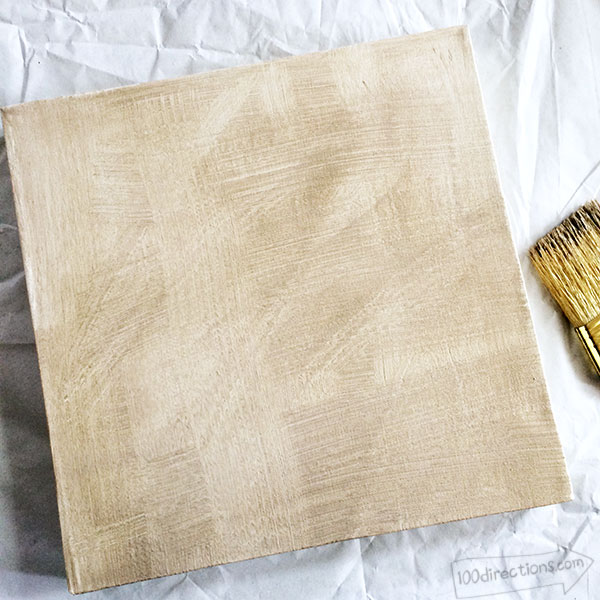
- Paint the surface of your canvas and allow to dry. I added a few different colors and gently blended them as I brushed them onto the canvas. Keep in mind, this background color needs to be either darker or lighter than the top color/s you use so the words show up after you use the stencil. In this project, my background is much lighter.
- Apply the stencil letters where you'd like them to appear. I originally tried using transfer tape for this step but found the transfer tape was more sticky than the letters to the canvas. So, instead, I hand placed the words on the canvas.
- Paint over the letters. Using the soft cloth, gently rub Metallic Lustre over each letter. Be careful not to move the letters… work slowly and the wax paint will help hold the letters in place. If you don't have Metallic Lustre, craft paint will work too. Use a sponge brush to dab the paint gently on top and around the letters, allowing to dry between layers.
- Use other paints to add more color and shading to your art however you'd like. Allow to dry completely.
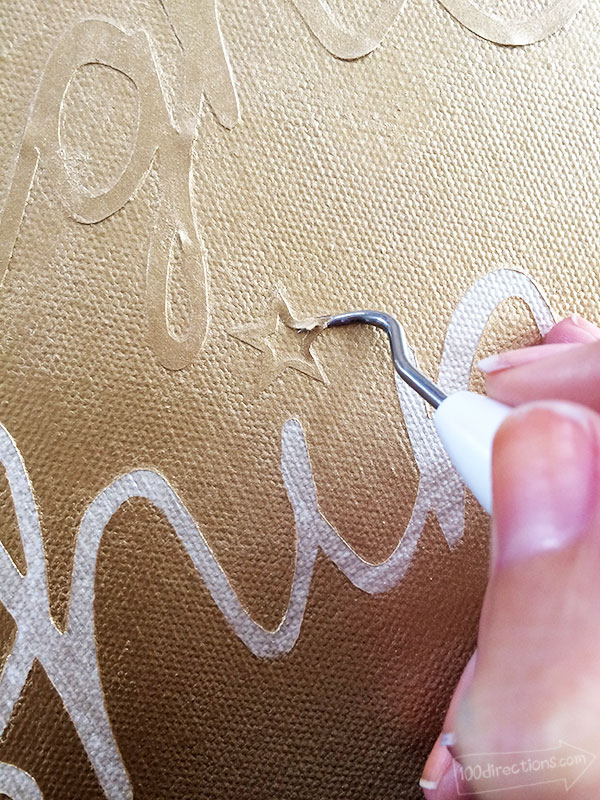
- Remove stencil. Using the weeding tool, carefully remove each letter or word from the canvas.
- Add finishing touches. I added twine along the sides and a bit of glitter along the corners and the center of the star. You can add whatever extra embellishments you'd like.
Take a look, I'll walk you through the process with photos.
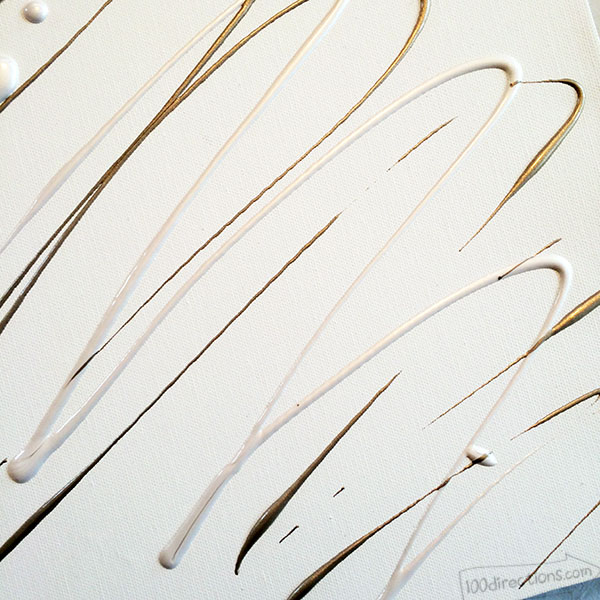
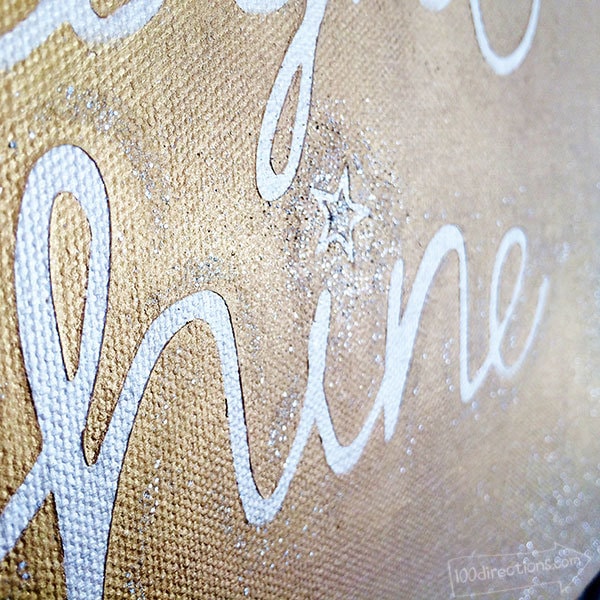
To add glitter, I used a variety of techniques. I used a glitter nail polish around the letters to give the word Shine some extra focus. I then added spray sealer (clear spray paint) to the entire piece and sprinkled fine glitter to the corners and edges before the paint dried.
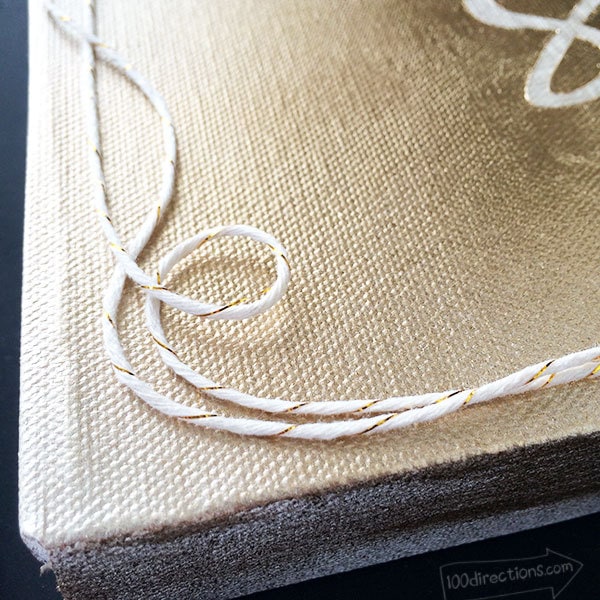
I started out adding twine to the entire art piece using the swirl patterns I love. Then I decided to keep the look a little more traditional and when with rows of twine together to create a stripe on each side of the canvas. The twine wraps down the sides of the canvas and then I trimmed the edges.

You can use the reverse stencil technique for so many different project ideas. You can also combine standard stencils with reverse stencils to create unique looks… think of word art with a regular stencil and then go back over with reverse stencils.
Play with it and see what you come up with! Tip: if you just want to practice, use the cardboard from a cereal box instead of a traditional canvas.
Grab the Let Your Light Shine stencil word art. It's a free download for a limited time. This download includes an SVG file, ready to upload to your Cricut Design Space. There is also a PDF you can use to cut the design however you'd like. Enjoy!


Let Your Light Shine SVG
FREE
Make your own DIY wall art with this stencil or use word art to create all kinds of other projects with your Cricut You can cut vinyl and decorate a tote bag or a t-shirt. Make little note cards or add vinyl to your wall. Have fun with it! As always, I'd love to hear about YOUR creativity. Stop back by and tell me what you have created!


Love how this turned out. Great technique. And the glitter details are great.
Thank you bunches!