I really love working with clay. I like sculpting, especially very small things. Back in the day I was making little penguins about the size of the original smurfs.. so cute! I've never tried Makin's Air Dry Clay, so when I saw an opportunity to check it out, of course I was excited to get involved. Today I'm sharing what I discovered, some projects I made and a great giveaway. There is a whole crew of other designers also sharing ideas using Makin's Clay today. Today is a special Designer Crafts blog hop, so make sure you check them all out!
Keep reading to find out more about the pieces I made and a great contest you can enter to get your own Makin's goodie pack.
I've since discovered I love this clay and I think you will too! It's more like the texture of stiff bread dough so it's easy to mold right out of the package, no need to condition it just to make it soft. It does, however begin to dry a bit almost right away, so make sure you keep moving with it or you'll find you have to knead it. Makin's clay seems to take about 24 hours to really set (in Colorado), and I love this. If after a few hours you need to make some subtle changes, the clay is still a bit workable – yay! I also love that because it air dries, you can mold it to objects that shouldn't be in the oven and yet it will still become permanent… imagine the possibilities!
I was sent a variety of Makin's Clay products to try…
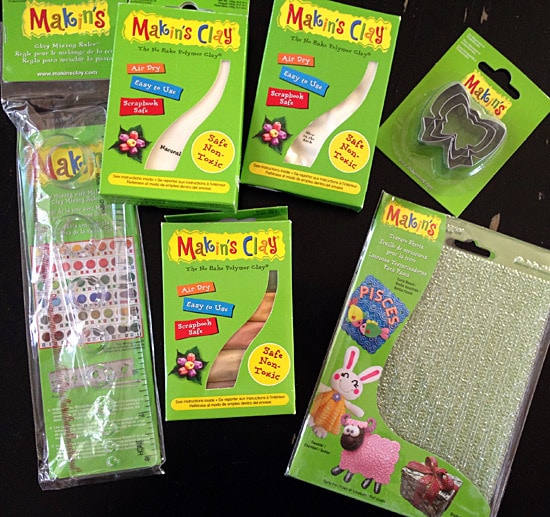
I received 3 packages of clay, natural, glow-in-the-dark (yay!) and color combo pack in earth tones. I also received some texture mats, color mixing measuring tool and a set of bow shaped clay cutters.
I started by just playing with the clay and getting used to the texture and how easy it was to work with. Since I had never used this clay, I made a few different things. Today I'll share a tutorial for one the bracelet… keep reading.
First I created some little ghost earrings with the glow-in-the-dark clay…
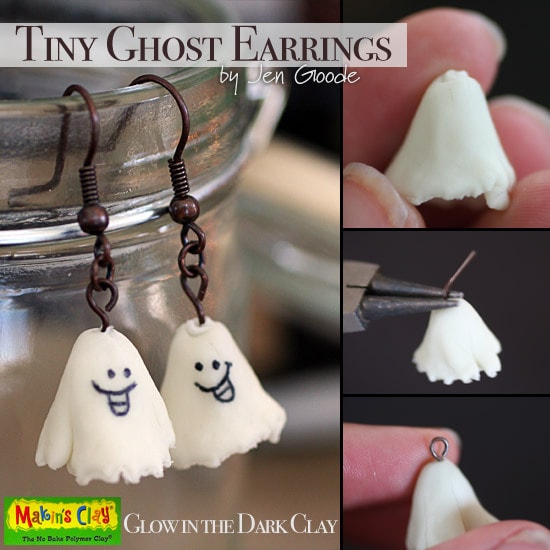
They are really easy to make, just roll out some clay, cut out a small circle, about the size of a water bottle, drape over a pencil top, poke a hole in the top and let dry. Once dry, add jewelry findings and draw a face using a Sharpie fine point marker.. voila! I tried to take a photo to show you of the Glow-in-the-Dark coolness.. but it was really dark… my camera didn't know it needed to participate. Sorry!
Next, being in a creative Halloween mood, I made a tiny glow-in-the-dark skeleton… go ahead, giggle at my lack of skeleton toe design ability.. poor guy has flat feet!
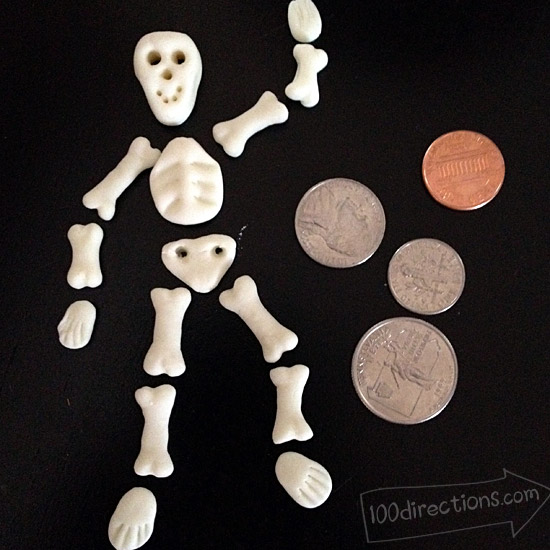
I was originally planning to make the skeleton into some kind of jewelry, a fun necklace of sorts, but I let the piece dry completely before adding in all the holes. I could still use a tiny drill or take the time to use a stylus but now I just like it as is… not sure what I'll do with it. I have a tiny pile of bones, I think it will make great yard decor for the Barbie house.
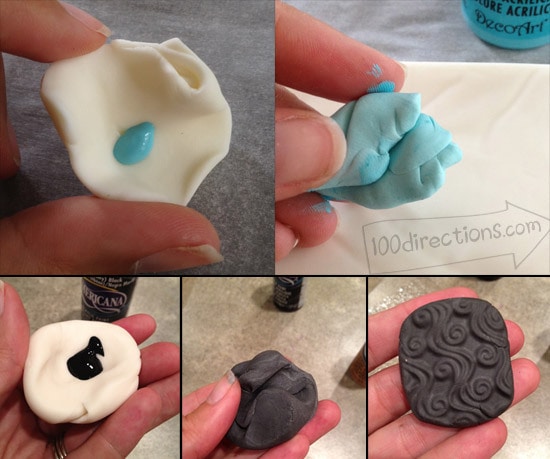
Next I played a bit with color mixing. I love that you can mix Makin's Clay with acrylic paint to create any color of clay you want – very cool! I work quite a bit with Decoart paint, so I thought I'd test it out. Easy – Love it! I haven't tried using metallics or glitter paint yet, but I imagine it will work well. I'll let you know when I test that out too.
I highly recommend you wear rubber gloves when mixing paint with your clay or you will end up with paint on your hands. I don't like gloves, so I just work very close to a sink so I can scrub my hands immediately. Getting paint out from under my fingernails is another story – yet another reason I don't pay to have my nails done! You don't need a ton of paint, just a little bit and then knead it in until it's mixed. Look how nice the color turns out…
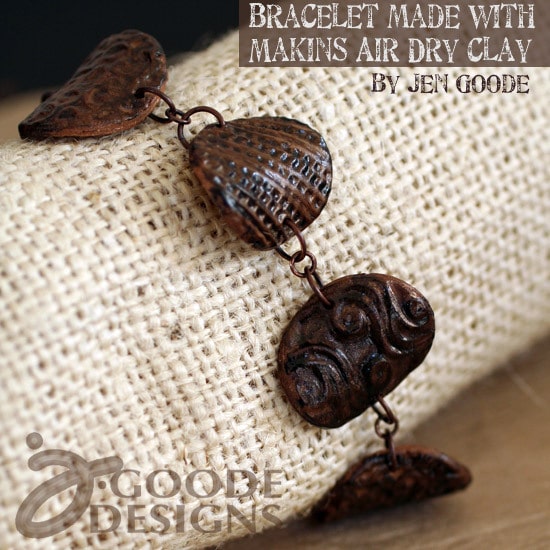
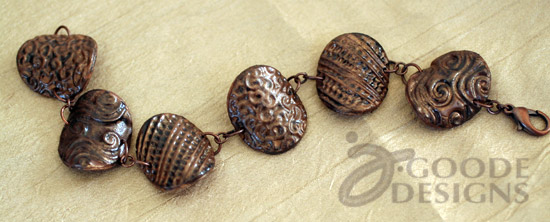
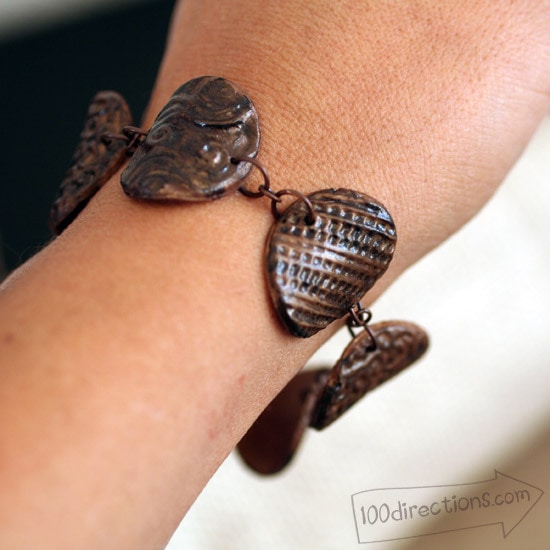
Once I was finished playing with all this clay goodness, I got to work on my real assignment.. try to make a finished project of some kind featuring this great clay. I wasn't sure what I was going to make, but I knew I wanted to use the texture mats. This is what I ended up with, a pretty bracelet with a metallic look and it's SO light-weight!
DIY Makin's air dry clay bracelet instructions:
Materials you need:
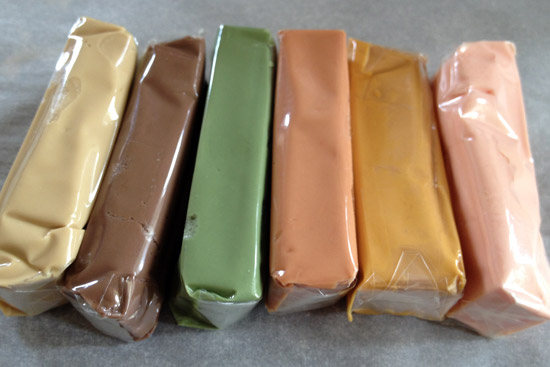
- Earth Tones Makin's air dry clay pack – I used the tan, dark brown, mustard and dark peach colors.
- Makin's clay texture sheet (Set E)
- Water bottle lid (or similar small round cutter)
- A pointed clay tool such as the Makin's rasp tool to make holes
- Jewelry findings and tools: jump rings, clasp set and round nose pliers
- Paint: Decoart Rich Espresso Dazzling Metallics, Emperor's Gold Dazzling Metallics and Black Crystal Enamel glass paint.
Steps to make this pretty air dry clay bracelet:
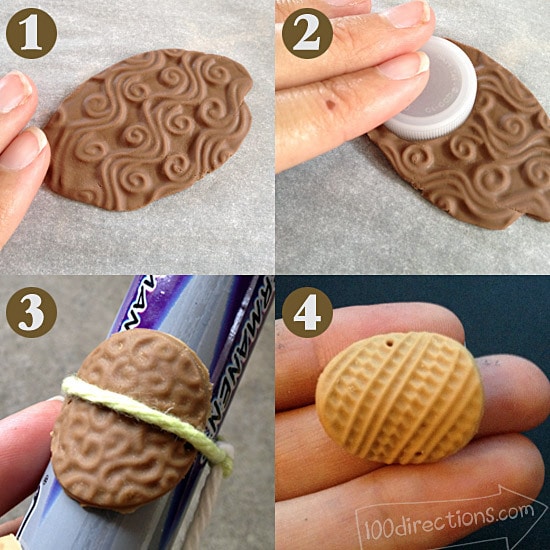
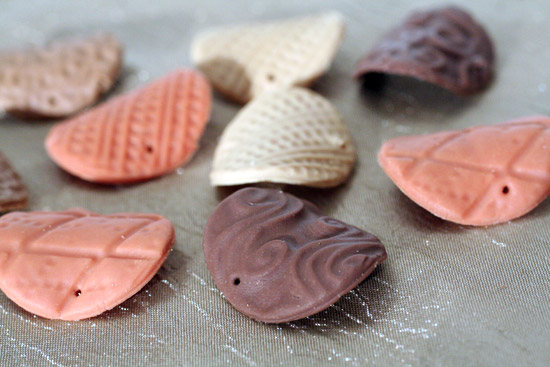
- Roll clay out into a flat sheet and then gently press into texture sheet to create a pattern in the clay.
- Cut out circles in the clay using the water bottle lid. Using a stylus or rasp of some kind, poke a small hole on 2 sides of each circle, These will later be used to attach your jewelry findings to create the finished bracelet.
- Repeat with each desired color making at least 2 circles per color. Alternate texture sheets as well to ensure a more random, diverse look for your bracelet.
- Slightly bend circle clay piece. I wrapped these circles around a large art marker and tied with warn to hold in place while it dried. Allow to completely dry 1-2 days. They turn out similar to mini Pringle potato chips (yum).
- Add a metallic look by brushing a light coat first of Rich Espresso, then with black. Lightly rub gold over top as if polishing each piece with the gold paint using a tissue. Allow paint to dry between coats and color layers.
- If needed, make sure the holes are all clear entirely through the clay and paint. Re-poke through the holes with your tool.
- Connect each piece together with 3 jump rings and finish the bracelet with a clasp.
Makin's Clay Blog | Makin's Clay on Facebook | Makin's Clay on Pinterest
More Great Makin's Ideas…
HOP to the next designer blog featuring Makin's Clay!
Click on the “Designer Crafts Connection” logo in the left side bar to see the other great projects using Makin's Clay now through October 31st.
Are you now inspired to get creative using some clay? Makin's air dry polymer clay is a great product to try since you don't have to worry about baking, and it's super kid friendly! If you've already gotten creative with clay, I'd love to hear what you've made or your favorite thing about it. Happy Creating!


Thanks for your ideas. I am a jewelry maker. I like to work with Air Dry clay for jewelary making. your bracelet is awesome
Thank you so much! I haven’t made a ton of jewelry with air dry clay, but I do like this Makin’s clay. I really don’t make a ton of jewelry in general… what other calys do you like?
is this clay strong enough for jewelry?
Yes. It depends how thick you make the clay pieces and what type of jewelry. It’s like a light weight polymer.
Does that clay does not break easily?
Thanks
I think it depends on what you are using it for.. it worked well for the little projects I created. What are you wanting to make? Thank you for stopping by!
I am intrigued with this clay
I absolutely LOVE that bracelet! If you ever get tired of it, just let me know, I’ll send you my address 🙂
These are all such great ideas! The earrings are adorable, and the bracelet looks like metal..so pretty!
Fun projects – love the bracelet! Thanks for participating :0)
What more to say then – Love all the ideas!
Girl you certainly are a creative one…love all these and those adorable earrings are so fun
Jen I adore your skeleton and ghost earrings, your instructions and step out are fabulous….and so is that beautiful bracelet….thanks for sharing!