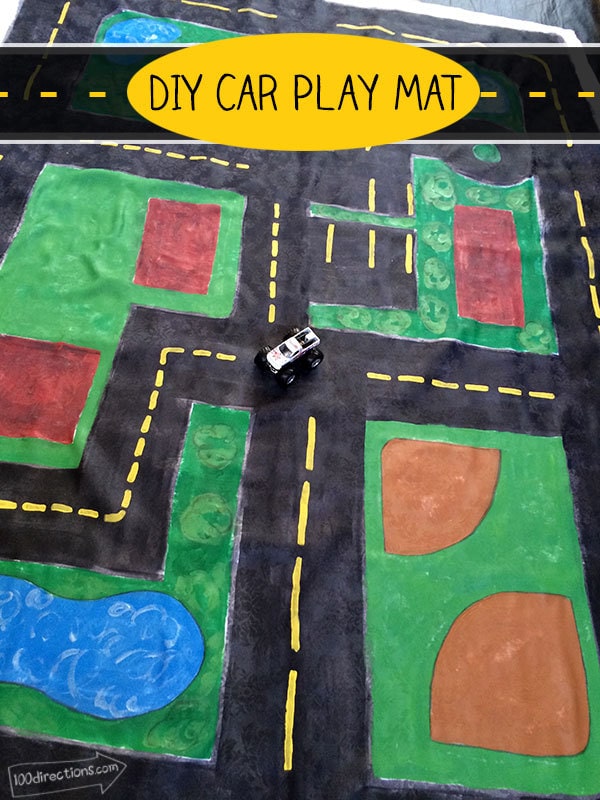
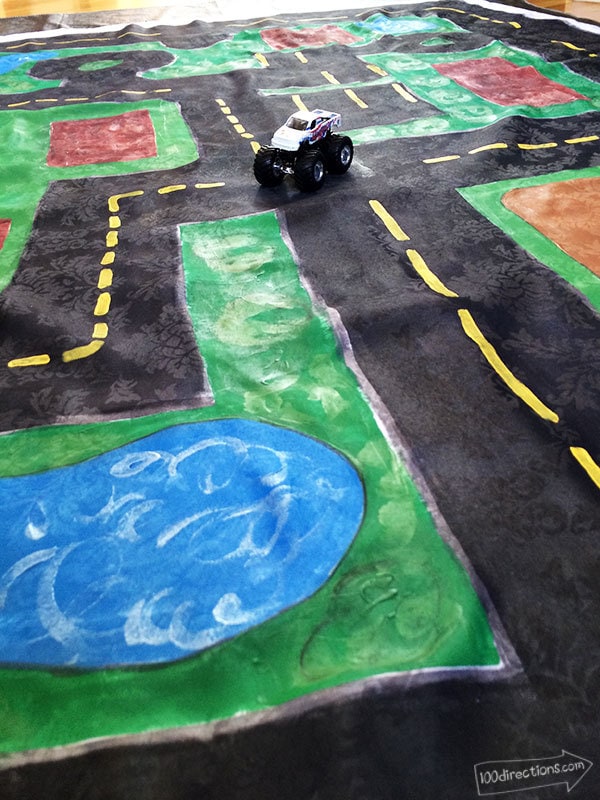
If you have kids that love to play with cars, then you probably know what a car play mat is. These fun rugs printed with roads and a map like scene that the kids can run their cars all over… my boys played with their so much we ended up buying two and making an entire metropolis for car-land in the basement! The only problem with these car rugs is that they are usually bulky and can be pretty expensive. So, how about we get all creative and make our own car rug. We’ll make it washable and make it convenient to stick in a backpack and take with us? That’s exactly what I have for you today… here’s a fun craft tutorial that the kids get to play with when you’re finished creating. Of course, there’s even a little doodling along the way (fabric marker fun)
Disclosure: this post is sponsored by Wayfair as well. All the ideas and tutorial along with photos are my own.
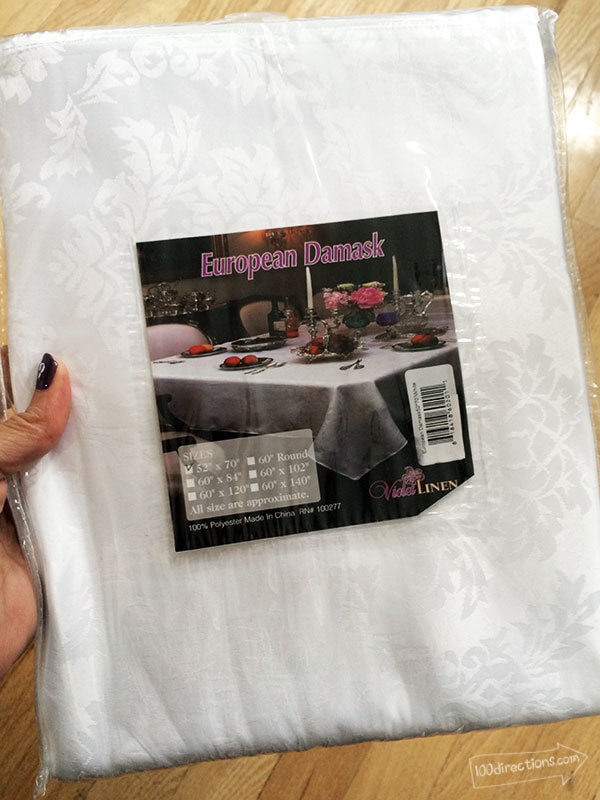
Immediately I started brainstorming ideas of things to make with a tablecloth that little boys might love. A couple of the unused ideas included: a cape, a table tent (hand painted with cool hiding place scenery) and fun fort building swag. I didn’t want to pull out the sewing machine and I wanted the project to be something others (YOU) could make AND something that the end result wouldn’t be more expensive than just buying a thing. So DIY Car Play Mat it is! Car rugs typically run about $25 or so… for the decent sizes. I had a table cloth that was about twice the average car rug size and only costs $8. Awesome again!
Make Your Own Car Play Mat
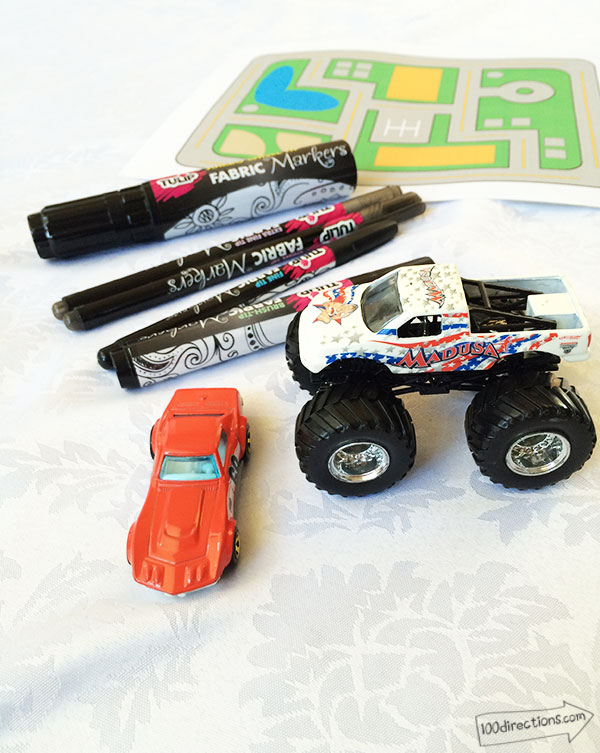
Materials you need:
- White European Damask Table Cloth ($8.99) – I know.. so pretty and I’m painting right over it!
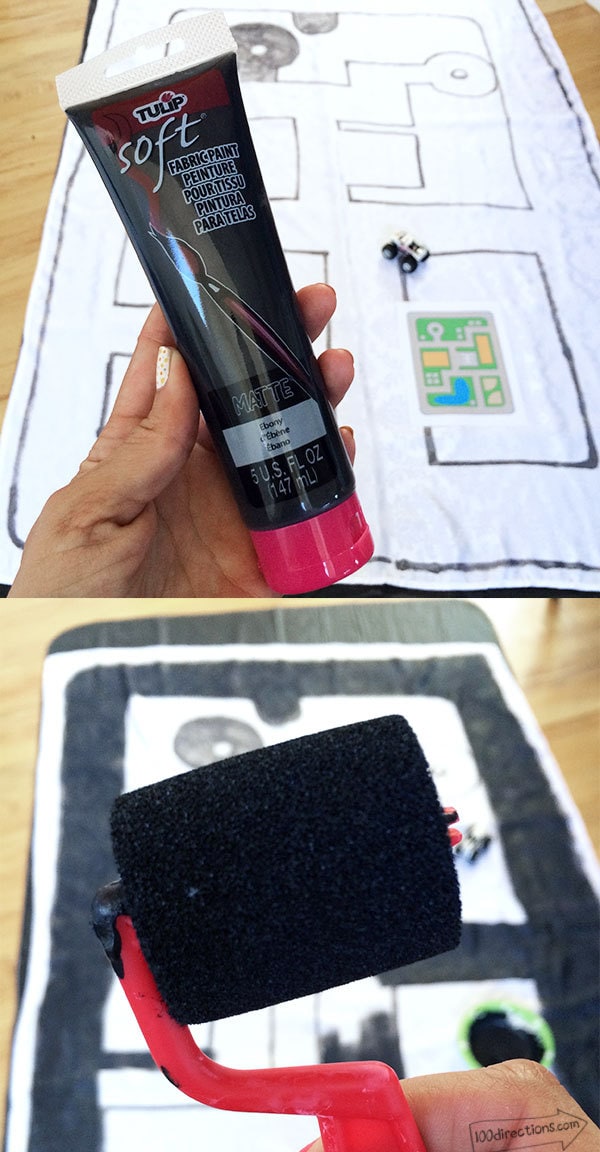
- Fabric paint and brushes – a sponge roller is handy too
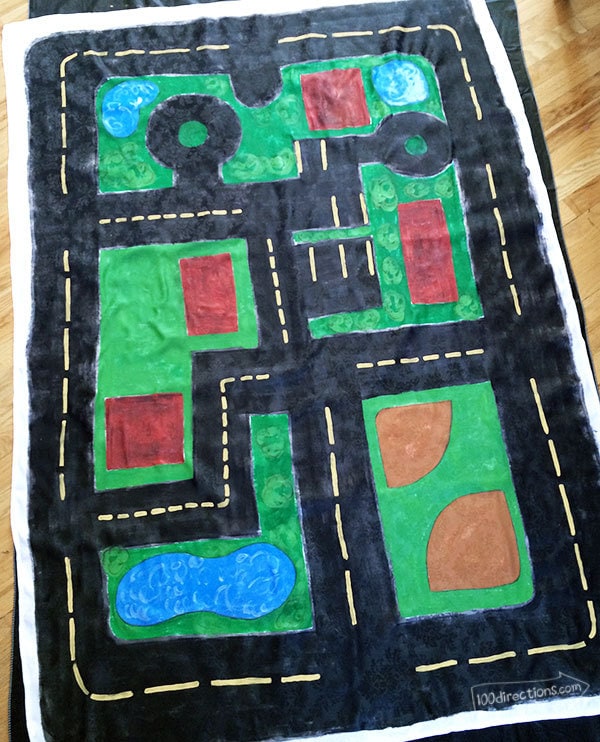
- Paint colors I used – black, blue, green, yellow, white and brown.
- Fabric pens – makes drawing the lines easier – sharpies might work, but I wanted it to wash well
Note about fabric paint and pens. There are plenty of brands to choose from. I personally love the Tulip line from ILovetoCreate – the products are fantastic and I work with the company from time to time… I love these people.
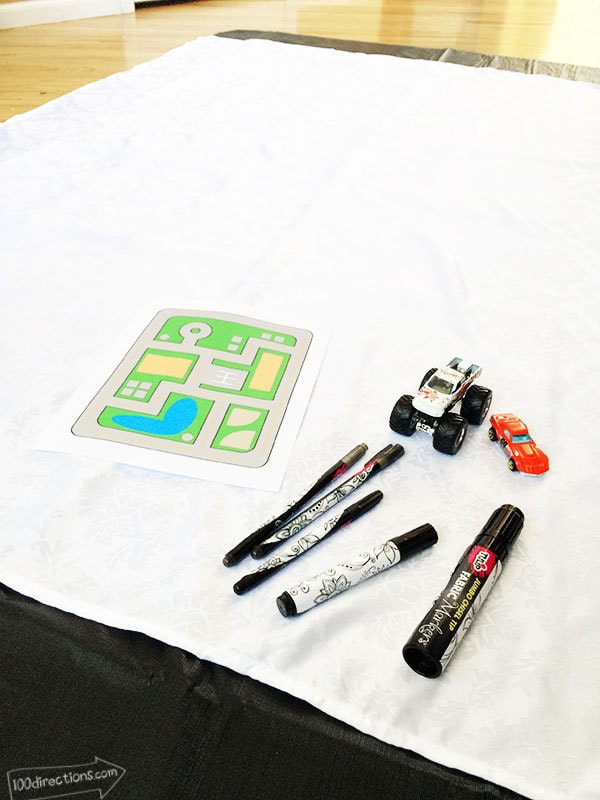
- COVER YOUR WORK AREA! You will be painting on fabric. Fabric paint will seep through the fabric. I used a plastic table cloth underneath the fabric table cloth.. laying the entire thing out on the floor. Pick a spot that you don’t have to move everything and you can leave it out to dry.
- Layout out your design on paper – before you put any ink on your tablecloth, think through your design. I have a free printable template you can use – download it below.
- Iron the tablecloth so you have a nice flat surface to create your car play mat masterpiece!
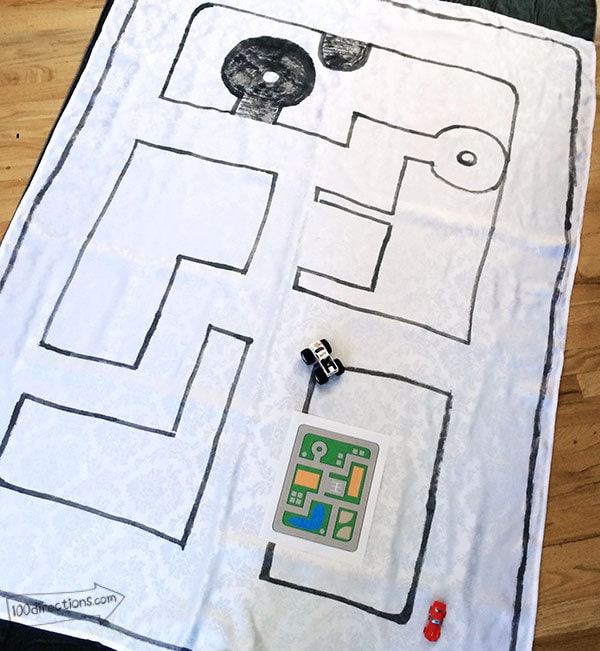
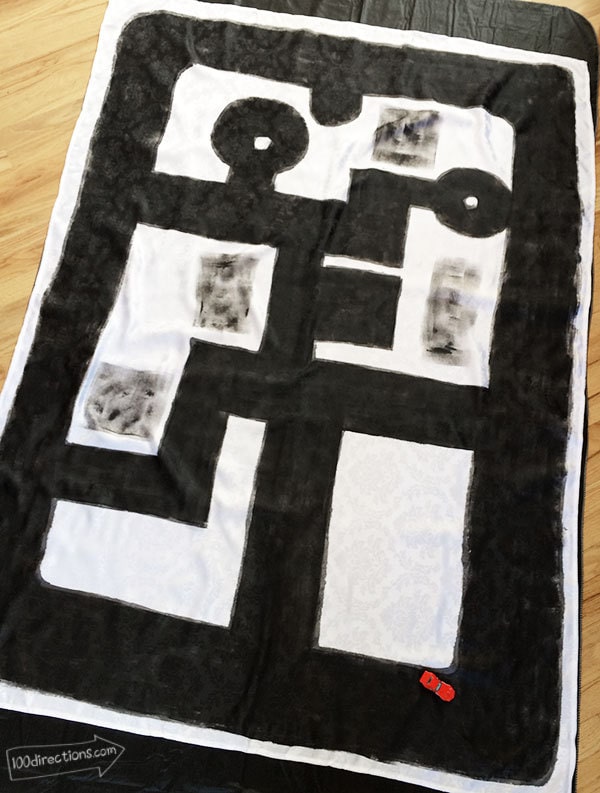
- Using a fabric marker, draw the main design – I chose to draw the outline of all the roads.
- Using fabric paint, paint in all the areas however you’d like. I started with a paint brush and found it to take FOREVER. So I switched to a mini foam roller brush and painting all the black for the roads was a snap.
- Using a smaller paint brush and a variety of different paint colors, add in your accent details.
- Outline some of the areas with black fabric marker for an extra detailed look. Note: fabric markers are not meant to be permanent ontop of fabric paint so I suggest using a Sharpie for this step or skipping it all together. I ended up using a fabric marker and then going back over all the lines with a small, damp cloth, to wipe away any excess ink that would otherwise smear. I don’t recommend you do this extra work.. just skip the lines or use a Sharpie. I also added a bit of shimmery paint to the blue, but I just happened to have the shimmer paint on hand in my stash.
- Let the entire piece dry overnight.
Washing tips: wash in cold and let hang to dry. Although, you could dry on low and remove immediately. Double check the fabric paint packing for any additional washing instructions and tips.
Now you can roll the entire mat up and store it in a backpack, pulling it out to play whenever you want. Easy Peasy and oh so fun!

Download and print out this free template you can use to create your own car play mat. It’s a black and white line drawing so you can color and adjust it however you’d like. If you look at it, you’ll notice, I changed up my final design on the actual project too.
Before you say it, I know you might be thinking it… “Why in the world would you paint such a pretty table cloth Jen???”. Well.. for a number of reasons. 1. the project was to make something out of something… 2. I have no idea how my swap partner likes to decorate so picking colors or designs was a tough decision process. 2. Who wants a tablecloth that is just a different tablecloth? 3. I didn’t feel like sewing. 4. I wanted the project to be something that would actually get used… I hope it gets used. 5. Because… isn’t that reason enough? That’s what a good creative girl does when posed with a challenge and a box of neglected fabric paint… she paints the fabric!
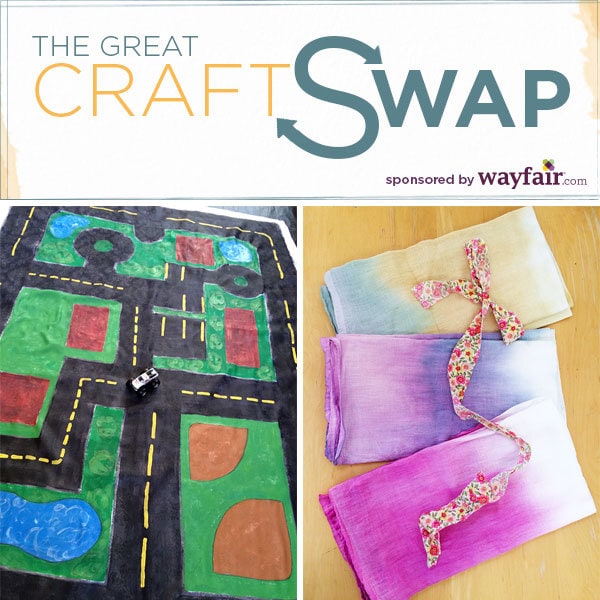
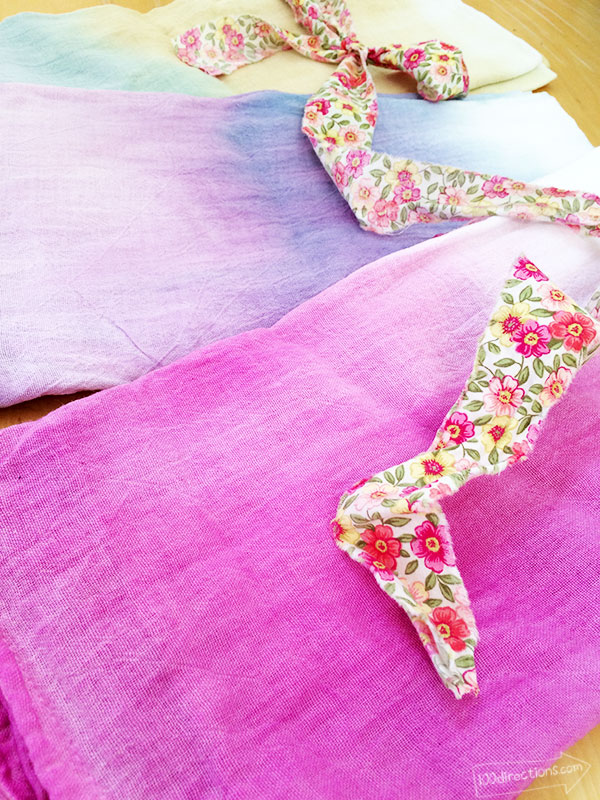
Now we wouldn’t have a swap without the other half of the trade, right? My swap partner is Sara from Meanest Look. She shares all kinds of insight about products, events and even some fun fashion. I wasn’t expecting that the person I created something for would be the same person that created something for me… so it was a big surprise when I received these gorgeous tea towels created by Sara. They are awesome!! She hand-dyed each of 6 towels with natural colors from vegetables… how cool is that!?
I love how vibrant the colors are.. I had no idea you could get these kinds of colors from natural pigments. Thank you bunches and oodles Sara. I love them! I’m excited to see how Sara made these and try the technique for myself! Head to Sara’s blog to check out her tutorial. (If you don’t see it yet, she’s a busy lady – check back later to see how she created these fabulous towels.)


This is pretty amazing! like beyond amazing..it’s genius! What a great idea! Well done!
Thank you so much! It was a ton of fun to paint.