Graduation is just around the corner and there are all kinds of celebrating going on. My oldest son graduated in 2014. He wouldn’t care if I decorated a thing, just invite his friends and have enough food and drink to last all night. So decorating for my son’s graduation party is definitely more for me than him. But my son’s high school graduation is only going to happen once, so I wanted to do a little more than throw a pizza in the oven. I want to personalize things a bit. School colors, graduation themed decor and custom cut 2014… that’s what’s going to happen around here!
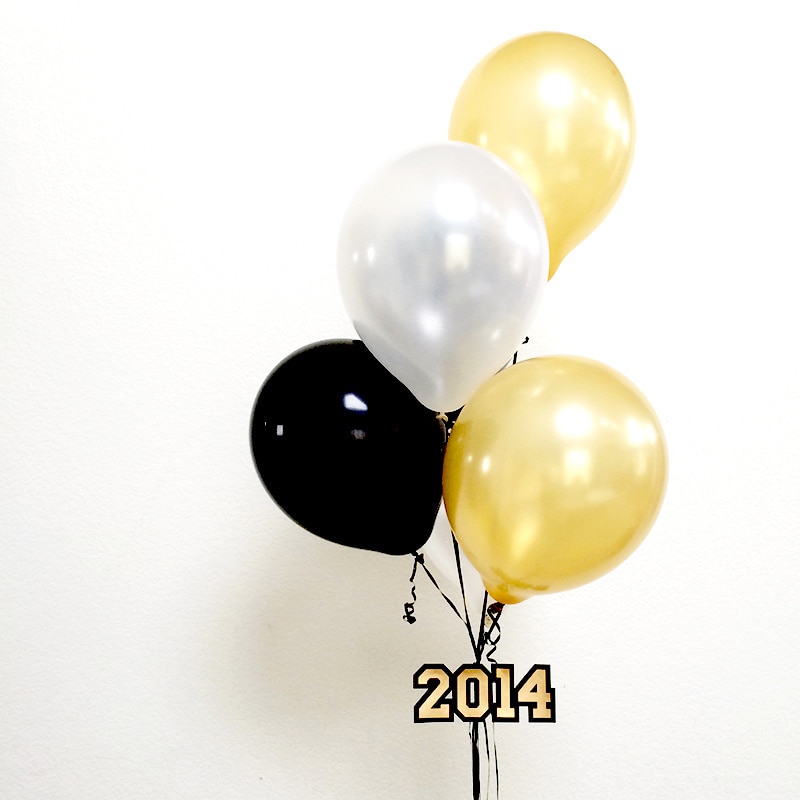
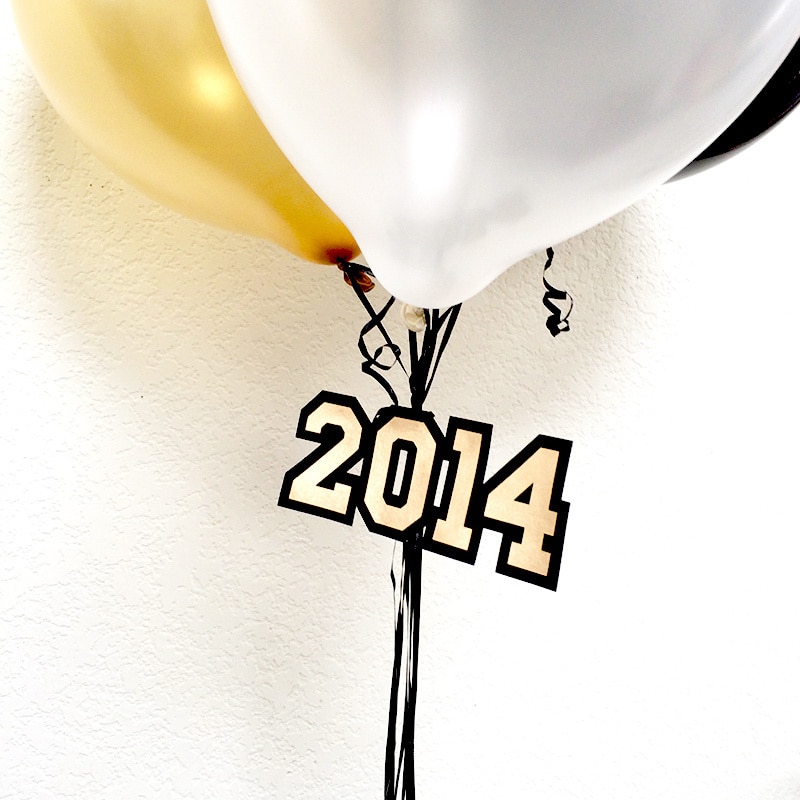
Last week I showed you how to make 2014 graduation confetti. Now I’ve got a 2014 decor cut out you can create in a flash and then add to the party decor all over the place. I think it really dresses up the balloon bouquets really well! BONUS: If you purchased the confetti project, this project is FREE for you!
Here’s what you need to make the 2014 cut out:
- Cardstock in your choice of colors (2 colors)
- Cricut Explore electronic cutting machine
- Adhesive
- 2014 graduation party decor project designed by Jen Goode
Make a 2014 decor cut out:
- Go to the 2014 graduation party decor project in Cricut Design Space and follow the on screen instructions to change paper colors.
- Once you have the cardstock layers removed from your cutting mat, adhere them together with whatever adhesive you’ve chosen.
- You can now use your custom cut decor to decorate!

Make your own graduation party decor
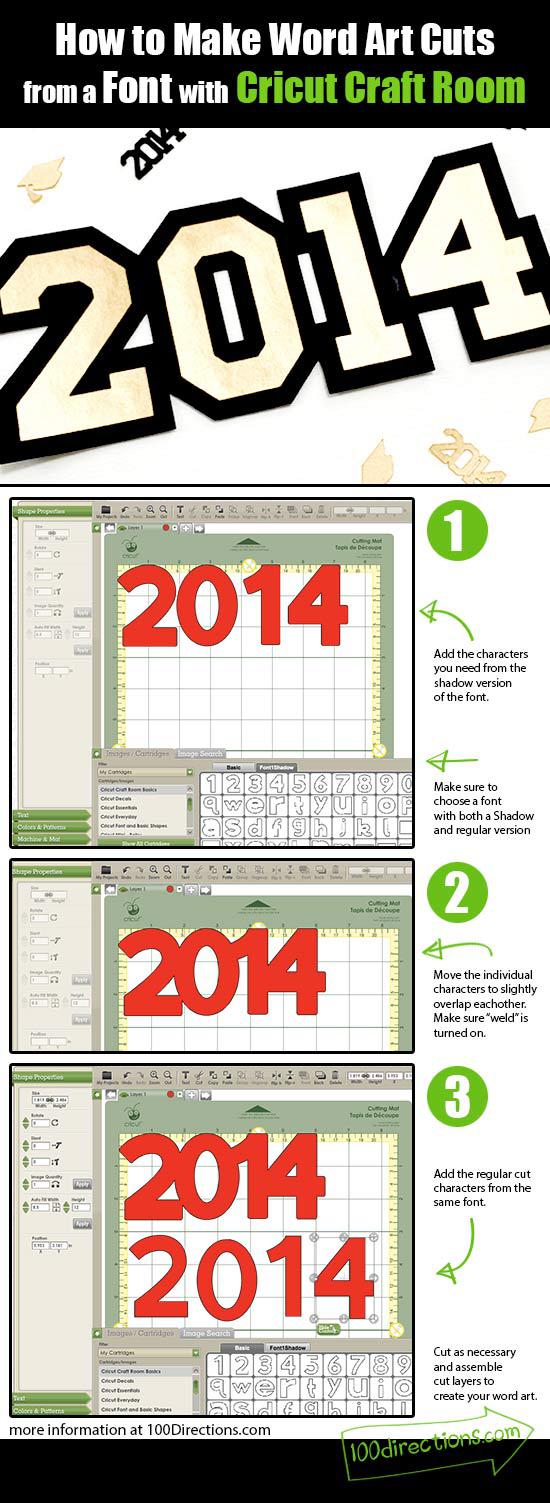
If you want to make this word art with your own font or another word/number set OR if you are still using the Cricut Craft Room, here’s how:
- Choose a font that has both a regular cut and a shadow cut. The shadow is needed because the sizing is a little different and will allow you to properly layer the fonts on top of each other, leaving the nice border.
- Once you have your word placed in your work space, move the letters so they overlap and then weld the letters together to create a single cut shape. In CCR, this is done by simply clicking and dragging the characters where you want them, making sure the “weld” option is selected. In Design Space, you need to ungroup the word you’ve written and then you can move them individually. Then select all of the characters and click “weld” in the layer palette.
- Tip: I place the letters right up against the top of the word space to make sure they are all horizontally aligned while I move them.
- Next, choose the characters you need from the regular version of the same font.
- Cut all of your letter/shapes and assemble as required.
If you are celebrating a recent grad, I hope you have a fantastic time – there are great new adventures up ahead! I’d love to hear about your graduation party fun. Leave a comment or stop by the 100 Directions Facebook page and tell me about it.


thanks so much for your input! the closest thing i found to work instead was the left tab,right tab and numbers in the plantin schoolbook cartridge (they don’t look as nice as the numbers you linked together) Thanks again!
trying to construct this for a class reunion..don’t have the explore..(have expression machine) don’t want to go into cricut craftroom and have to deal w/ computer..i am not savvy w/computers AT ALL! any idea how to link/weld letters together from cartridges only?Thank you!!
Hi Julie, I do not know how to link letters together using cartridges, I don’t have any cartridges. HOWEVER, I will ask around and see what I can find out for you! Thank you for stopping by. 😀